One of the new features available in the recent versions of Rufus is the ability to create Windows To Go drives with a few mouse clicks. For those who haven’t heard about Windows To Go before this, the feature allows you to install and run Windows 10/11 from a USB drive.
In short, you do not need to install Windows 10/11 on an internal hard drive (HDD) or SSD. The feature literally allows users to carry their Windows operating system on a USB drive. Users can connect the Windows To Go USB drive to any PC and boot from the USB drive to start using their Windows installation on the USB drive.
As all Windows 10/11 users likely know, the Windows To Go feature was first introduced with Windows 8, although there were third-party solutions to install Windows to USB drive even before the release of Windows 8. The Windows To Go Creator feature was present in Windows 10 for a long period of time. Besides that, the feature was exclusive to Enterprise and Education editions.
With the Windows 10 May 2020 Update (version 2004), Microsoft has removed the Windows To Go feature from Windows 10. This means that none of the editions of Windows 10 now offer a built-in tool to create a Windows To Go drive. From here on, you will have to use tools like Rufus to prepare Windows To Go even if you are running Enterprise edition.
Although Windows 10 and 11 no longer offer a built-in tool to prepare a Windows To Go drive, you can use Rufus software to create a Windows To Go drive.
Things to remember while preparing Windows To Go drive
# The Windows To Go feature of Rufus is available only when you are running the software on Windows 11 or Windows 10 versions. This means that you need a PC running Windows 10 or Windows 11 in order to prepare a Windows To Go drive using Rufus.
# The size of the USB drive that you want to use as a Windows To Go drive must be at least 16 GB. We recommend you use a USB drive with a capacity of 32GB, though.
# We recommend you use a Windows To Go certified USB drive for optimal performance. Standard USB flash drives are not ideal for installing Windows, meaning that the Windows OS installed on your standard USB flash drive will be very slow compared to the one installed on certified drives.
# Rufus supports all editions of Windows 10 and Windows 11.
Windows To Go option missing in Rufus?
It seems that Rufus 2.3 and later versions do not offer the ability to create a Windows To Go drive when using Windows 10 ISO downloaded using the Media Creation Tool.
So, if you want to create Windows To Go with Rufus, please directly download Windows 10 ISO from Microsoft within in your web browser without using the Media Creation Tool or download via MSDN or TechNet (subscription is required).
And if you have already downloaded Windows 10 ISO using the Media Creation Tool, try using the other free tools in the market. Refer to our five free tools to create Windows 10 To Go USB drive for all the tools.
Preparing Windows 1o/11 To Go with Rufus
Follow the given below instructions to create your Windows To Go drive using Rufus software.
Step 1: The first step is to visit this page of Rufus and download the latest available version of the software. When you are on the download page, please click on the normal Rufus instead of the portable version.
Step 2: Connect your USB flash drive that you want to use as a Windows To Go drive and backup all data from the drive to any other location as the drive needs to be erased completely, and all data will be deleted while doing so.
Step 3: Launch Rufus software on a PC running Windows 10 or Windows 11.
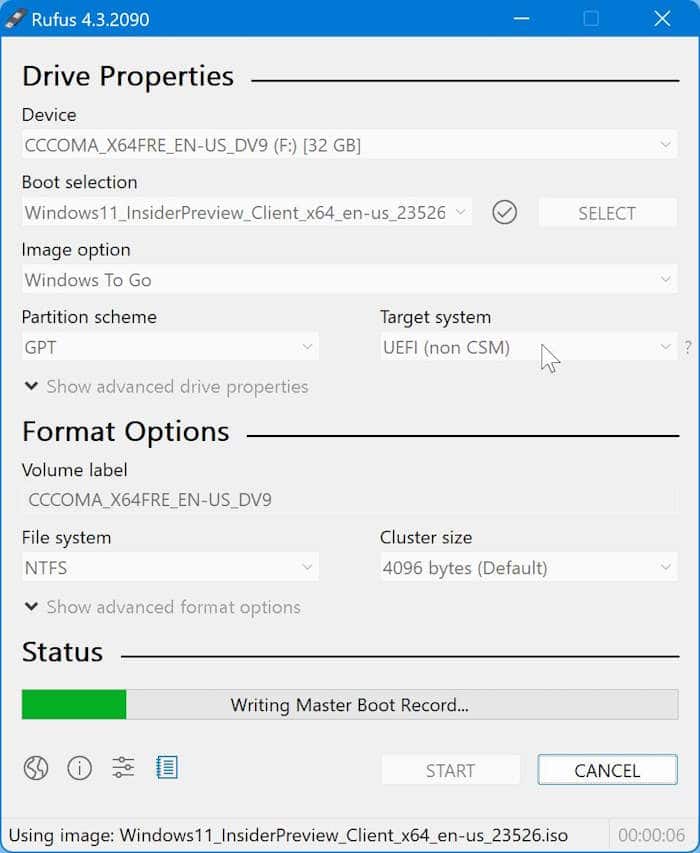
Step 4: Select your USB drive from the Device drop-down menu.
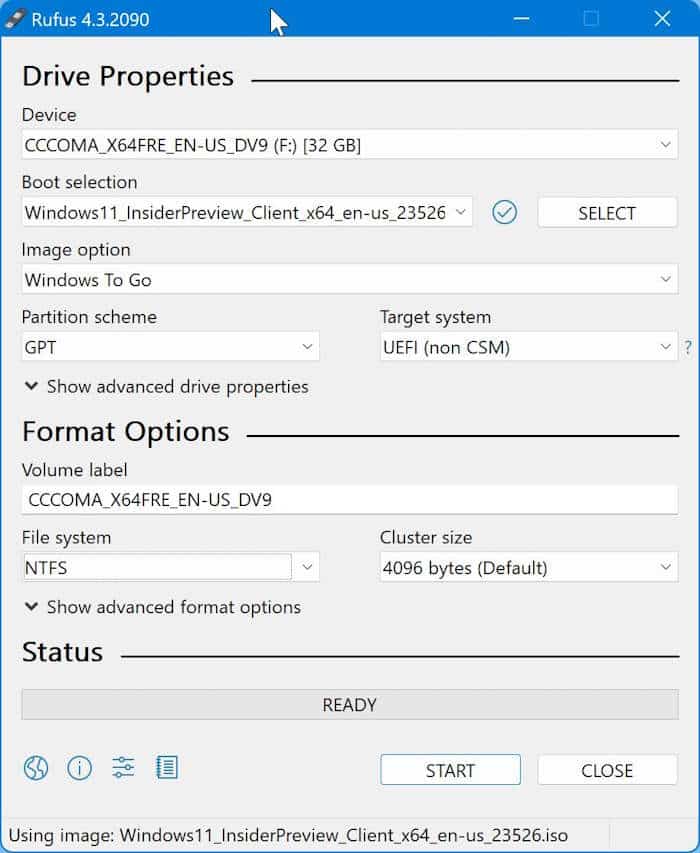
Step 5: Next, click the Select button next to the Boot Selection field and then select your Windows 10/11 ISO image file. If you have not downloaded it yet, refer to our how-to download Windows 10 ISO or how-to download Windows 11 ISO image guides.
Step 6: Next, from the Image Option drop-down, select the Windows To Go option.
Step 7: Next, select the partition scheme from the available two options. If you’re going to use the Windows To Go drive with the MBR partition scheme, select MBR. If not, select GPT (for the GPT partition scheme).
Step 8: Select the File system as NTFS, as FAT32 can’t be used to create Windows To Go. You can safely skip the Cluster size section.
Step 9: Finally, click the Start button.
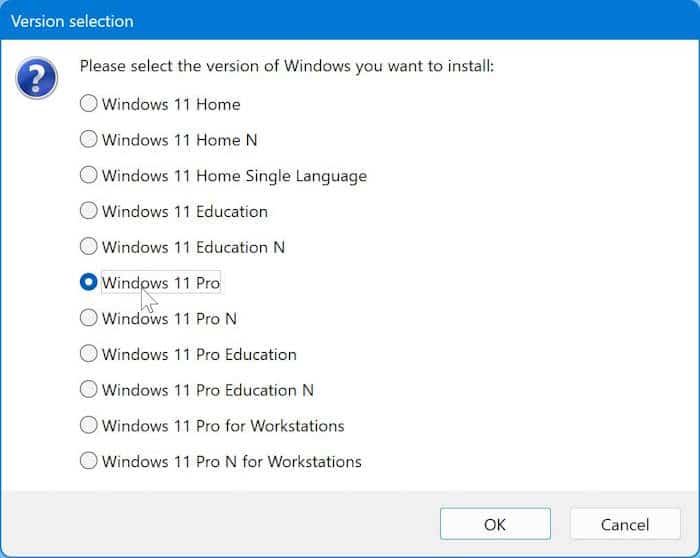
Step 10: When you are asked to select the edition of Windows 10/11, please select the edition that you wish to install on the USB drive.

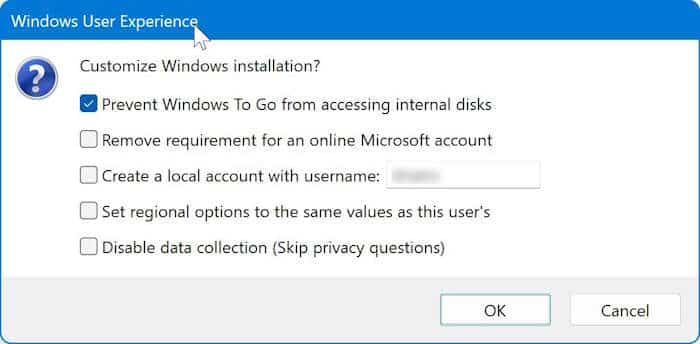
Step 11: Next, you will get the following dialog where you can customize the installation. We do not recommend you change the default selections unless you know what you are doing. Click OK.

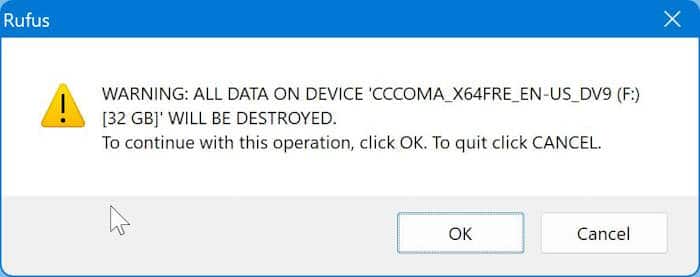
Step 12: Now, you will get a dialog with a warning that all data on the USB drive will be erased. Click the OK button to let Rufus wipe the USB drive and prepare the Windows To Go drive.

The software might take about forty-five to sixty minutes to prepare the Windows To Go drive. Once the job is done, you’ll see the “Ready” message. You can now restart your computer to test your newly prepared Windows To Go drive. Good luck!

Do let us know if you have any difficulties in following the guide or experiencing any issues by leaving comments.
Our how-to use Rufus to download Windows 10 ISO guide might also interest you.