The desktop context menu or popularly known as the desktop right-click menu, which appears when you perform a right-click on an empty spot on the Windows 10 desktop, is useful for quickly accessing Settings and display settings, showing/hiding desktop icons, sorting desktop items, and create a new folder on the desktop.
Ever since the release of Windows 10, several users have been complaining about the slow desktop context menu. According to users who have been experiencing this issue, when you perform a right-click on the empty area of the desktop, the context menu doesn’t appear instantly. The context menu appears slowly after about 4 seconds.
If you’re also experiencing the slow desktop right-click menu issue in Windows 10, you will be happy to know that the problem can be fixed in a few minutes. In most cases, the desktop context menu takes longer than usual time to appear because of the integrated third-party items like Intel graphics card properties and the NVIDIA Control Panel.
Follow the given below directions to remove third-party entries from the desktop context menu and fix the slow desktop right-click issue in Windows 10.
Method 1 of 2
Fix the slow desktop context menu in Windows 10
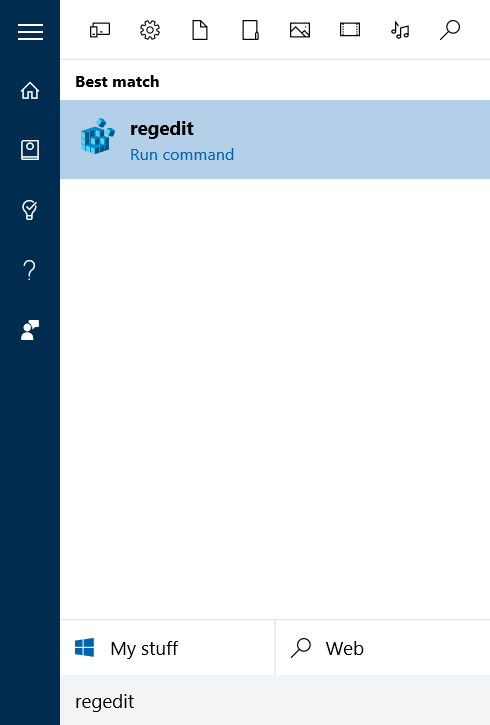
Step 1: In the Start menu or taskbar search box, type Regedit and then press Enter key to open Registry Editor. If you see the User Account Control dialog, please press the Yes button.
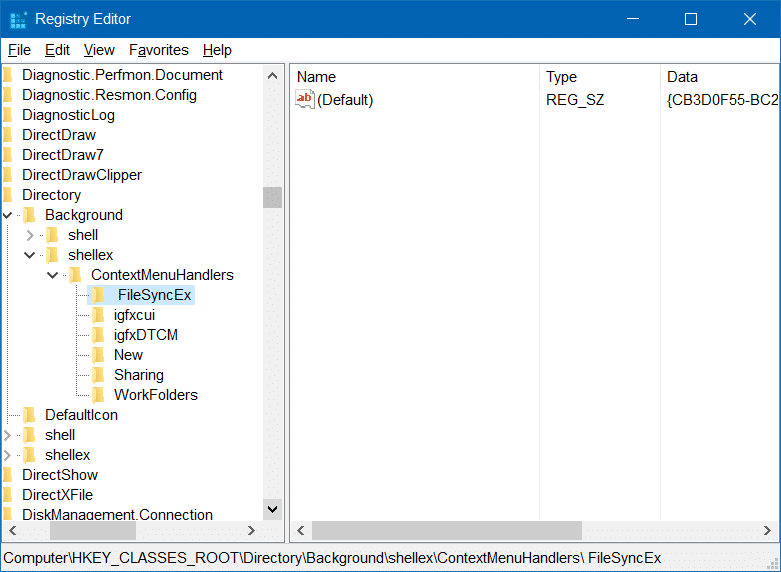
Step 2: Once the Registry Editor is launched, navigate to the following key:
HKEY_CLASSES_ROOT\Directory\Background\ shellex\ContextMenuHandlers
Step 3: Under ContextMenuHandlers, several folders will appear.
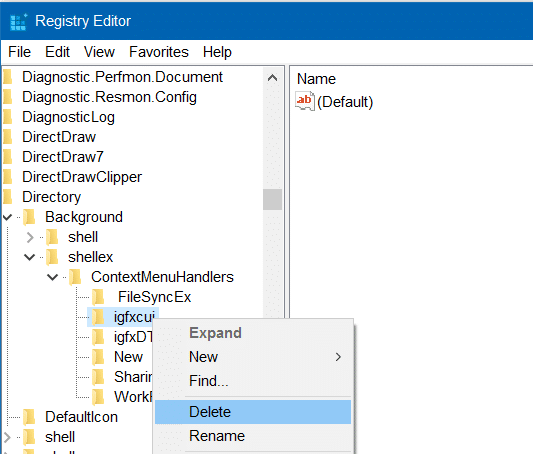
Step 4: In order to remove Intel Graphics Properties and Graphics Options entries, you need to delete igfxcui and igfxDTCM folders. To delete a folder, simply right-click on it and then click Delete. Click Yes when you see the confirmation dialog.
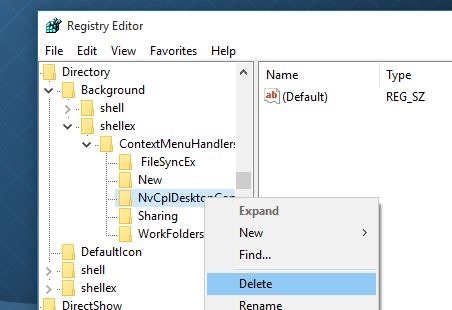
Likewise, if your PC has NVIDIA graphics hardware, you will see NvCplDesktopContext under ContextMenuHandlers. Simply right-click on it and then click Delete.
You may close the Registry Editor now.
Step 5: The desktop context menu should now appear instantly, without any delay. If not, restart your PC once.
Method 2 of 2
Another way to fix the slow desktop context menu in Windows 10
Those of you who don’t want to play the Registry can use a free utility called ShellExView to remove those entries from the desktop context menu. Here is how to download and use ShellExView on Windows 10.
Step 1: Visit this page and download the latest version of ShellExView. Note that the download link appears toward the end of the page.
Step 2: Extract the zip file and then run the shellexview.exe file by double-clicking on it. Click Yes button when you see the User Account Control prompt.
Step 3: The tool will take a few seconds to scan your PC for context menu entries.
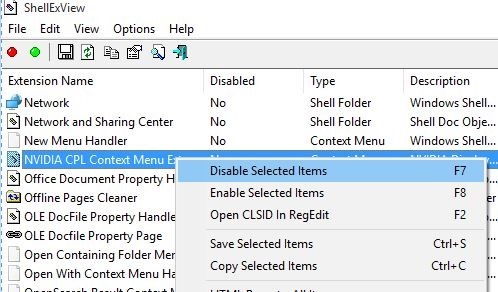
Step 4: Finally, look for the entry named NVIDIA CPL Context Menu Extension, right-click on it, and then click Disable.
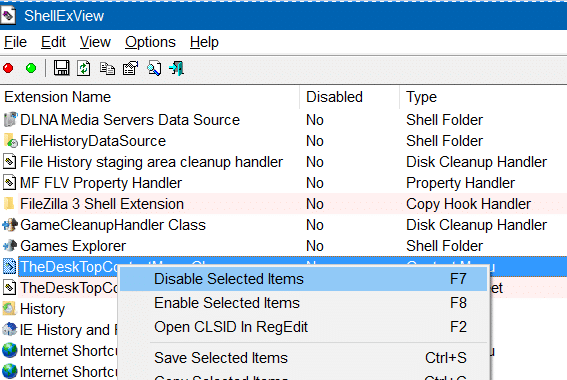
Likewise, if you have Intel graphics, under Extensions, look for two entries named TheDesktopContextMenu Class and TheDesktopContextMenu Class and disable them by right-clicking on them and then clicking Disable. You might need to restart Windows Explorer once or perform a reboot to see the change.
How to fix the Downloads folder opening slowly in Windows 10 guide might also interest you.
