With Windows 10, Microsoft ships its brand-new web browser called Microsoft Edge. The UWP version of the web browser is developed from scratch and miles ahead of the old Internet Explorer in every department.
Although Microsoft Edge is better than Internet Explorer and is at par with the browser market leader Chrome, it could not cause a dent to Chrome’s browser market share. To make the Edge browser more desirable, Microsoft is now developing a Chromium-based Edge browser.
Microsoft is expected to release the stable version of the new Chromium-based Edge browser in the second week of January 2020 (preview versions are available for a few months now). Once released, Chromium-Edge will be pushed to Windows 10 via Windows Update to replace the legacy Edge browser.
The new Chromium-based web browser will be automatically pushed to Windows 10 version 1803 and later versions via Windows Update service.
If you are happy with the built-in UWP version of Edge and don’t want to install the new Chromium-based Edge browser, you can block the new Chromium Edge browser from automatically installing in Windows 10.
Here is how to block the new Chromium-based Edge from automatically installing in Windows 10.
IMPORTANT: These methods prevent the automatic installation of Chromium-based Edge via Windows Update. However, users can manually download and install the Chromium-based Edge without any issues.
Method 1 of 2
Prevent Chromium-Edge installation via Registry
Step 1: Open the Registry Editor by typing Regedit.exe in the Start/taskbar search field and then hitting the Enter key.
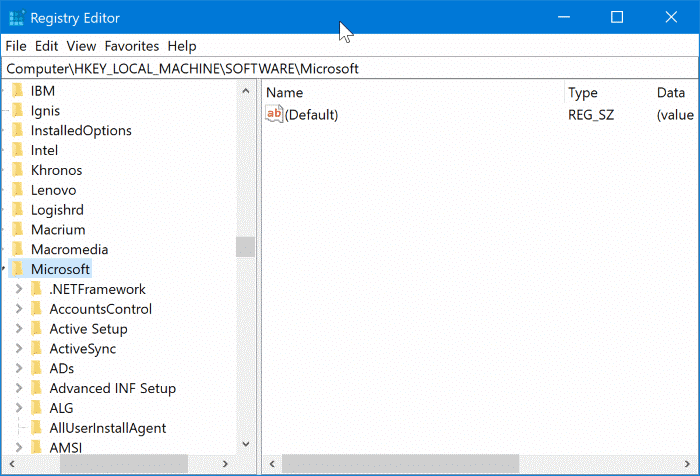
Step 2: In the Registry Editor window, navigate to the following key:
Computer\HKEY_LOCAL_MACHINE\SOFTWARE\Microsoft
Step 3: On the left pane, right-click on the Microsoft key, click New and then click Key. Name the new key as EdgeUpdate.
Step 4: Now, select the newly created EdgeUpdate key in the left pane. On the right side, right-click on an empty spot, click New, and then click DWORD 32-bit Value and name it as DoNotUpdateToEdgeWithChromium.
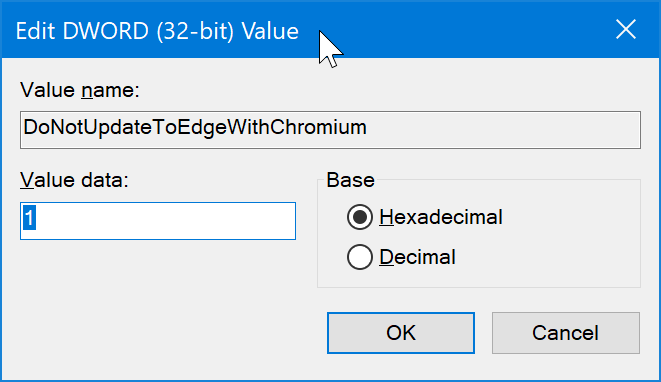
Step 5: Finally, double-click on DoNotUpdateToEdgeWithChromium and set its value data to 1.
Reboot your computer once. From here on, Windows 10 will not automatically download and install the new Chromium-based Edge browser.
To get the Chromium-Edge via Windows Update, delete the DoNotUpdateToEdgeWithChromium value.
Method 2 of 2
Block Chromium-Edge using Blocker Toolkit
Microsoft has released Edge Blocker Toolkit, which you can use to block the Chromium-based Edge from automatically installing in Windows 10. The Blocker Toolkit ads the same registry key and value mentioned above.
Step 1: Visit this page of Microsoft support and download the Edge Blocker Toolkit.
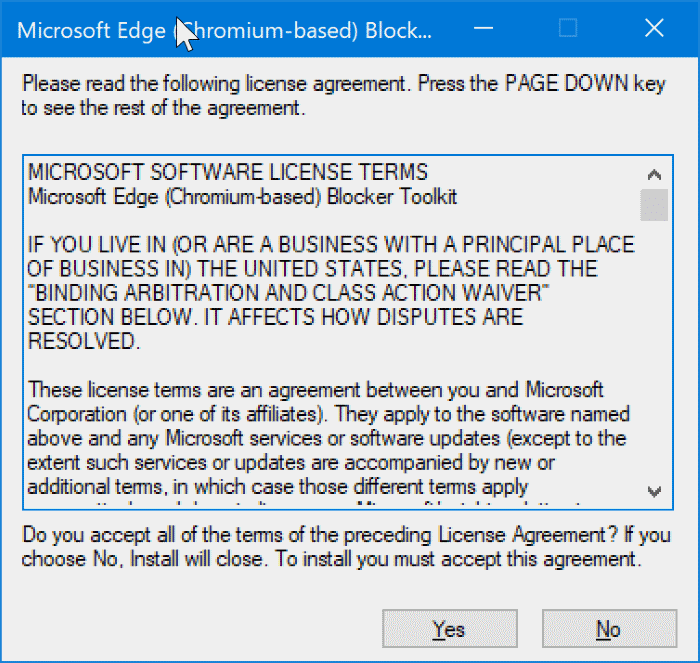
Step 2: Run the Edge Blocker Toolkit. When you get the agreement dialog, click the Yes button.
Step 3: Next, you will be asked to select a folder where you would like to save the extracted files. Select a folder and click OK to extract the files.
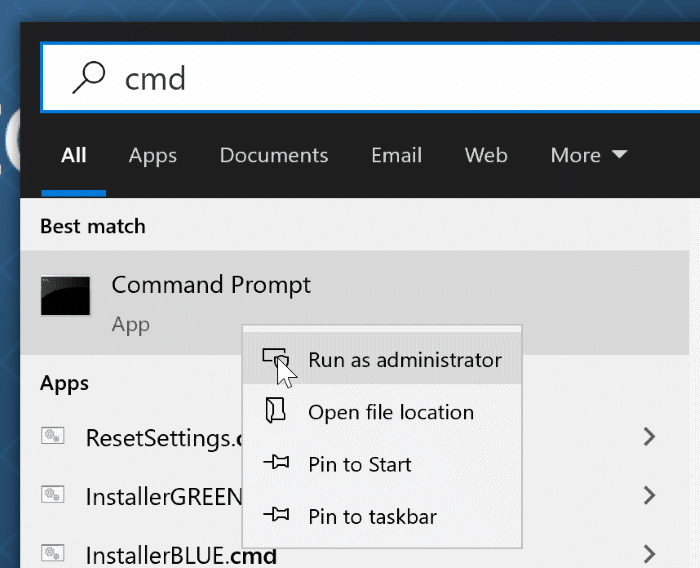
Step 4: Open Command Prompt as an administrator. To do that, type “CMD” in the search, right-click on the Command Prompt entry and then click the Run as administrator option.
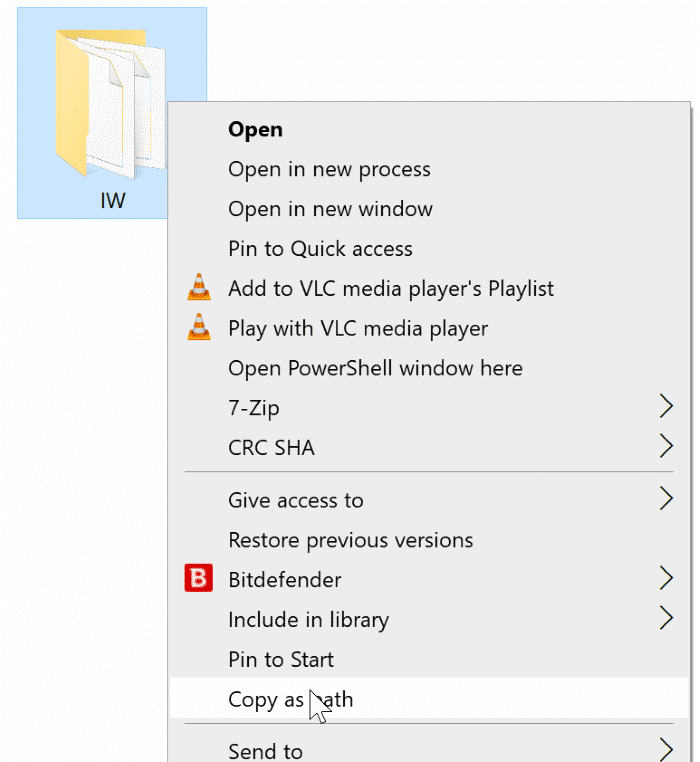
Step 5: Hold down the Shift key, right-click on the folder containing extracted files of Edge Blocker Toolkit and then click the Copy as path option to copy the folder path to the clipboard.
Step 6: At the Command Prompt window, execute the following command to block the Chromium-Edge automatic installation.
cd c:\PathToEdgeBlockerToolkitFolder
Press Enter key. Replace PathToEdgeBlockerToolkitFolder with the path that you copied in the previous step. Paste the path.
EdgeChromium_Blocker.cmd /b
Press Enter key.
If everything goes well, you will see “The operation completed successfully” message.
That’s it! You may close the Command Prompt window now.
