Computer users who have been anxiously waiting to install and experience the next version of Windows can download the recently released Windows 8 Consumer Preview (build 8250) with the product key. Use this link to download your copy of Windows 8 Consumer Preview.
A couple of options are available for users who would like to install and test drive the Windows 8 Beta. One can install it on virtual machine (see install Windows 8 on VMware, install Windows 8 on VirtualBox), install Windows 8 in dual boot with Windows 7, install Windows 8 on VHD, install Windows 8 on Mac, upgrade Windows 7 to Windows 8, or you can completely erase Windows 7 partition and install Windows 8 as your primary OS.
As you may have already noticed on the official Windows 8 download page, a direct upgrade path is available to upgrade from Windows 7 to Windows 8 Consumer Preview. So, this guide is not for users who wish to upgrade Windows 7 to Windows 8. To upgrade Windows 7 to Windows 8, follow our how to upgrade Windows 7 to Windows 8 guide.
This guide is for users who wish to move installed applications, files and settings from one Windows 7 PC to another Windows 8 PC. You can also use this guide to transfer files, settings, and apps from Windows 7 to Windows 8 if you have installed Windows 8 in dual boot with Windows 7.
The biggest and tedious task is not installing Windows 8 (as it takes hardly ten to fifteen minutes) but installing your favorite applications all over again on your new PC and then configuring Windows settings.
Users who are moving to Windows 8 are in luck as you can now use Windows 8 Beta Assistant program for free till June 2012. Windows 8 Beta Assistant is an excellent piece of program that lets you move all your files, programs, and applications from your Windows 7 PC to Windows 8 PC.
NOTE: This guide is not for users who are looking to upgrade Windows 7 to Windows 8 Consumer Preview. Instead, this is for users who would like to move all installed applications, settings, and files from old Windows 7 PC to new Windows 8 PC.
IMPORTANT: There are a few things you need to remember before using this software. First, it doesn’t work on the x86 version of Windows. That is, you can use Windows 8 Beta Assistant if you are moving from Windows 7 x86 to Windows 8. Second, you must install the same version of Windows 8 Beta Assistant on both Windows 7 PC and Windows 8 PC.
Procedure:
Step 1: Kick start the procedure by downloading and installing Windows 8 Beta Assistant on your Windows 7 (download Windows 8 Beta Assistant). The download size is ~80 MB. The installation is straight-forward and shouldn’t take more than 5 minutes. Please note that the setup asks you to install the Ask toolbar during the installation. Uncheck the “Enable search assistant” and “Make Ask.com your browser’s home page” boxes and click the “I Accept” button to install PC Mover without the Ask toolbar.
Step 2: Once installed, run the software to see the welcome screen. On the welcome screen, click the next button to see some important information about the limitations of the software. Check “I have read and this message” box and click the following button to continue.
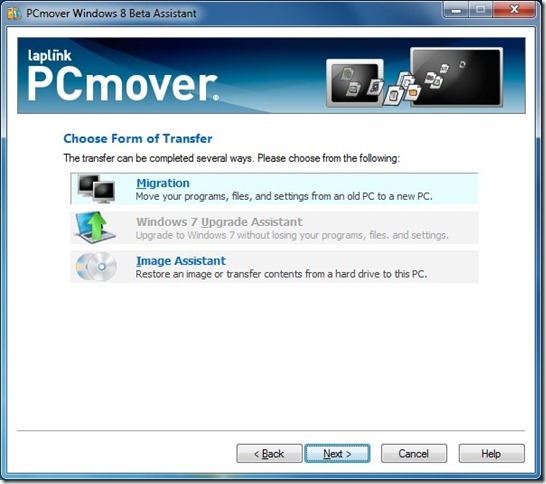
Step 3: Here, you will need to choose the type of transfer you would like to initiate. As you are here to move applications, files and settings from Windows 7 to Windows 8, click on the first option named Migration and then click Next button.
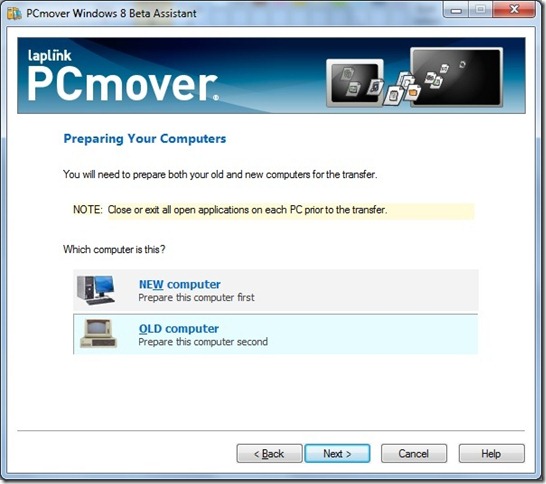
Step 4: In the following screen, select the Old Computer option and click the next button. Here, you will be asked to enter your name and email address to continue. Once done, click the Next button.
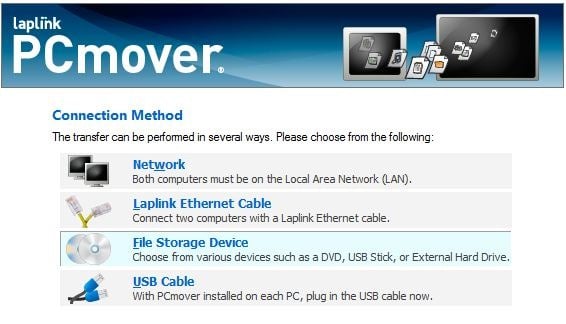
In the next screen, you will need to select the type of the transfer from available four options: Network, Laplink Ethernet Cable, File Storage Device, and USB Cable.
We are going to select the File Storage Device option as a connection method. This is the best way to move programs and files if you have installed Windows 8 in dual boot with Windows 7.
Click the Next button.
Step 5: You will be asked to select a snapshot of the new computer to determine what files, programs, and settings do not need to be transferred. But we think this step is unnecessary. Simply select Skip this step. Do not use a snapshot option and click the Next button.
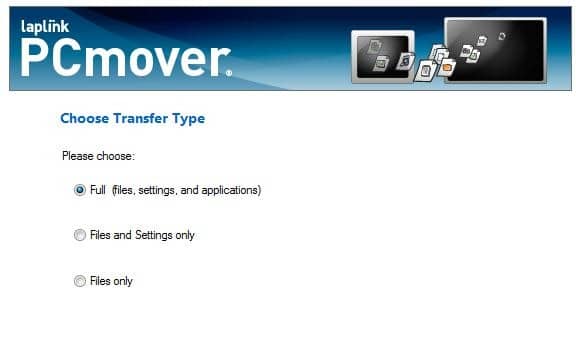
Step 6: In the following screen, you need to choose the transfer type from available three options: Full (files, settings, and applications), Files and Settings only, and Files only.
We suggest you choose the first option (Full) and click the Next button. Those who are not interested to move applications can select the second option.
Step 7: The next screen is where you will see a Custom Settings button. Clicking on the Custom Settings button will open Advanced User Options dialog where you can choose if you want to transfer wallpapers, screen savers, browser cookies, and application settings.
With default settings, it will transfer wallpapers, screen savers, ini files, Control Panel icons, cookies, Internet Explorer home page settings, and Internet Explorer options. Uncheck options that you don’t wish to transfer and click Ok button. Click the Next button to proceed to the next step.
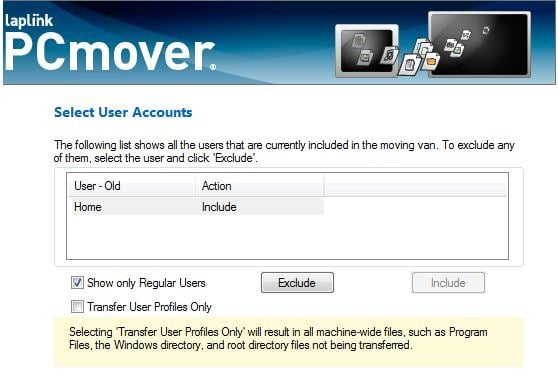
Step 8: Here, you will see the list of user accounts that are included in the transfer. You can include or exclude an account by clicking on include or exclude button.
Click the Next button.
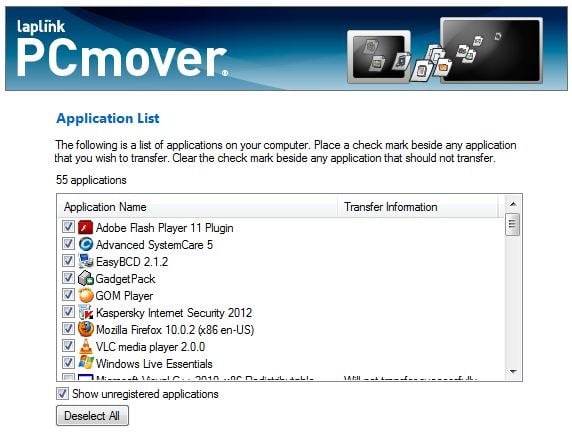
Step 9: Click the Next button to scan your PC for applications and then list applications that will be transferred. This step can take a while. Select apps that you wish to transfer and click the next button. Please note that PC Mover won’t list unregistered applications, by default. For some reason, PC Mover lists Windows Live Writer, Live Mail, and Live Photo as unregistered applications.
We suggest you check Show unregistered applications box and then select applications before clicking the Next button.
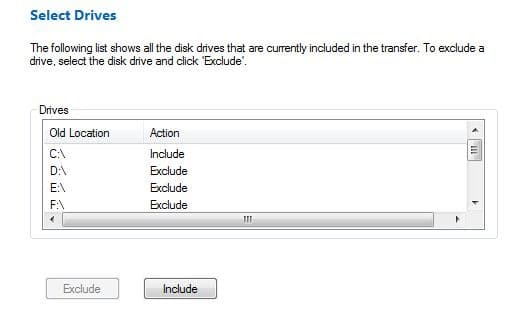
Step 10: On the next screen, you will see disk drives that are currently included in the transfer. If you have installed Windows 8 in dual boot with Windows 7, we suggest you include only Windows installation drive in the transfer.
Click the Next button to Continue.
Step 11: Select any folders that you don’t want to include in the transfer and click the Next button. You can also exclude file types from the transfer. Use the add button to exclude a file type and click the Next button.
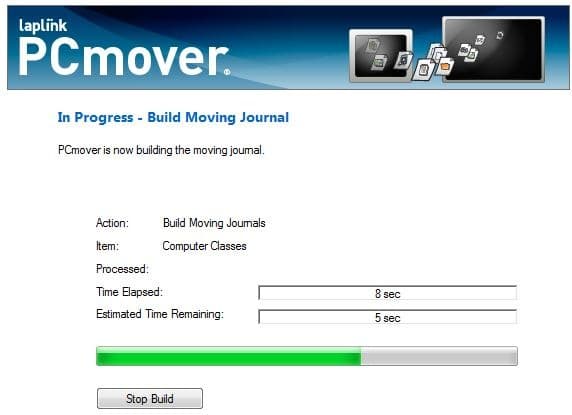
Finally, click the Next button to build moving van journals. When asked, select your flash drive or external USB drive to begin transferring all selected applications, files, and programs. This process may take a while. So, be patient.
Turn on your Windows 8 machine (if you have installed Windows 8 in dual boot with Windows, you need to reboot the machine and then boot into Windows 8) and connect the flash drive or the external hard drive that you have used to backup Windows 7 applications, files, and settings.
Step 12: Install PC Mover on Windows 8 and launch the program. Do note that you must download and install the same version of Windows 8 Beta Assistant (the same version that you previously installed on Windows 7) on your Windows 8 as well to be able to move apps and settings.
Step 13: On the welcome screen, click the Next button to see the Important Information screen. Check “I have read and understand this message” box and click the Next button.
Step 14: In the following screen, click on Migration and click the Next button. Select the New Computer in the next screen, click the Next button.
Step 15: Select the File Storage Device as the connection method and click the Next button. Click the Next button again. Here you will be asked to take the computer snapshot. We advise you to select “Skip this step. I already have or do not want to a snapshot” option and click Next.
Step 16: In the next step, you will be asked to enter your name and email address. But if you don’t like to share your name and email ID with PC Mover, just click the Next button to proceed to the next step.
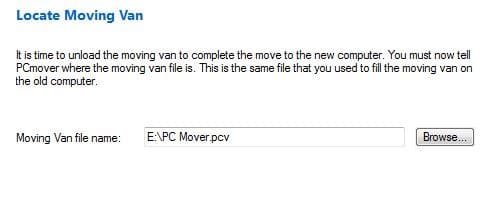
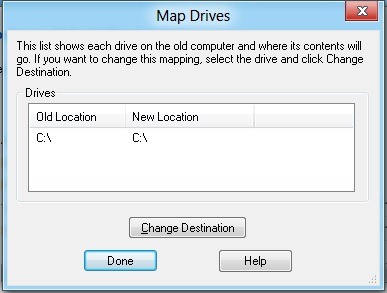
Step 17: Finally, browse to the Moving Van file that you have created on your Windows 7 and click Next button thrice to begin moving all selected applications, files, and settings. You will be asked to choose the user accounts and the Windows drive.
Note that if you are using a different user name of the new computer, you should select the “Change Target” option when a dialog appears.
Step 18: Windows 8 Beta Assistant will begin moving selected files, programs, and settings. This step may take a while, depending upon the size of the applications and data. Once done, you may need to reboot your PC. Good luck!
You might also like to read how to remove or uninstall Windows 8 guide.

