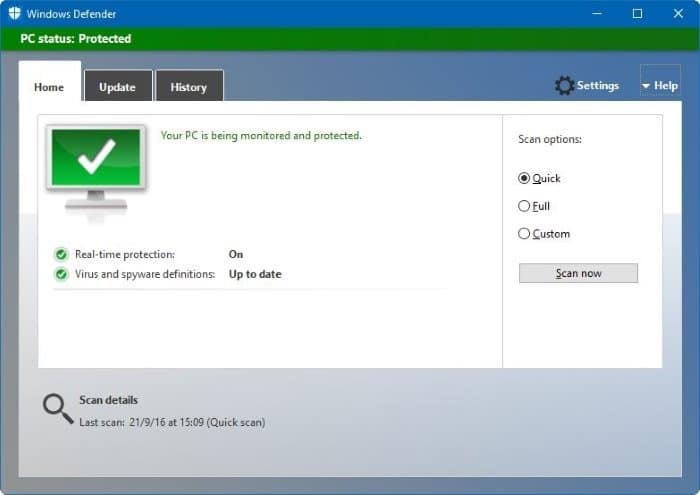
Windows Defender is the default antivirus program in Windows 10 operating system. The Windows Defender in Windows 10 helps you protect your PC from viruses, malware and spyware.
The Defender runs in real-time to offer the best possible protection and you can also perform a full or file/folder scan when you want. The newest version of Defender supports offline scan as well, which means you can now run Windows Defender without booting in to Windows 10 to find and remove viruses, malware and other threats.
For some reason, there is no option to schedule a scan in Windows Defender program in Windows 10. This can be useful if you want to scan your PC when its idle or if you want to scan your PC at specified time. Or you may want to schedule Windows Defender scan your PC even time you log out or log in.
Although Windows Defender regularly scans your PC in background when your PC is idle, many of you might want to schedule Windows Defender scan at your own time for piece of mind.
Luckily, you can use the Task Scheduler feature in Windows 10 to schedule Windows Defender scan in Windows 10.
Schedule Windows Defender scan in Windows 10
Complete the given below directions to schedule Windows Defender in Windows 10 to scan at a time and frequency that you want.
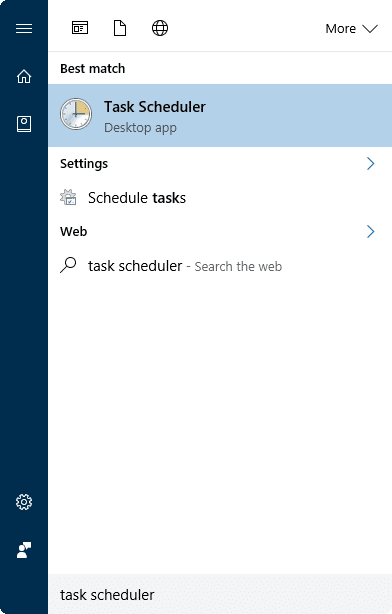
Step 1: Open Task Scheduler. This can be done by typing Task Scheduler in Start menu/taskbar search box and then pressing enter key.
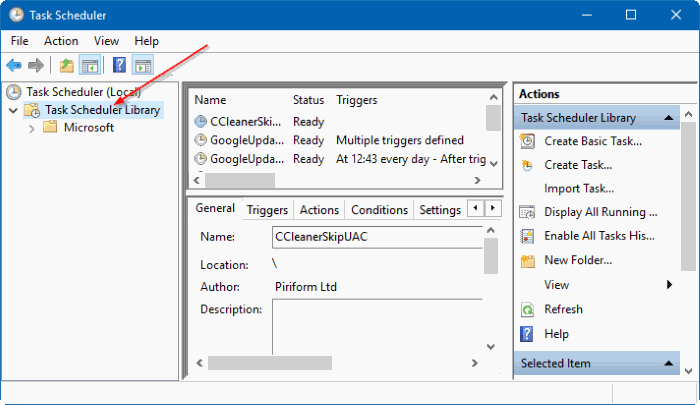
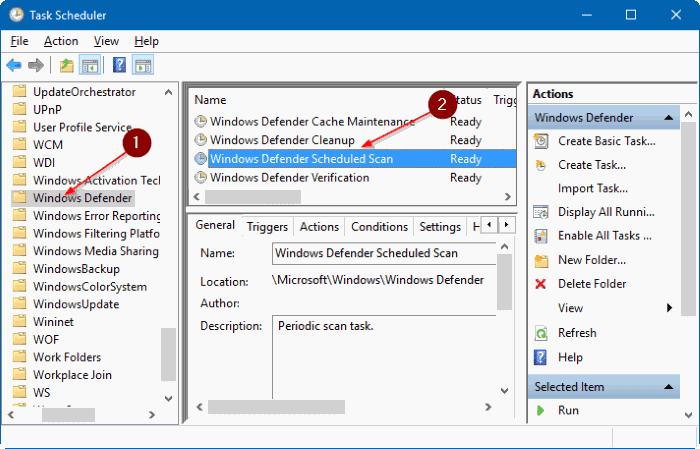
Step 2: In the left-pane of Task Scheduler, double-click on Task Scheduler Library to expand it.
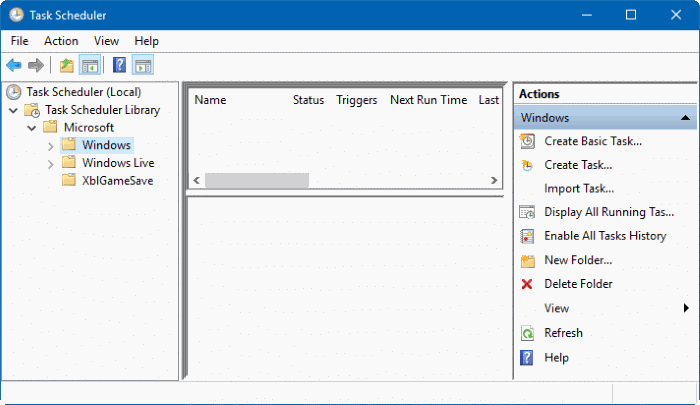
Step 3: Now, in the left-pane, double-click on Microsoft to expand it and see Windows and other entries.
Step 4: Double-click on Windows entry and then scroll down to see Windows Defender entry.
Step 5: Select Windows Defender. In the top center pane, you should now see Windows Defender Scheduler Scan among other tasks.
Note that you might not see these entries if Windows Defender is turned off. So if Windows Defender Scheduler Scan task is not showing up, please check if Defender is turned on.
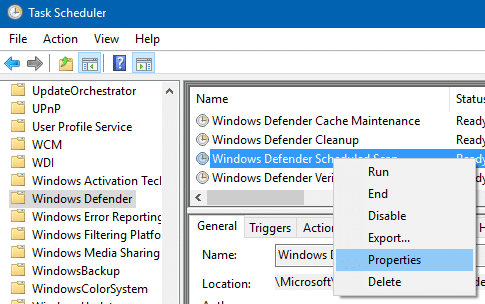
Step 6: Right-click on Windows Defender Scheduled Scan task and then click Properties to open Windows Defender Scheduled Scan Properties (Local Computer) dialog.
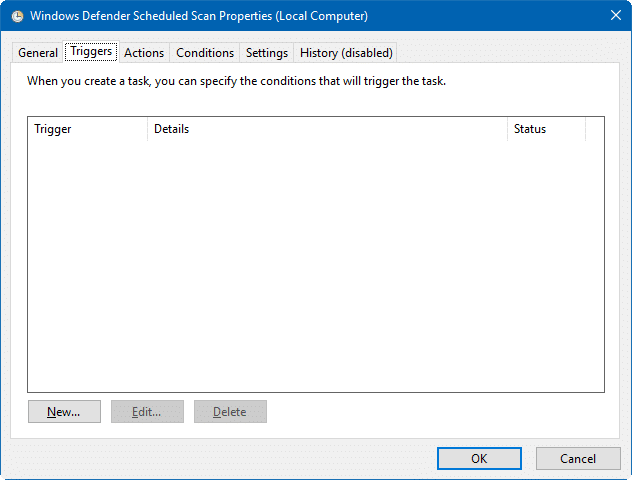
Step 7: Switch to the Triggers tab by clicking on the same.
Step 8: Here, click New button.
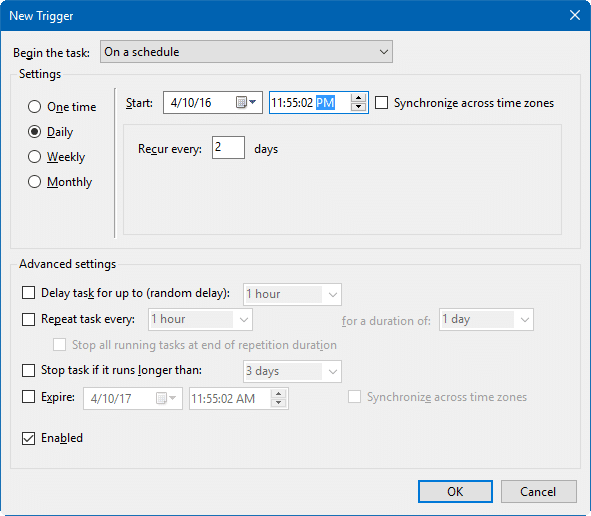
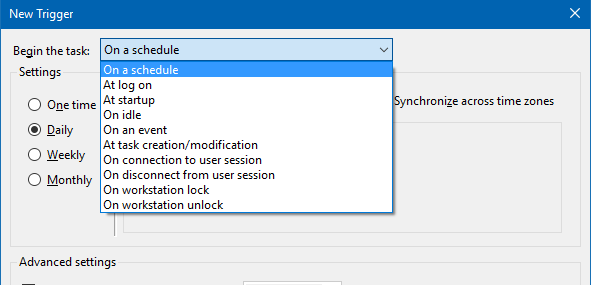
Step 9: Select when to begin the scan task, how often you want to schedule the scan and at what time you would like to perform the scan. You can also schedule a scan for a specific date and time , specific time, every day or every “n” number of days.
As you can see in the picture above, you can schedule the task when you at log on, at startup, when the PC is idle, on an event, at task creation/modification, on connection/disconnection to/from user session, and on workstation lock or unlock.
Once done, click OK button. That’s it!
You might also want to know how to manually update Windows Defender offline in Windows 10.
