Like in previous versions of Windows, your local or Microsoft account’s name is displayed on the login screen as well as at the top left side of the Start menu in Windows 10. If you’re not happy with the way your name is being displayed on the Start or login screen, you can easily edit the display name of your Microsoft account or local user account in Windows 10.
In this guide, we will see how to change the local user account name as well as Microsoft account name in Windows 10.
Method 1 – rename Microsoft account
Method 2 – rename local user account
Method 1 of 2
Change your Microsoft account name in Windows 10
NOTE: To rename your Microsoft account, your PC must be connected to the internet.
IMPORTANT: This method will not rename your Microsoft account email address, and will only change the display name that you see on the Start menu as well as on the login screen.
Step 1: Open the Settings app by following the instructions in our how to open the Settings app in Windows 10 guide.
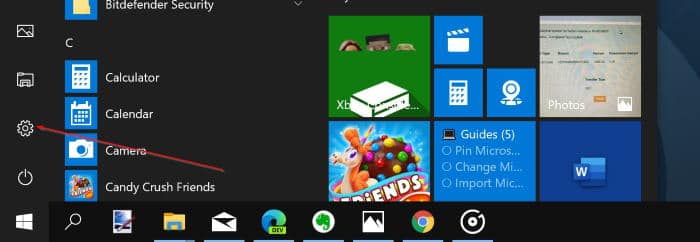
Step 2: Once the Settings app is launched, go to Accounts > Your info page.
Step 3: Now, click the link labeled Manage my Microsoft account. This will open a new link in your default browser. If you’re asked to enter the password, please enter the same for your Microsoft account, and then click Sign in.


Step 4: The Microsoft accounts page will be opened in your default web browser. If asked to sign in, please sign in with the same Microsoft account that you want to rename.
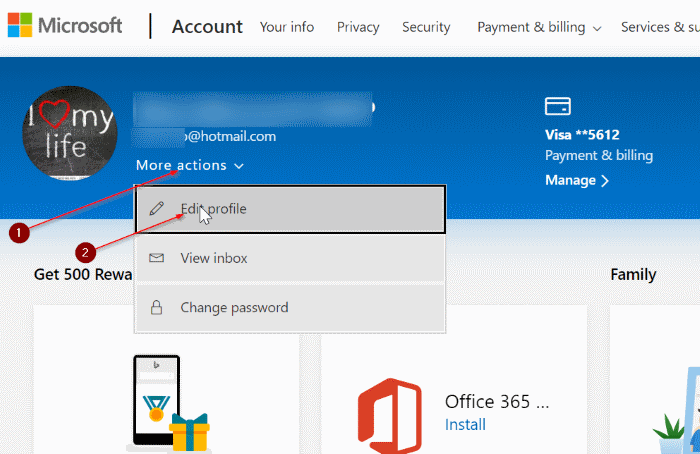
When you see the following page, click on the More actions link and then click the Edit profile option.

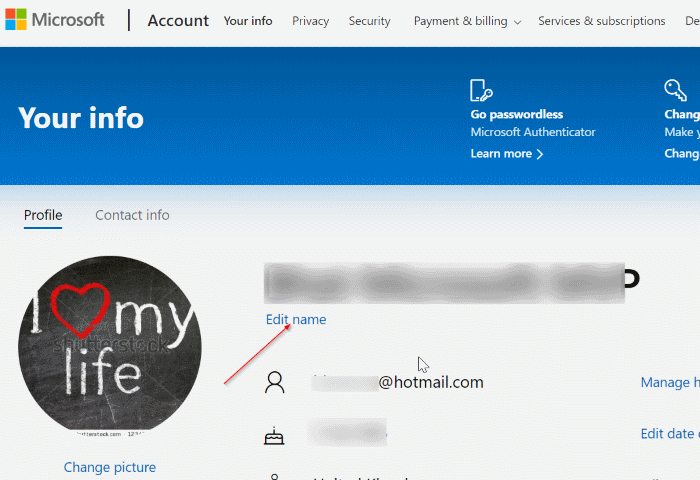
Step 5: When you see the Profile page, click on the Edit name link, which shows up just below your present profile name.

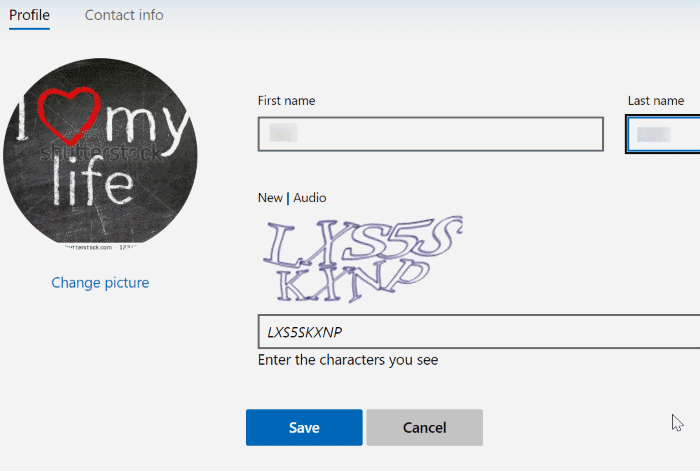
Step 6: Finally, you will see the following page where you can change your Microsoft account display name. Once done, click the Save button to save the new name. That’s it!

Method 2 of 2
Rename your local user account name in Windows 10
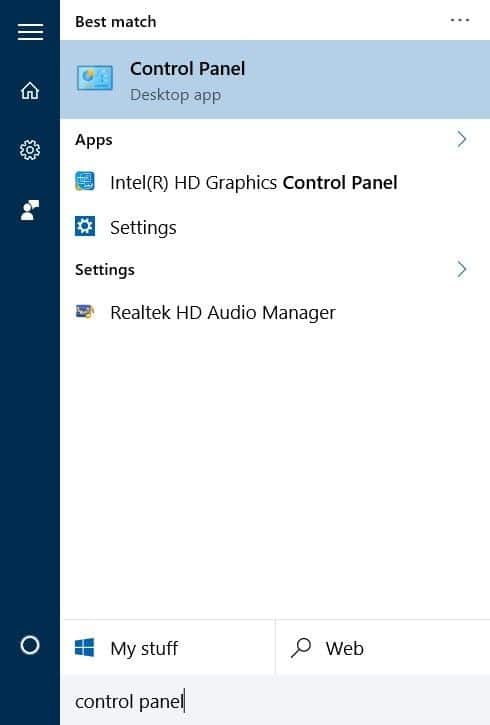
Step 1: Open Control Panel either by typing Control Panel in Start menu search box or right-clicking on the Start button and then clicking Control Panel.
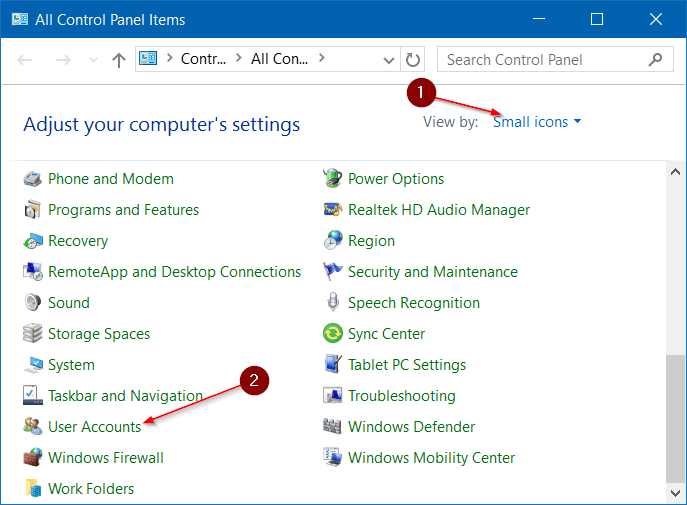
Step 2: Change the Control Panel View by to Small icons. Click User Accounts.
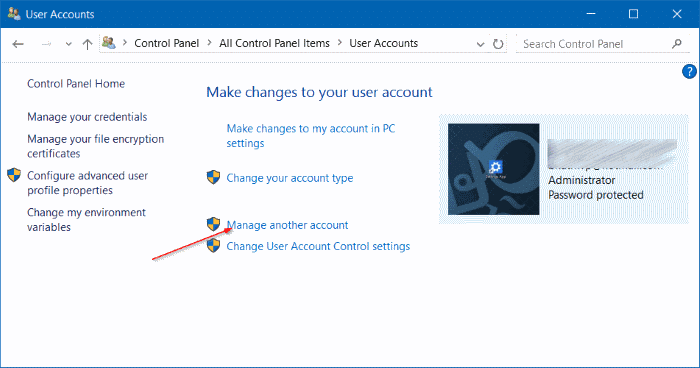
Step 3: Click Manage another account to see all local as well as Microsoft accounts on the PC. Click on the local user account that you want to rename.
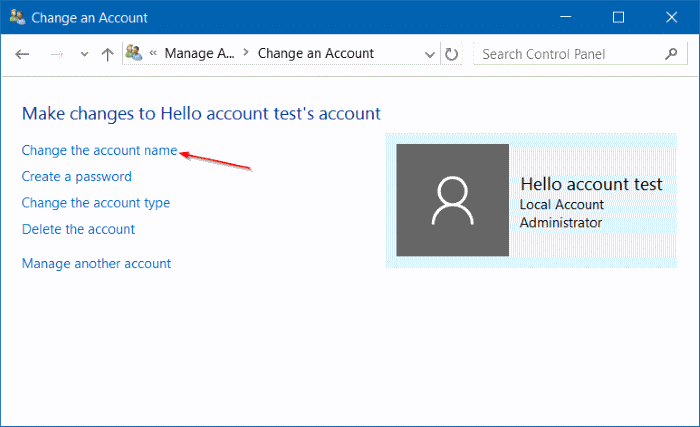
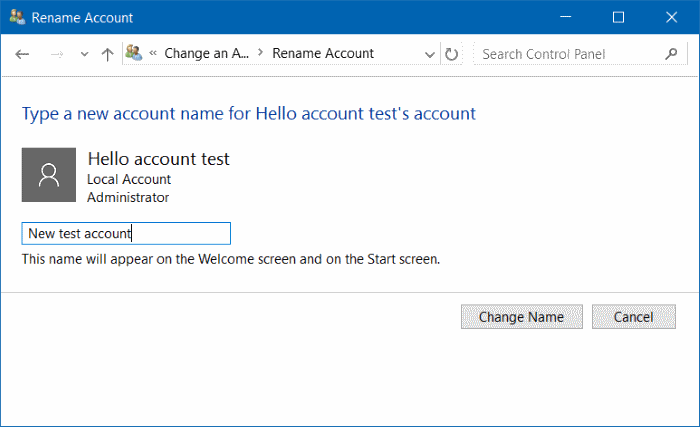
Step 4: Clicking on the account will open this window. Click Change the account name link and then type a new account name before clicking the Change Name button. That’s it!
How to install and use Windows 10 without a Microsoft account guide might also interest you.
