The Windows 10/11 operating system, drivers, and apps take up considerable space. One of the ways to free up some space on your Windows drive is to move installed apps from the Windows 10/11 drive to another.
Both Windows 10 and Windows 11 not only let you change the default install location of apps but also allow you to move installed apps from the current drive to a new drive so that you can free up space on the Windows 10/11 drive.
NOTE 1: Not all apps can be moved using this method. That said, most apps installed from the Microsoft Store can be moved.
NOTE 2: Windows 10 and 11 do not allow you to move classic desktop programs. You need to use third-party programs to move installed desktop programs and games.
NOTE 3: When you move an app to a new drive, a new folder called WindowsApps will be automatically created at the root of the drive, and the same is used to save apps.
Move apps to another drive in Windows 10
Fore Windows 11 directions, please scroll down the page.
Step 1: In the Windows 10 Settings app, navigate to Apps > Apps & features page to see all apps installed on your computer.
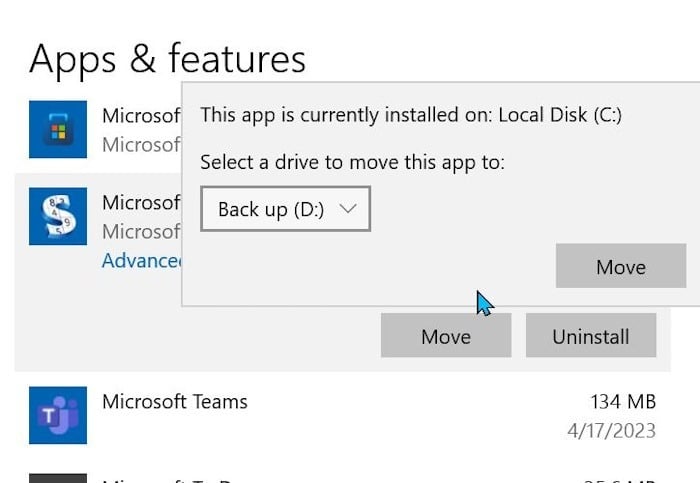
Step 2: Scroll down the list to see the app that you want to move. Perform a click on the app’s entry to reveal the Move and Uninstall buttons. To move the app, click the Move button.
NOTE: If the Move button does not appear for an app, it’s likely because it cannot be moved from one drive to another.
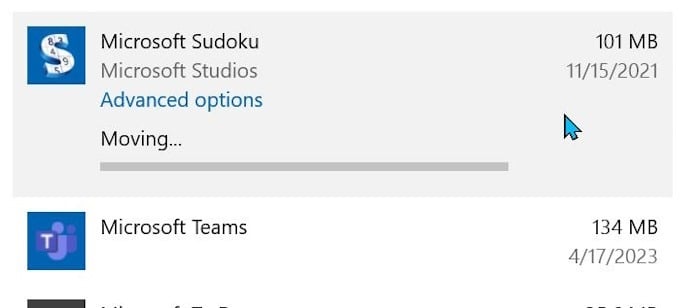
Step 3: Select the drive you want to move the app and click the Move button. That’s it!
Move apps to another drive in Windows 11
Step 1: Open the Windows 11 Settings app.
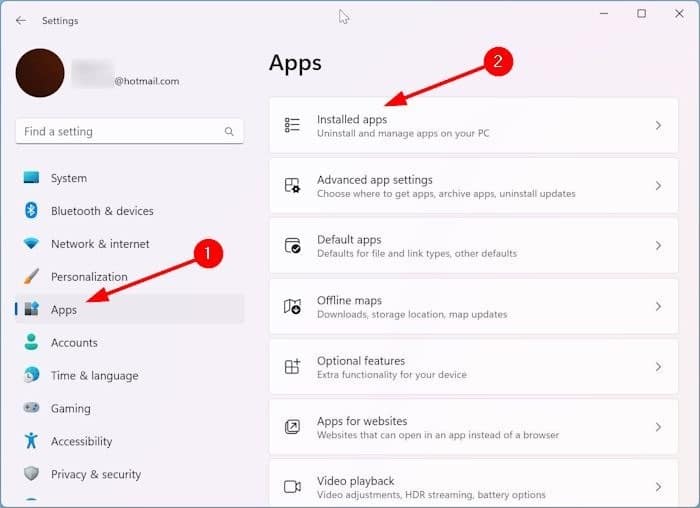
Step 2: On the left pane, click Apps. Now, on the right side, click Installed apps.
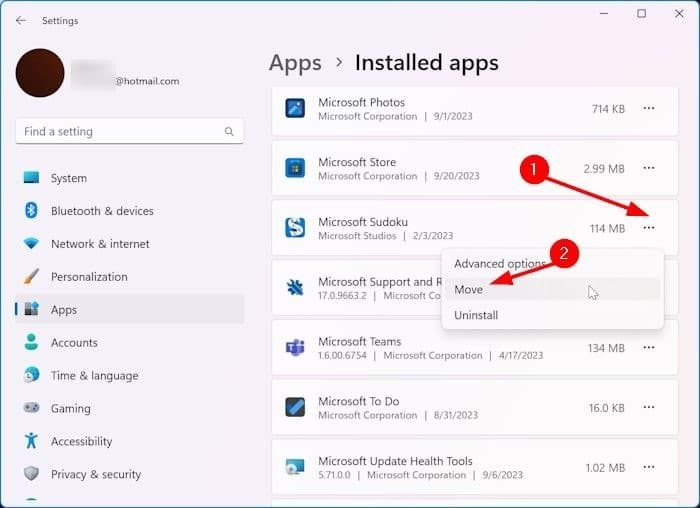
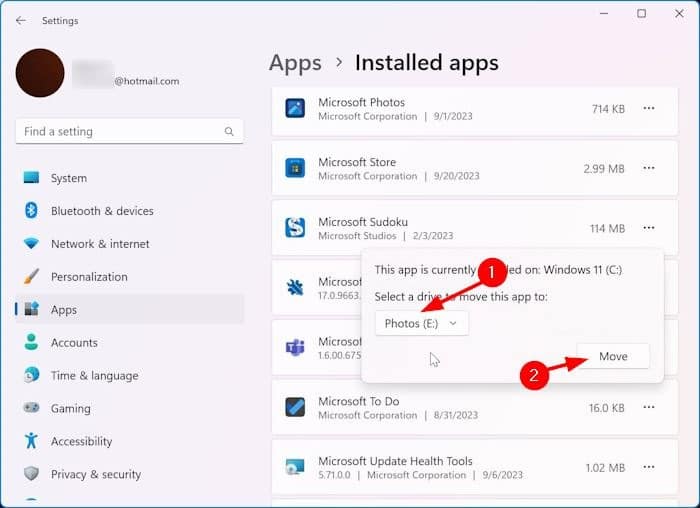
Step 3: The Installed apps page displays all installed apps as well as built-in apps. To move an app from the current drive to another drive, click the three dots next to its entry and then click the Move option.
Note that not all apps can be moved from the current installation location. If the “Move” option is missing, it’s likely because Windows 11 cannot move the app.
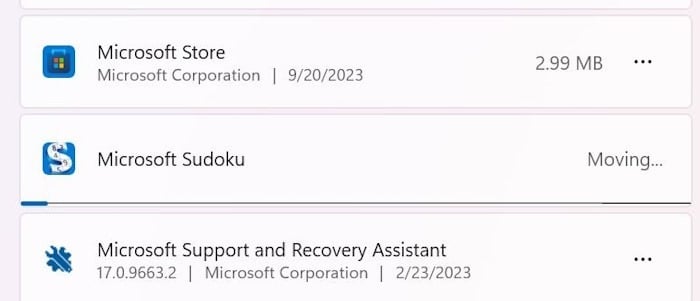
Step 4: Once you click the “Move” option, a small dialog will show up where you need to select the drive where you would like to move the app. Finally, click the Move button to begin moving the app to the selected drive.
