It’s a common practice to watch movies with subtitles while watching foreign language movies. Majority of the video playback software out there support subtitle feature out of the box, without the help of third-party software or extensions.
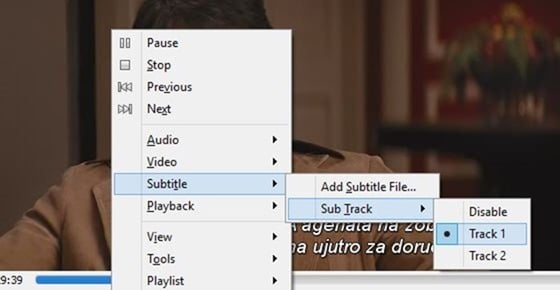
Just like other video playback software, the popular VLC Media Player also supports subtitles. While watching a video, you can right-click on VLC Media Player, click Subtitle and then click Add subtitle to select the subtitle file. Even though, VLC Media Player lacks the some of the advanced features present in GOM while dealing with subtitles, features offered in VLC are sufficient for most users.
With default settings, as you likely know, VLC Media Player loads subtitles if the video file has embedded (built-in) subtitles or the subtitles file is present in the same folder (with the same title) where the video file is located.
While this behaviour of VLC Media Player might help users who always watch movies with subtitles, those of you who rarely take the help of subtitles to watch movies might find this feature annoying as one needs to right-click on the video file, click Subtitle, click Sub Track, and then click Disable in order to stop VLC from showing subtitles for the current video file. That is, you need to follow this procedure each time you open a video file with subtitles in order to disable subtitles.
VLC Media Player lacks an easy-to-access option to stop it from automatically displaying subtitles but there is an option present under Preferences to stop VLC from automatically playing subtitles.
In this guide, we are going to show how you can prevent VLC from automatically showing subtitles for video files.
Method 1 of 2
Stop VLC from automatically loading subtitles
Step 1: Launch VLC Media Player.
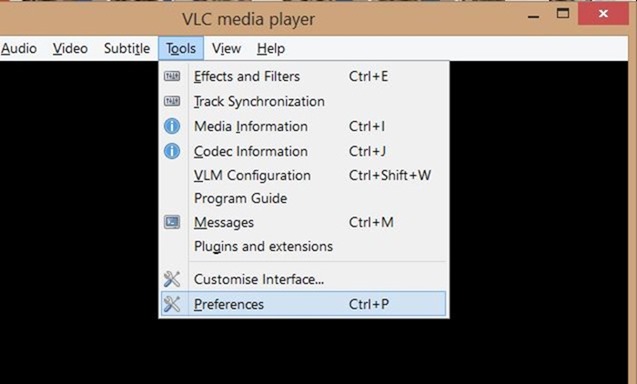
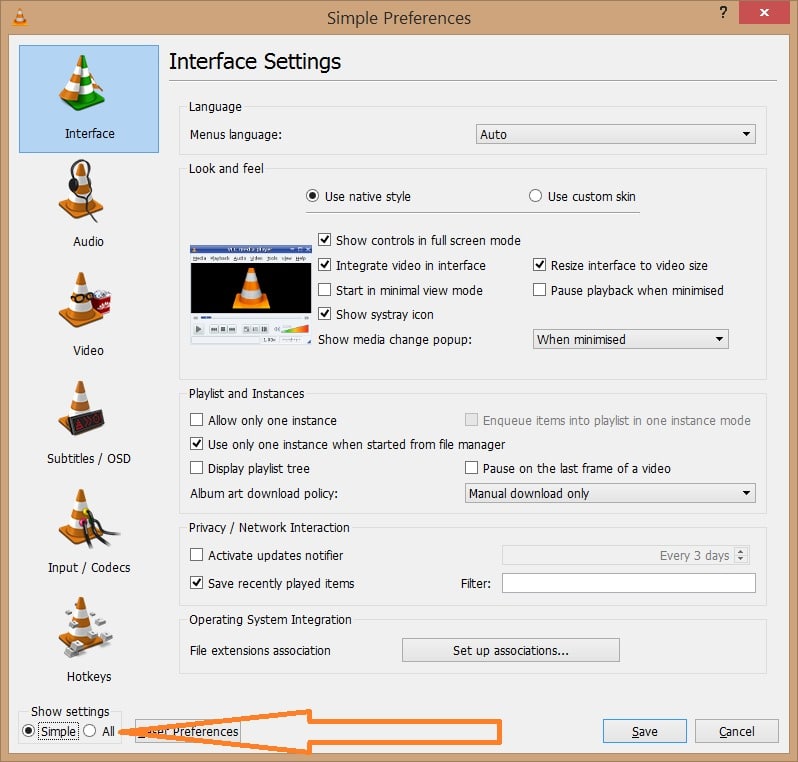
Step 2: Navigate to Tools menu and then click Preferences to open Simple Preferences dialog. Alternatively, you can use the Ctrl+P hotkey to quickly launch Simple preferences dialog.
Step 3: Next, switch to the Advanced Preferences. To do so, click All radio button (see picture) located at the bottom of left-pane.
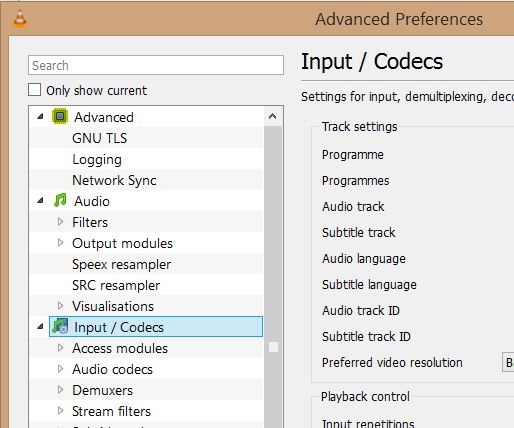
Step 4: Now, in the left-pane of Advanced Preferences, look for Input/Codecs entry. Click Input / Codes to see Input / Codes settings on the right-side.
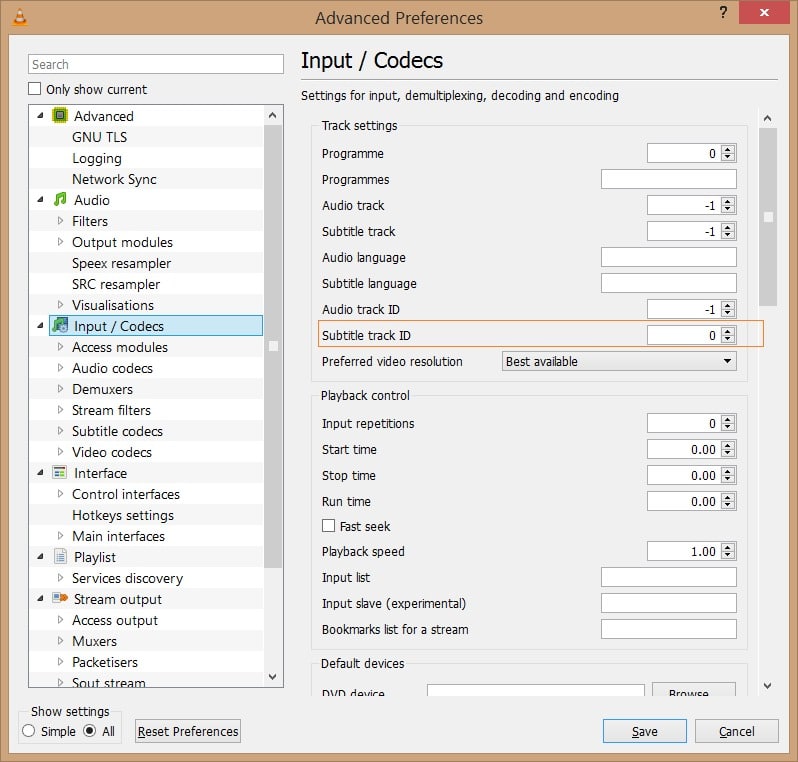
Step 5: Here, under Track settings, change the value of Subtitle track ID to 0 (zero). Click Save button. This will stop VLC Media Player from automatically loading subtitles. Finally, restart VLC Player.
When you want to view subtitles for the current file, simply right-click on VLC Player window, click Subtitle, click Sub Track, and then select Track 1 or Track 2 (if more than one subtitles are available).
Good luck!
Method 2 of 2
Stop VLC from automatically detecting subtitles
Use this method only if the above method isn’t working for you as this will completely disable subtitles and you need to open Advanced Preferences to enable subtitles again to enable subtitles.
Step 1: Open Advanced Preferences of VLC by following instructions mentioned in the above method.
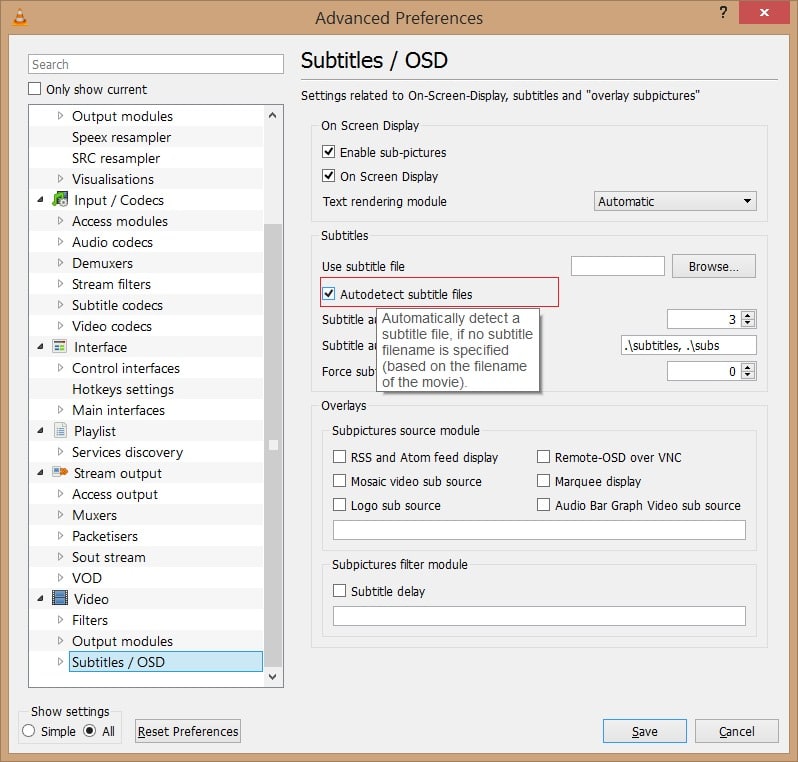
Step 2: In the left-pane of Advanced Preferences, expand Video tree, and then click Subtitles/OSD.
Step 3: Now, on the right-side, uncheck the option titled Autodetect subtitle files option. Click Save button. That’s it!
If you’re aware of a better solution, do let us know in comments.
