Want to change window border color in Windows 10? Here are two easy methods to change the default color of window borders in Windows 10.
Microsoft has made a couple of changes to window borders in Windows 10. The window borders are extremely slim in Windows 10, unlike previous Windows versions, where the border was quick thick.
In Windows 10, the window border color as well as title bar color is turned off by default. This means that, Windows 10 doesn’t decorate window borders with a color.
However, there are options under the Settings app to change the default settings. Using these options, you can turn on window border and title bar colors. There also an option to automatically match the window border color with your current desktop background.
IMPORTANT: Note that changing window border color also changes taskbar and Start menu color in Windows 10, if you have enabled colored taskbar and Start menu. It also changes the color of some tiles on the Start menu.
To change window border color in Windows 10, follow the instructions mentioned in one of the three methods given below.
Method 1 of 3
Change window border color via Settings in Windows 10
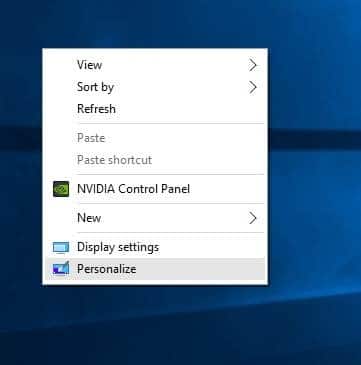
Step 1: Right-click on the desktop and click Personalize option to open the Personalization section of the Settings app.

Step 2: On the left pane, click Colors. Now, on the right-side, scroll-down the page, and make sure that the option titled Title bars and window borders is turned on. If this option is turned off, Windows 10 doesn’t show a color on window borders.
Needless to say that turning on the option shows a color on the title bar as well.
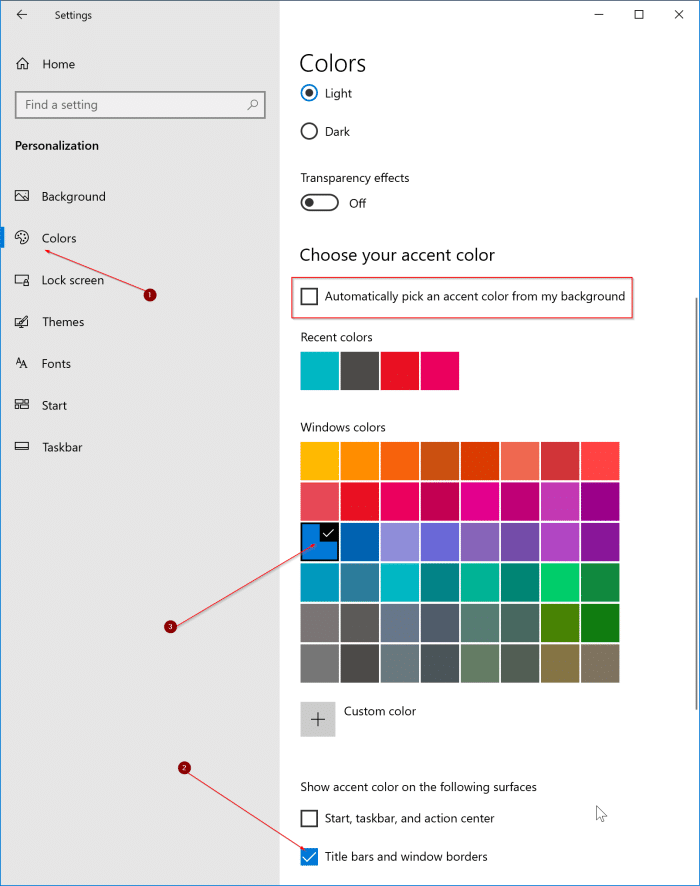
Step 3: Next, under Choose your accent color section, click on a color to set it as window border color. To pick a different color that is not in the list, click the Custom color option and then create one!
If you want Windows 10 to automatically pick an accent color to match your desktop background, select Automatically pick an accent color from my background option.
Method 2 of 3
Change window border color via Color and Appearance
Note that this method works only if you already have turned on window border color in the Settings > Color page (check instructions in Method 1).
If you are not pleased with the default set of colors offered under Settings, you can use the mixture tool present in Color and Appearance to customize the color and pick up a color for window borders. Here is how to do it:
Step 1: Open the Run command box simultaneously pressing the Windows logo and R keys.
Step 2: Type the following path in the box, and then press Enter key to open Color and Appearance window.
shell:::{ED834ED6-4B5A-4bfe-8F11-A626DCB6A921} -Microsoft.Personalization\pageColorization
Step 3: Here, you can either select a pre-defined color or click Show color mixture to customize the color. Note that while using the color mixer, keep a tab on window borders as they change in real-time.
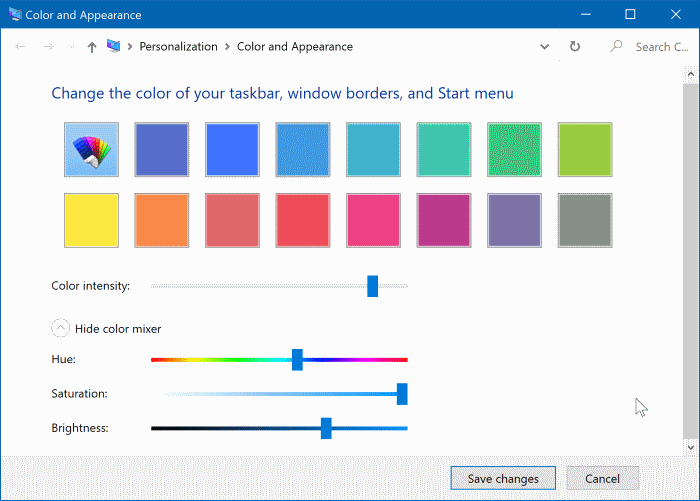
Step 4: Finally, click the Save changes button to apply the selected color. That’s it!
Method 3 of 3
Automatically change window border color in Windows 10
If you want Windows 10 to automatically select an appropriate window color depending on your desktop background, you can configure Windows 10 to automatically pick a color from your current desktop background.
Step 1: Right-click on the desktop, click Personalize to open the Settings app.
Step 2: On the left pane, click Colors. On the right side, make sure that Title bars and window borders option is turned on.
turn on the option labeled Automatically pick an accent color from my background. That’s it!
