Want to access the UEFI firmware settings to change the default boot order or set a UEFI password? In this guide, we will see how to access the UEFI settings on a Windows 10 running PC.
Most PCs that came pre-loaded with Windows 8 or Windows 10 use UEFI firmware instead of the traditional BIOS. Unlike the legacy BIOS, which can be accessed by pressing a manufacturer-assigned key, UEFI requires a different route to access its settings.
Check if your PC supports UEFI
As said before, if your PC came preinstalled with Windows 8, Windows 8.1 or Windows 10, your PC likely supports UEFI. But if you are not sure, you can refer to our check if your PC supports UEFI guide to easily know if your PC includes the traditional BIOS or the modern UEFI.
Complete the given below directions to access UEFI settings on a Windows 10 PC.
Method 1 of 3
Access UEFI settings from Windows 10
Step 1: Save your work and close all running programs, if any.
Step 2: Open the Settings app by either clicking its icon in the Start menu or simultaneously pressing the Windows logo and R keys.
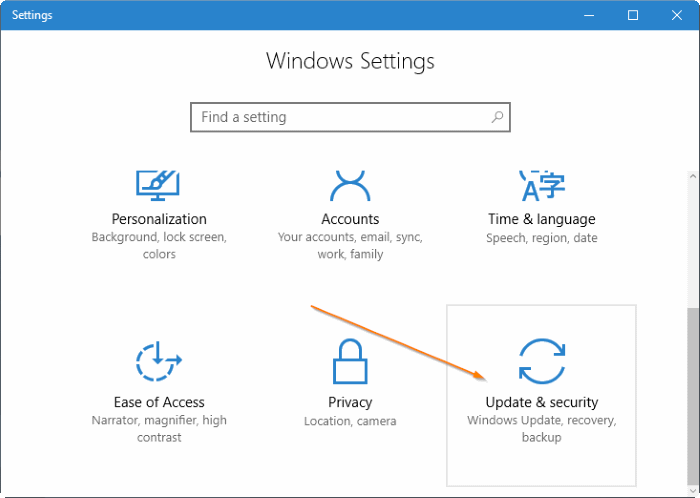
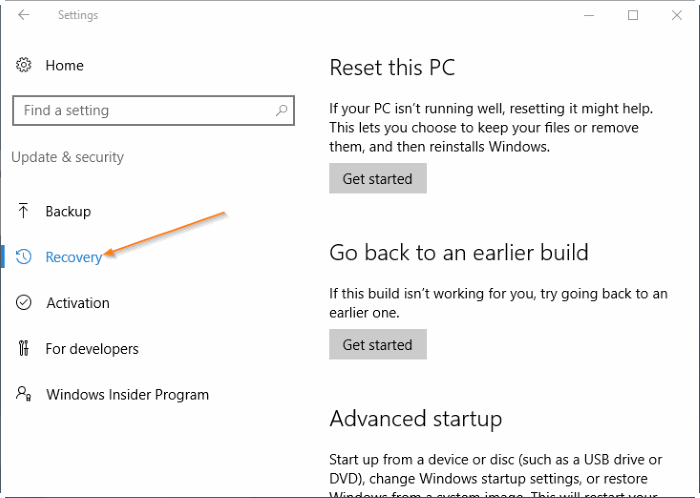
Step 3: Click Update & security icon. Click Recovery.
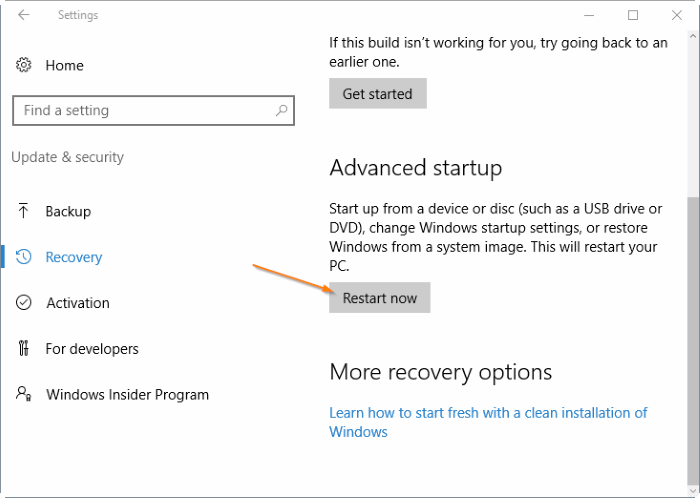
Step 4: Under the Advanced startup section, click the Restart now button to restart your PC.
Step 5: When you see Choose an option screen, click Troubleshoot to visit the Troubleshoot screen.
Step 6: At the Troubleshoot screen, click Advanced options to navigate to the same.
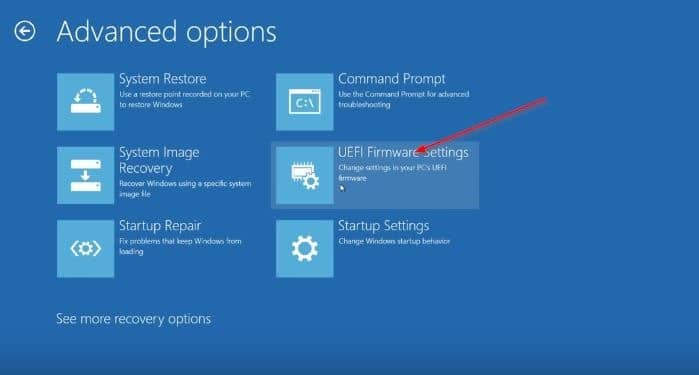
Step 7: When you see the Advanced options screen, click UEFI Firmware Settings. Note that the UEFI Firmware Settings option doesn’t appear if your PC doesn’t support UEFI.
Step 8: Finally, when you see the UEFI Firmware Settings screen with “Restart to change UEFI firmware settings” message, click the Restart button to restart your PC and get into UEFI firmware settings.
Method 2 of 3
Use Command Prompt to access UEFI settings from Windows 10
If the Settings app is not opening for some reason, you can use the Command Prompt to access UEFI settings. Here is how to do that.
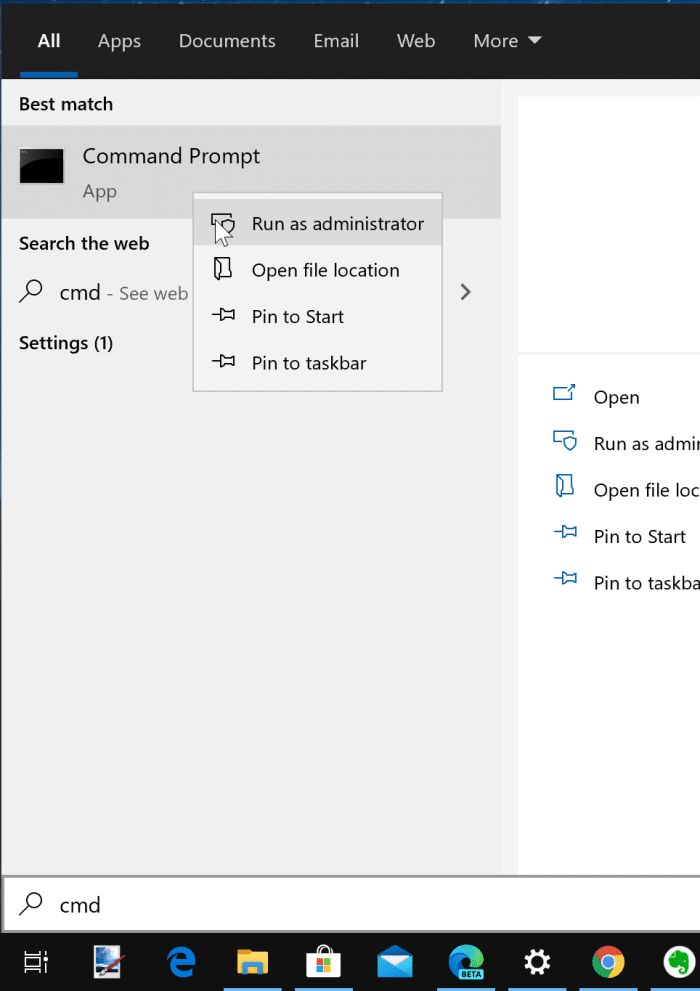
Step 1: Type CMD in the Start/taskbar search field, right-click on the Command Prompt entry and then click Run as administrator option. When you see the User Account Control prompt, click the Yes button.

Step 2: At the Command Prompt window, type the following command and then press Enter key.
shutdown.exe /r /o
After typing the command, don’t forget to press the Enter key.
You will see “You are about to be signed off” message. Your PC will restart in less than a minute.
Step 3: Once your PC restarted, follow the directions mentioned in Step 5, Step 6, Step 7, and Step 8 of Method 1 to access UEFI settings.
Method 3 of 3
Another way to access UEFI settings from Windows 10
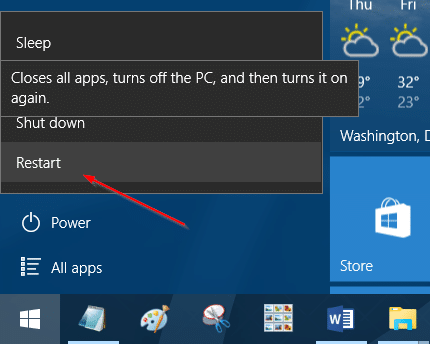
Step 1: Open the Start menu. Click the power button, hold down the Shift key and then click on the Restart button.
Step 2: Once your PC rebooted and you’re at Choose an option screen, follow the directions mentioned in Step 5, Step 6, Step 7 and Step 8 of Method 1 (scroll up to see).

