Windows 10 automatically updates a lot of things and tries to make the PC maintenance a little easier for you. By default, Windows 10 is configured to automatically download and install updates for the operating system, device drivers, and apps installed from the Store.
In a nutshell, on a Windows 10 PC, you don’t need to spend your precious time looking for driver updates. Windows 10 takes care of them. All you need to update manually is desktop applications that you installed from the web to keep your Windows operating system in good shape.
While it’s always a good idea to have up-to-date device drivers, at times, you might want to stop or prevent Windows 10 from automatically downloading and installing the latest version of device drivers. For instance, when you know that a newer version of the hardware driver is full is issues, you might want to configure Windows 10 to stop automatically updating device drivers.
Luckily, Windows 10 offers an easy way to enable or disable automatic driver updates, and you don’t need to go for third-party utilities to turn on or off automatic device driver updates.
Tip: How to view recently installed driver updates in Windows 10.
In this guide, we will show you how to prevent Windows 10 from automatically downloading and updating device drivers.
Method 1 – Disable automatic device driver installation
Method 2 – Disable automatic driver installation using Group Policy
Method 3 – Turn off automatic device driver installation using Registry
Method 1
Disable automatic device driver update on Windows 10
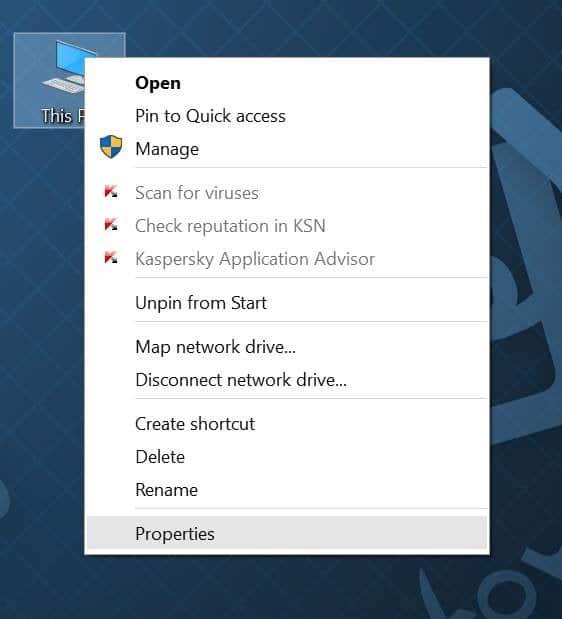
Step 1: Right-click on This PC icon on the desktop and click Properties to open the System properties window.
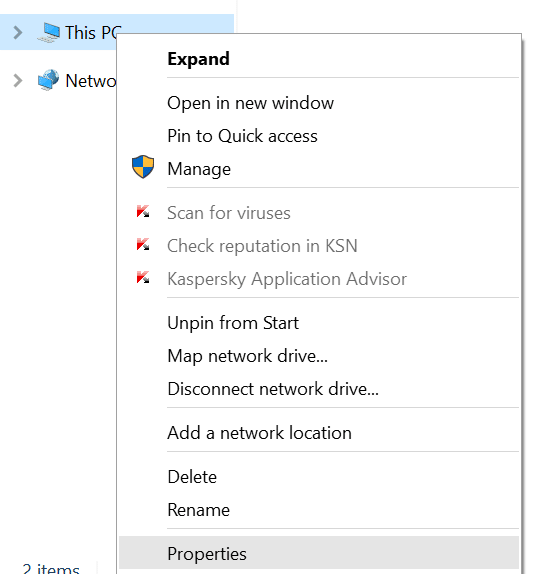
Alternatively, you can right-click on This PC icon in the navigation pane of File Explorer (Windows Explorer) and click Properties to open the System properties window.
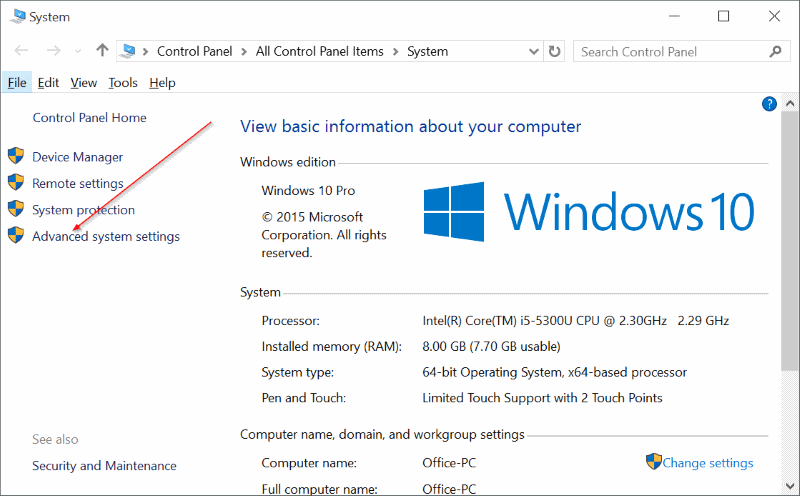
Step 2: On the left pane, click Advanced system settings to open the System Properties dialog.
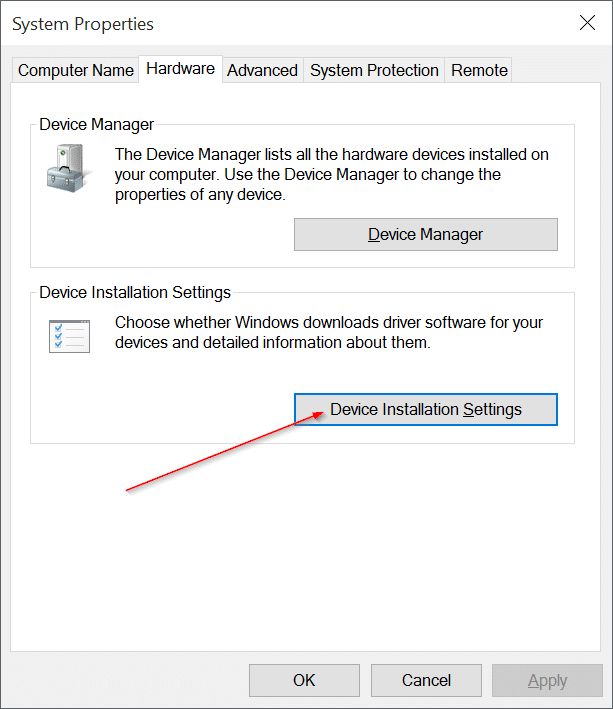
Step 3: Switch to the Hardware tab and then click Device Installation Settings. This will open Device Installation Settings.
Step 4: Select the second option titled No. Finally, click the Save changes button to stop Windows 10 from automatically updating device drivers.
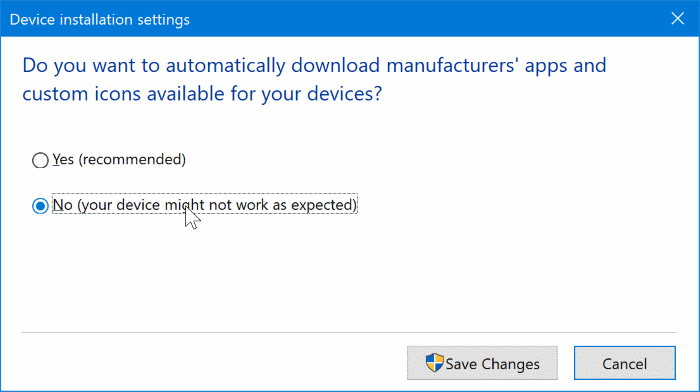

From now on, you can manually update device drivers in Windows 10.
Method 2
Disable automatic driver updates using Group Policy
Group Policy Editor is not part of Windows 10 Home Edition.
Step 1: Open the Group Policy Editor by typing Gpedit.msc in the Start/taskbar search field and then hitting the Enter key.
Step 2: In the Group Policy Editor window, navigate to:
Computer Configuration > Administrative Templates > Windows Components > Windows Update.
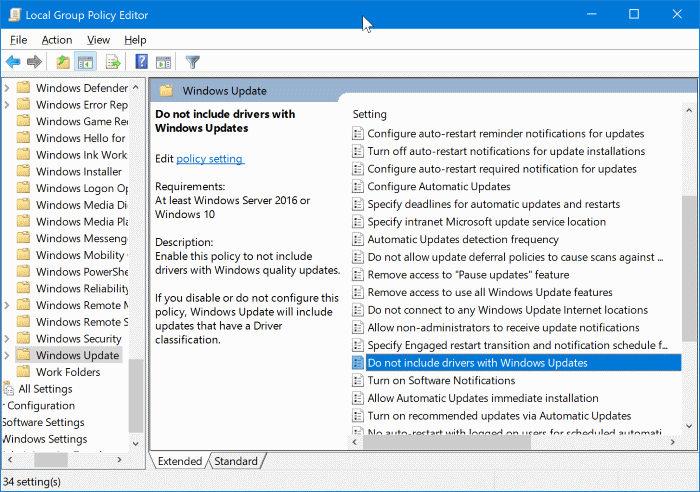

Step 3: On the right side, look for Do not include drivers with Windows Update option. Double-click on the entry to open its properties dialog.
Step 4: Select the Enabled option. Click Apply.


Method 3
If, for some reason, you are unable to configure automatic driver updates, use the Registry Editor for the job.
Turn off automatic device driver update via Registry
Step 1: Type Regedit in the Start menu search box or Run command box and then press the Enter key. Click the Yes button when you see the User Account Control confirmation prompt to launch Registry Editor.
Step 2: Once the Registry Editor is launched, navigate to the following key:
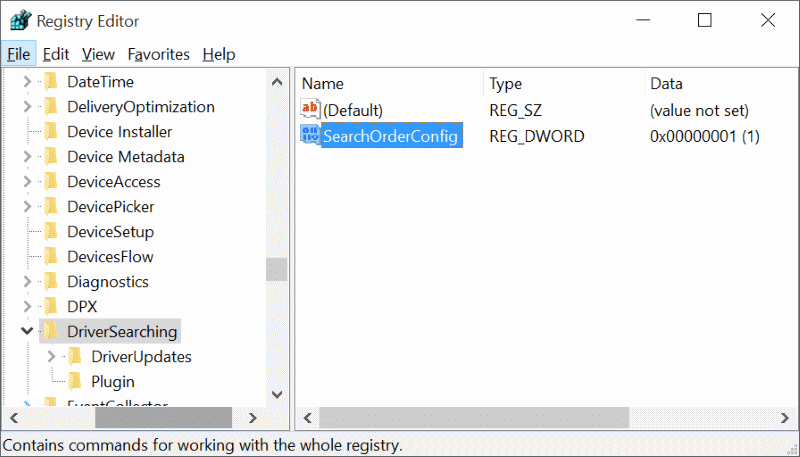
HKEY_LOCAL_MACHINE\SOFTWARE\Microsoft\Windows\CurrentVersion\DriverSearching
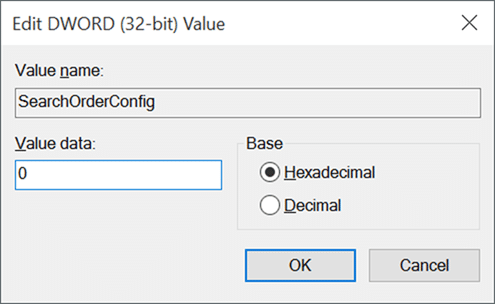
Step 3: On the right-side, look for the entry named SearchOrderConfig, double-click on it, and change its value from the default 1 to 0 (zero) to turn off automatic updates.
