Many of the PCs available today come with a dedicated graphics card. During normal operations, graphics cards work without breaking a sweat. However, while playing resource-intensive games for an extended period, you might need to monitor the GPU (Graphics Processing Unit) temperature to avoid overheating the GPU.
Checking your computer’s GPU should have been an easy task. Sadly, the Windows operating system did it support monitoring the GPU temperature until the recent build of Windows 10. In fact, Windows 10 (and earlier versions) did not have temperature monitoring support out of the box. We had to use third-party applications to monitor CPU and GPU temperature.
Know your PC’s GPU temperature
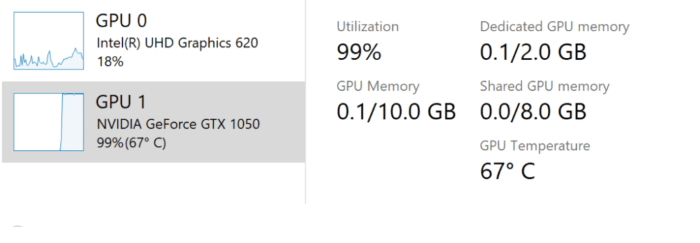
Luckily, starting with Windows 10 build 18963, the Performance tab in the Task Manager displays the GPU temperature. This means that users can now monitor GPU temperature without installing third-party software.
The GPU temperature value is shown in Celsius, and unfortunately, you cannot change it to Fahrenheit for now.
While this is an excellent feature, currently only dedicated GPUs are supported. That is, on-board or integrated graphics is not supported for now.
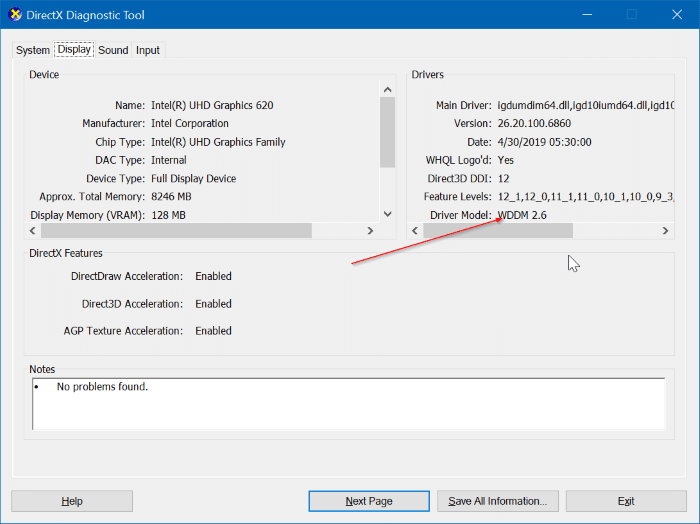
Besides that, the current version (see how to check driver version in Windows 10) of your graphics card driver might not support this new feature. So, update the graphics card driver to the latest available version. Also, the graphics card driver should support version 2.4 or higher WDDM. To check the WDDM version on your PC, type dxdiag in the Start/taskbar search field, hit Enter key, click the Yes button when you get a dialog box, and then navigate to the Display tab. The Driver Model field displays the WDDM version.
We now expect temperature monitoring support for CPU as well!

