With default settings, Windows 10 displays 24-hour format clock on the taskbar as well as on the lock screen. Although there is nothing wrong with the 24-hour time format, many users find it difficult to read the 24-hour format clock and prefer the easy to understand 12-hour format clock.
If you’re on Windows 10 and prefer to change the default 24-hour time format to 12-hour or vice versa, you can change time format under Settings as well as Control Panel.
In this guide, we will see how to change the 24-hour time format to 12 hour or vice versa in Windows 10.
Please note that changing time format from 24-hour to 12-hour will not affect the clock on the lock screen. The lock screen clock will continue to display time in 24-hour format. Unfortunately, as of now, there is now way to change time format of the clock on the lock screen.
Method 1 – change time format via Settings
Method 2 – change time format via Control Panel
Method 3 – customize AM and PM symbols
Method 1 of 3
Change time format from 24-hour to 12-hour via Settings
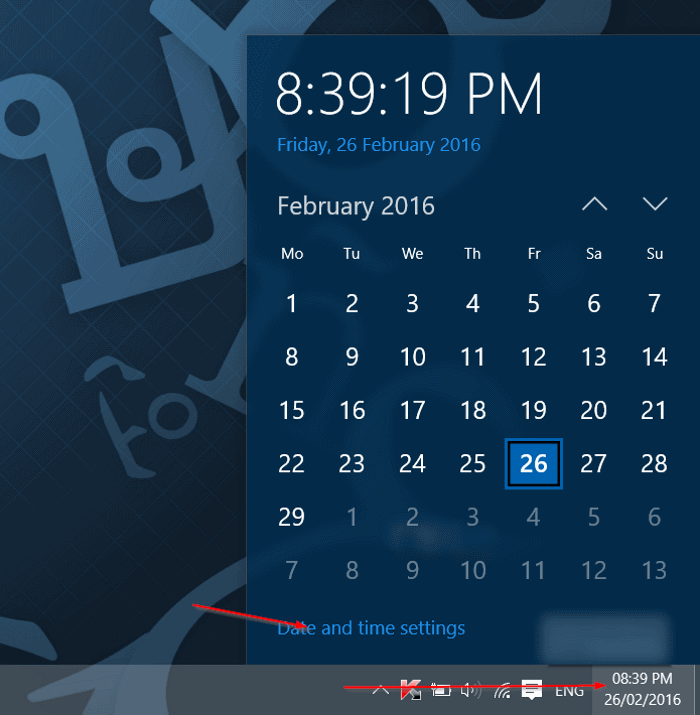
Step 1: Click on the date and clock on the taskbar, and then click Date and time settings link to open Time and Language section in Settings app.
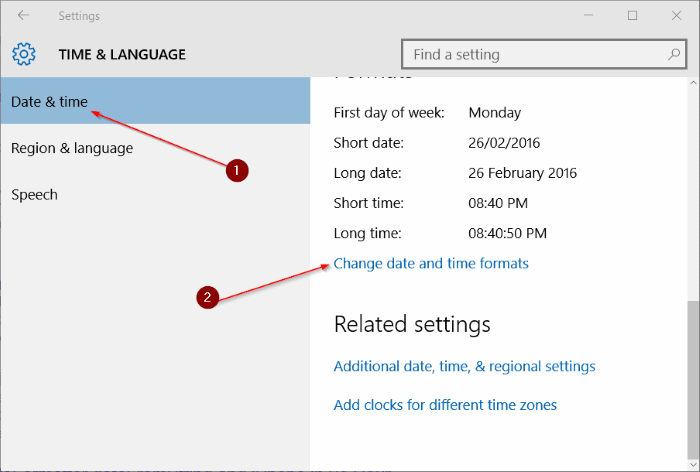
Step 2: Under Formats, click on the link labelled Change date and time formats.
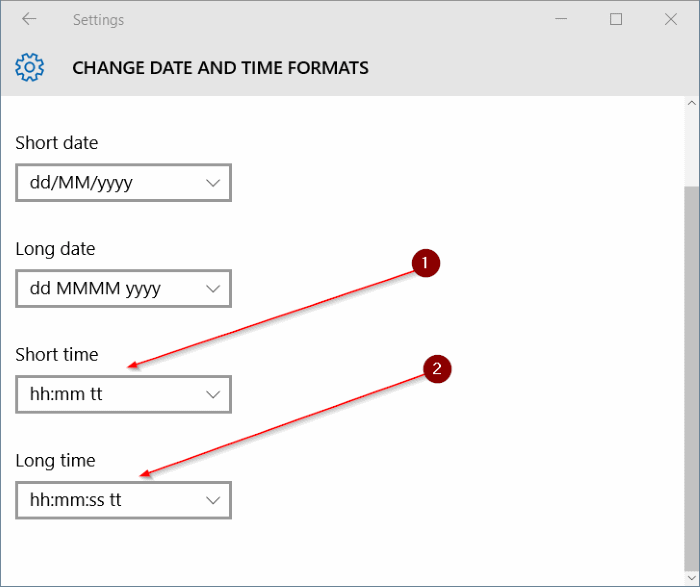
Step 3: Finally, under Short time section, select hh:mm tt to see 12-hour time format instead of the default 24 hour.
Also, under Long time section, select hh:mm:ss tt.
NOTE: Instead of hh:mm tt you can also select h:mm tt. When you select h:mm tt instead of hh:mm tt, Windows displays 04:29 as 4:29 (removes the initial zero).
Similarly, for long time, you can select h:mm:ss tt instead of hh:mm:ss tt.
Method 2 of 3
Change clock format from 24 hour to 12 hour via Control Panel
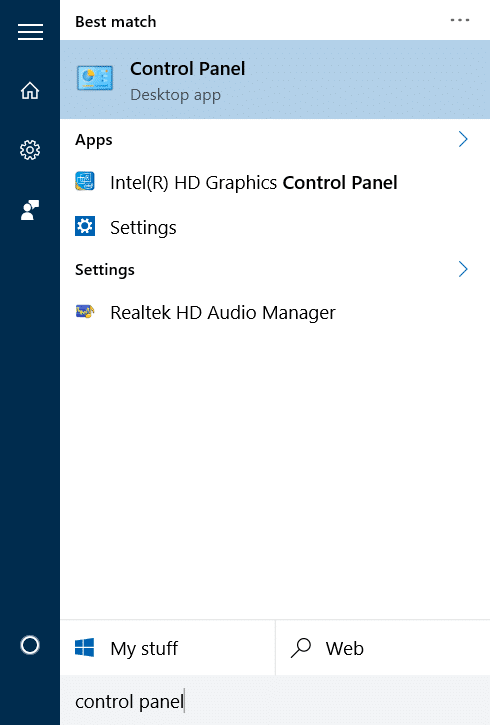
Step 1: Open Control Panel by typing its name in Start menu or taskbar search box and then pressing Enter key.
You can go through our 5 ways to open Control Panel in Windows 10 guide to know all ways out there to access the traditional Control Panel in Windows 10.
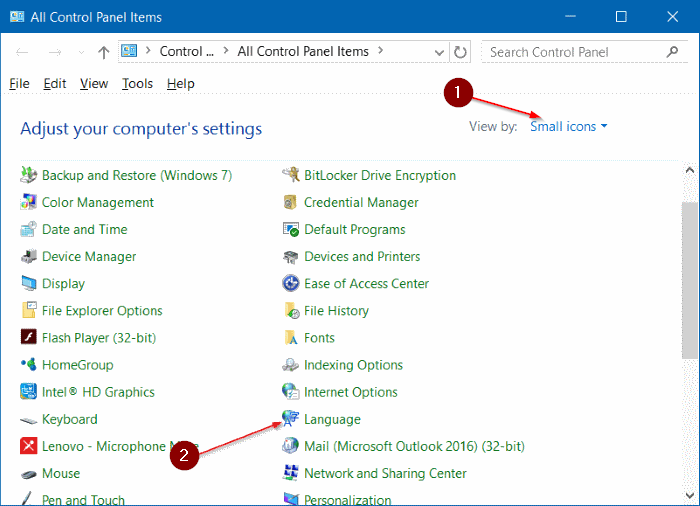
Step 2: Change the Control Panel View by to Small icons. Click Language.
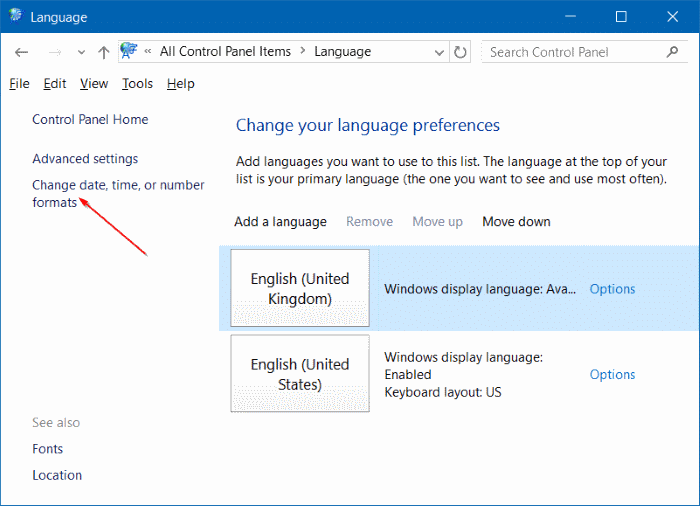
Step 3: In the left-pane, click Change date, time, or number formats link.
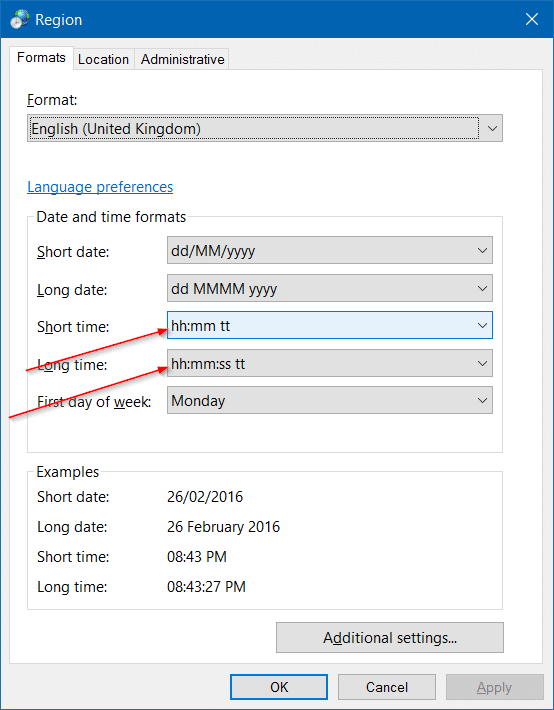
Step 4: Under Formats tab, under Date and time formats section, select hh:mm tt from the drop-down box next to Short time.
Select hh:mm:ss tt from the drop down box next to Long time.
Click Apply button.
Method 3 of 3
Customize AM and PM symbols
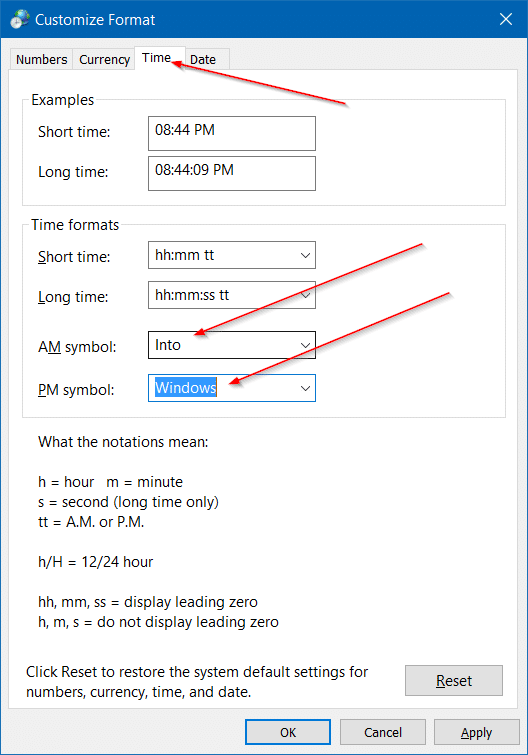
Did you know that you can customize AM and PM symbols as well? Yes, you can configure Windows 10 to show your name or any other name instead of AM and PM. To do so:
Step 1: Follow the instructions mentioned in Step 1, Step 2 and Step 3 of Method 2.
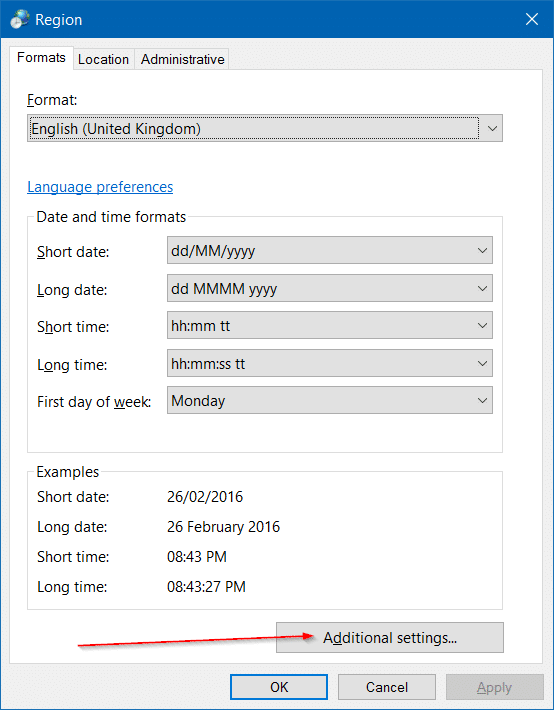
Step 2: Click Additional settings button.
Step 3: Switch to the Time tab by clicking on the same.
Step 4: In the field next to AM Symbol, enter what you want to use instead of the default symbol. Likewise, enter something in the field next to PM Symbol. Click Apply button.
Hope this helps!
