Oracle VM VirtualBox, without a doubt, the best free virtual machine software out there for Windows, Mac, and as well as Linux. Whether you want to test a version of Windows or test a bootable ISO file, VirtualBox is the best software out there for the job.
While installing an operating system in VirtualBox is relatively easy, first time users may need some help, especially if the user plans to boot from an ISO file and install from the same. The problem is that VirtualBox doesn’t let you select an ISO image file while creating a new virtual machine or virtual hard drive, and one needs to add it later after creating the virtual hard drive.
For those who’re using VirtualBox for the first time, this is the guide with step-by-step instructions to easily boot and install Windows or any other operating system from ISO image file.
Boot and install from ISO in VirtualBox in Windows
NOTE: We assume that you already have installed VirtualBox.
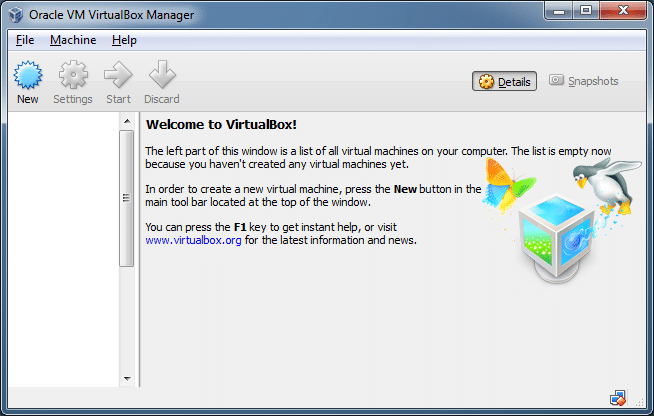
Step 1: Launch VirtualBox. Click the New button to open Create Virtual Machine wizard.
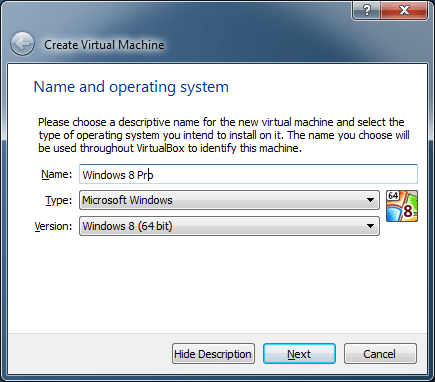
Step 2: Enter a name for the virtual machine, select the type of operating system you want to install by selecting an entry from the drop-down list, and then select the version before clicking on the Next button to continue.
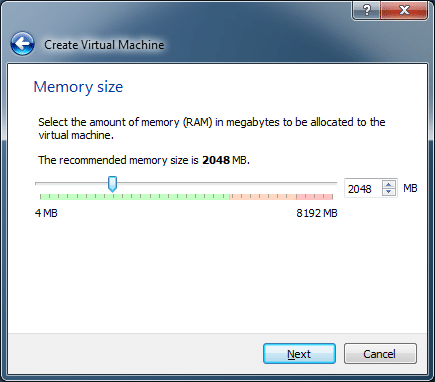
Step 3: In the resulting screen, you need to allocate a portion of the RAM to the virtual machine. Depending on the amount of RAM installed on your PC and the operating system you have selected in the previous step, Virtual Machine recommends you allocate x MB of RAM. You can either go with the recommended amount or allocate a little more but make sure you don’t allocate less than the recommended amount.
After selecting the RAM, click Next button.
NOTE: One shouldn’t allocate more than half the size of physical RAM to the virtual machine.
Step 4: In this step, you need to create a virtual hard drive. To do so, click on the Create button to open Create Virtual Hard Drive wizard. Here, select VDI or VHD as the virtual hard drive type. Click Next button.
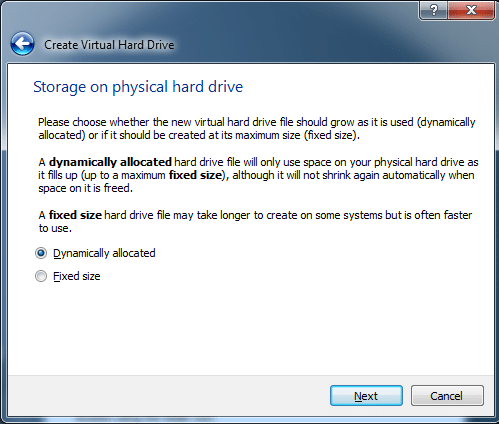
Select Dynamically allocated or Fixed size be carefully reading the available description. In short, if you select Dynamically allocated option, the virtual hard drive will grow as you use it, whereas Fixed size means that the virtual machine will use all allocated space from right now.
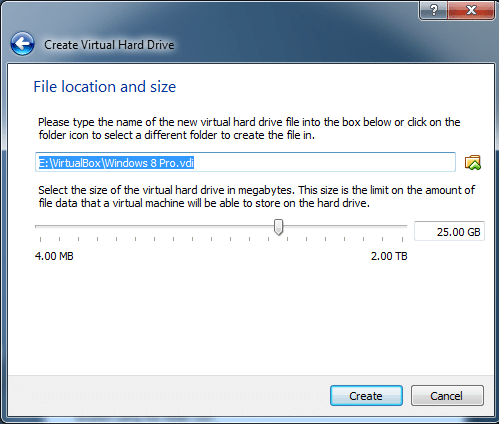
Step 5: Next, select a location to save the virtual hard drive and also select the size of virtual hard drive. Please note that if you want to install Windows 7/8, you need to create a virtual hard drive with at least 16 GB for 32-bit or 20 GB for 64-bit. Click Create button to create a virtual hard drive.
Step 6: Now that you have the virtual hard drive, it’s time to select an ISO image file that you want to use to install the operating system. Please note that the ISO must be bootable. To know, refer to our how to check if Windows 10 ISO is bootable guide.
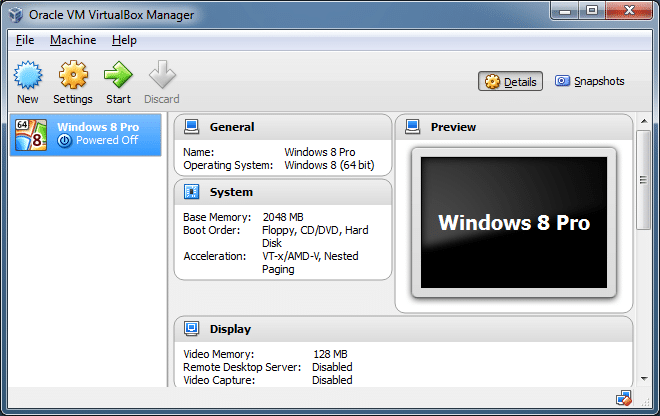
Right-click on the newly created virtual machine entry (in the left pane of VirtualBox Manager) and then click Settings button.
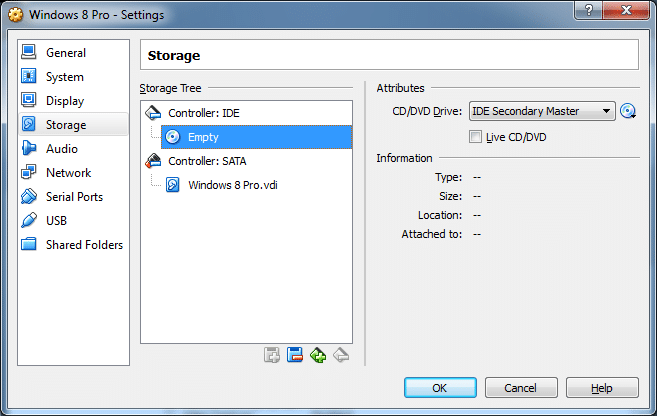
Step 7: In the left-pane of Settings, click Storage, double-click on the Controller (located under Storage tree) to expand the same and see newly created virtual hard drive entry.
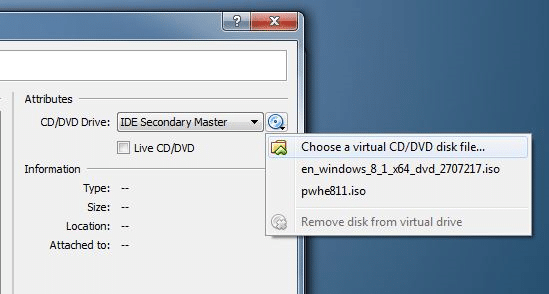
Here, click on Empty (see picture), then click the small icon next to CD/DVD drive, click Choose a virtual CD/DVD disk file option to browse to the location of the ISO file. Select the ISO file and then click OK button. That’s it!
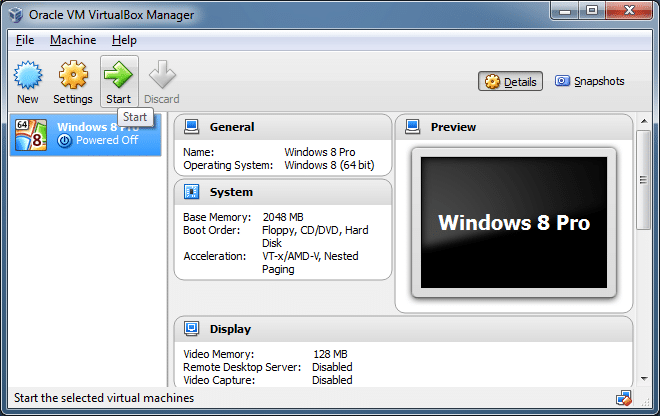
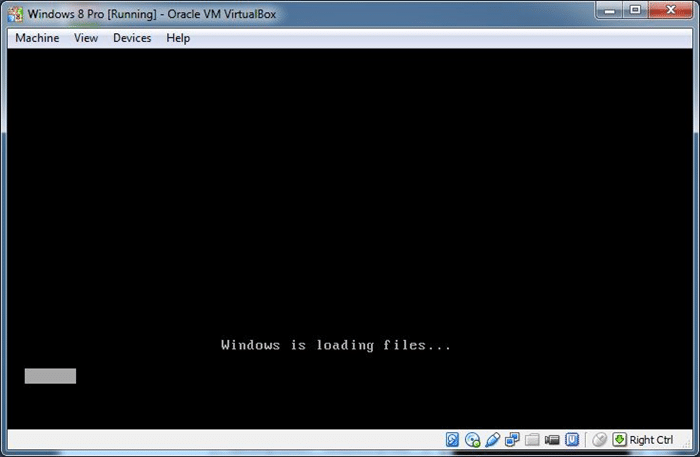
You can now select the virtual machine entry on the home screen of VirtualBox Manager and then click Start button to boot from the selected ISO file and start installing your operating system. Good luck.
How to boot from USB in VirtualBox, how to enable Aero in VirtualBox, and how to share files between Windows host and virtual machine guides might also interest you.

![boot and install from ISO VirtualBox Step5[3] boot and install from ISO VirtualBox Step5[3]](https://www.minitechtips.com/wp-content/uploads/2025/01/boot-and-install-from-ISO-VirtualBox-Step53_thumb.png)
