In Windows 10, the default color of window title bar, as you can see in the picture, is white. Most users prefer to have a custom color or a color that matches with the current desktop background.
In early versions of Windows 10, it was not possible to change the title bar color via the Settings or Control Panel. We had to make changes to the Registry in order to see a color other than white on the title bar. With Windows 10 1511, Microsoft added an option to the Settings app that allows us to change the default color of the title bar.
Change title bar color via Settings in Windows 10
Step 1: Navigate to Settings > Personalization > Colors. Scroll down the page to see Show accent color on the following surfaces option.
Step 2: Select Title bars and window borders checkbox. That’ts it! From now onwards, title bar will use the same color as the current accent color.
Step 3: To change the color, on the same page, either click on of the color tiles or click the Custom option to create a color of your choice.
Change Windows 10 title bar color via Registry
UPDATE: You no longer need to use this method as the method mentioned above works great. Moreover, it’s easy.
Out friend at WinAero has come up with a cool workaround to change the title bar color in Windows 10 to a color of your choice. The good thing is that you can change the title bar color without the help of any third-party software. You just need to edit a file.
Follow the given below instructions to change title bar color in Windows 10.
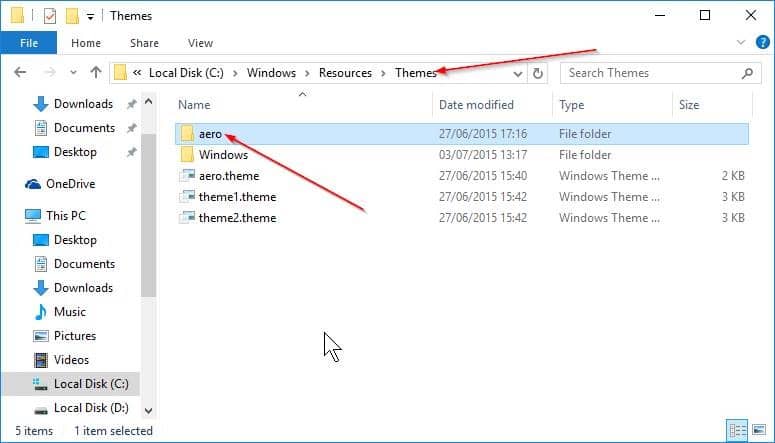
Step 1: Open up File Explorer (Windows Explorer) and navigate to the following location.
C:\Windows\Resources\Themes
Where, “C” is the drive where Windows 10 is installed.
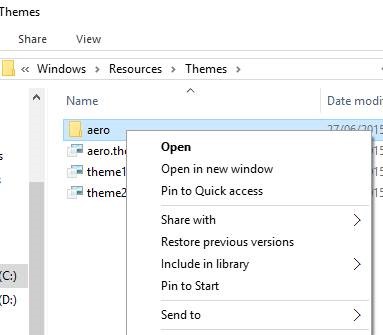
Step 2: Here you’ll see a folder named “aero”. Right-click on “aero” folder, click Copy, right-click again (not on the folder this time), and then click paste. The idea is to create a copy of the “aero” folder in the same location. Of course, you can use Ctrl + C and Ctrl + V.
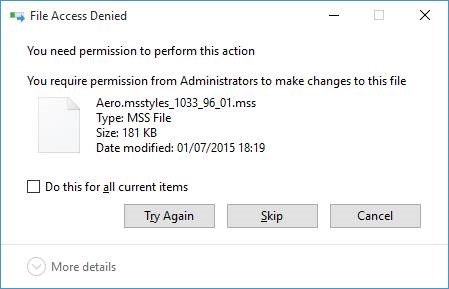
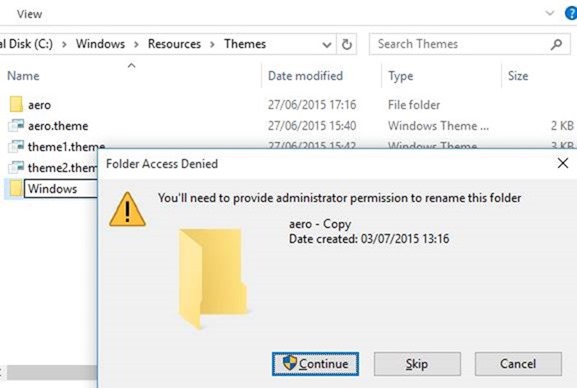
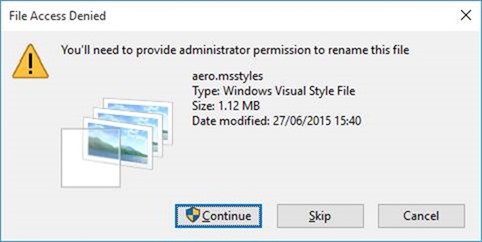
When you see Folder Access Denied dialog, click the Continue button. And then when you see File Access Denied dialog, click Skip button. This will copy the “aero” folder and will skip MSS files.
Step 3: Now, rename the newly created aero-copy folder to Windows. When you see the UAC prompt, click Yes button confirm the rename.
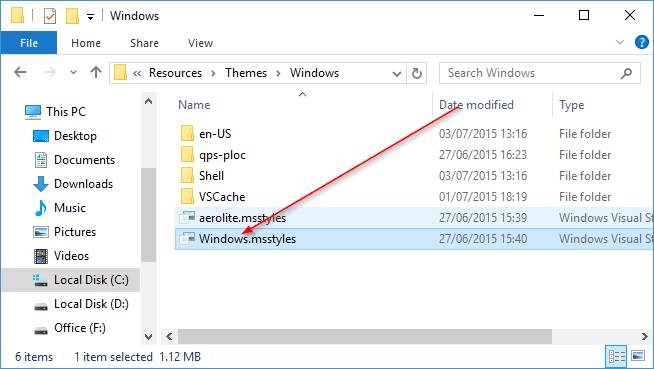
Step 4: Open up the newly created Windows folder. Rename aero.mstyles to windows.msstyles. Click Yes if you get the UAC prompt.
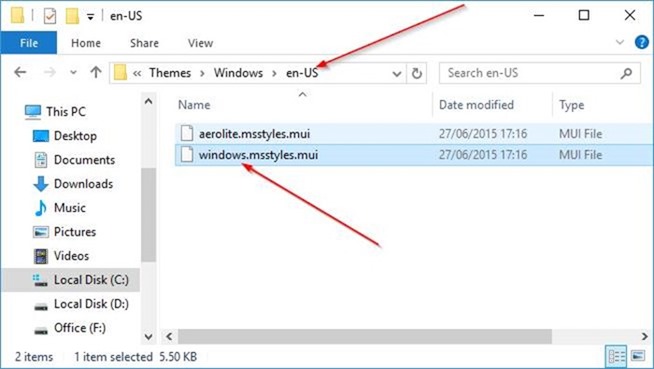
Step 5: Now, open up en-US folder located under the newly created Windows folder. Here, rename the file titled aero.msstyles.mui to windows.msstyles.mui.
Step 6: Go back to the following folder:
C:\Windows\Resources\Themes
Copy aero.theme file to your desktop and then rename it to windows.theme. While
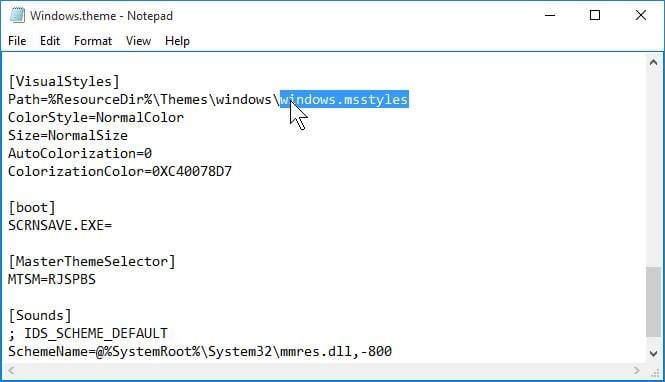
Step 7: Open windows.theme file with Notepad and look for the following line under Visual Styles section:
Path=%ResourceDir%\Themes\Aero\Aero.msstyles
Rename Aero.msstyles to windows.msstyles.
Save the file.
That’s it!
Step 8: Finally, double-click on the edited windows.theme to see colored title bar.
From here onwards, you can change title bar color to your liking. The title bar uses the accent color and can be changed by opening Color and appearance.
The workaround although seems a bit time consuming, it’s actually not. You can make it happen under five minutes. Good luck!
Do let us know if you’re unable to change the title bar color even after following the above mentioned directions.
To revert to the original color:
Step 1: Open up C:\Windows\Resources\Themes folder.
Step 2: Double-click on aero.theme file. That’s it!
