UPDATE: Microsoft has now removed the Guest account from Windows 10. These solutions don’t work with the recent versions of Windows 10. So, we recommend you create a standard local user account via the Settings > Accounts > Family & other users.
What’s a guest account on a Windows PC? A guest account is nothing but an account for users who don’t have a permanent or specified account on the PC. The guest account comes in handy when you want to let someone else use your PC for a short period without creating a new user account.
The user on the guest account can’t access files on other accounts. Additionally, the guest account user can’t make any changes to system settings, create a new user account, or create a password for the account.
In the previous version of Windows, turning on or enabling the built-in guest account was fairly straightforward. We could navigate to the user accounts section of the Control Panel to turn on the guest account.
In Windows 10, Microsoft has moved almost all user account settings to the new Settings app, but there is no option under the Accounts section of Settings to enable the guest account. The Settings app only allows you to create standard local or Microsoft accounts.
Is the Guest account missing from Windows 10?
No, the guest account is available in Windows 10 as well. It’s only that the guest user account can’t be enabled in Windows 10 via Settings or classic Control Panel. In order to enable the guest account in Windows 10, you need to use the Local Users and Groups.
Enable the guest account in Windows 10
Complete the given below directions to turn on or enable guest account in Windows 10.
Method 1 – Turn on guest account via Local Users and Groups
Method 2 – Enable guest account via Command Prompt
Method 3 – Enable guest account in Windows 10 via Group Policy
Method 1 of 3
Enable guest account via Local Users & Groups
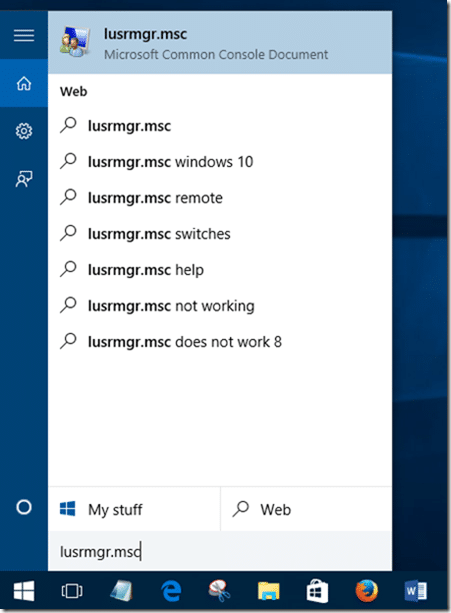
Step 1: In the Start menu or taskbar search box, type Lusrmgr.msc and then press Enter key to open Local Users and Groups.
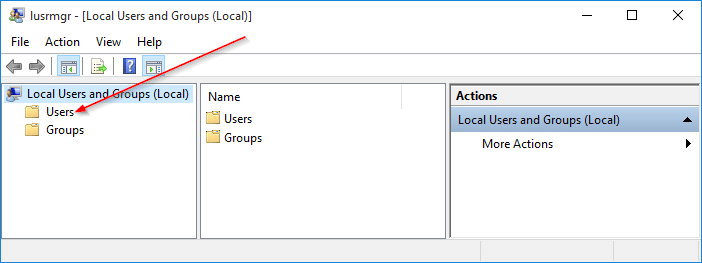
Step 2: Here, on the left-side, under Local Users and Groups (local), click Users.
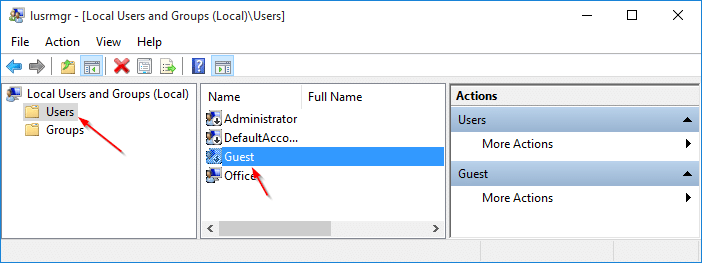
Step 3: Next, in the middle pane, double-click on Users to view all user accounts on your Windows 10 PC.
Step 4: Right-click the Guest and then click Properties or double-click on Guest to open its properties.
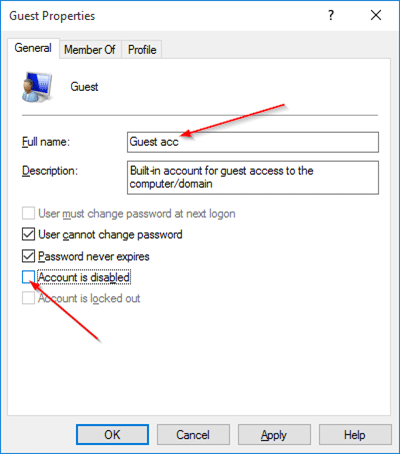
Step 5: To enable the Guest account, under the General tab, uncheck the option titled Account is disabled. In the full name field, type in a name for the account if you wish to have a different name for the account, and then click the Apply button to enable the guest account.
You have just enabled the Guest account!
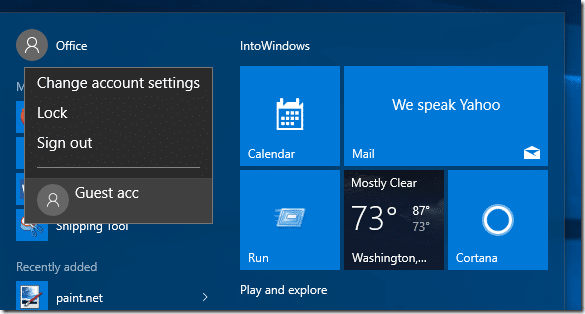
To sign in or switch to the Guest account, click on your user account name on the Start menu (top-left of the Start) and then click on the Guest account to switch the account.
Note that many users are reporting that the Guest account is not correctly working even after enabling the same.
Method 2 of 3
Enable Guest account via Command Prompt
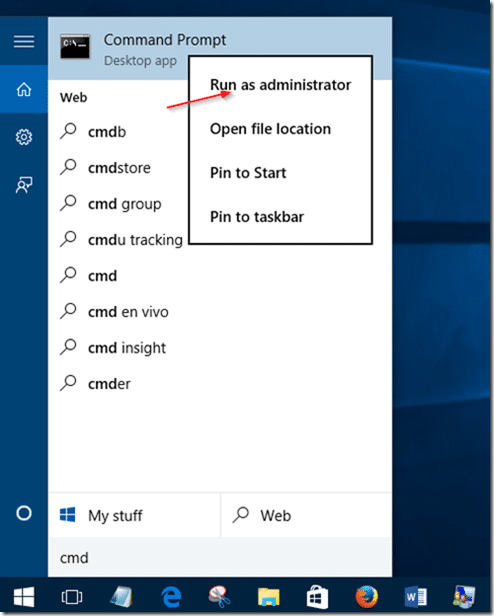
Step 1: Open Command Prompt as administrator. To do so, type CMD in the Start menu or taskbar search box to see Command Prompt in the search results, right-click on the Command Prompt entry, and then click Run as administrator option.
Click Yes button when you see the User Account Control prompt.
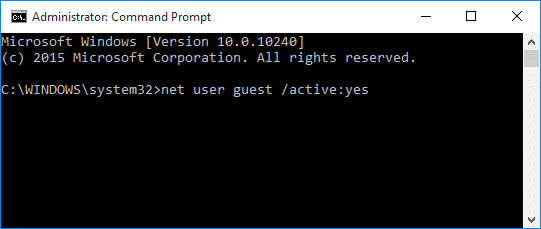
Step 2: In the elevated prompt, type the following command and then hit Enter key.
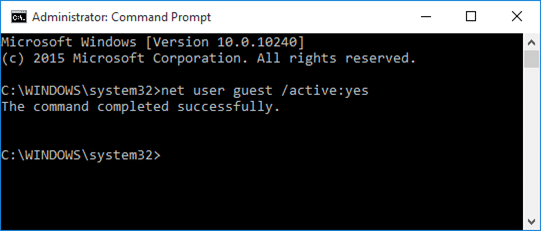
net user guest /active:yes
Step 3: Close the Command Prompt window. That’s it!
Method 3 of 3
Enable Guest account via Group Policy
Note that Group Policy is not part of the Home edition of Windows 10. So, this method doesn’t work on Windows 10 Home edition.
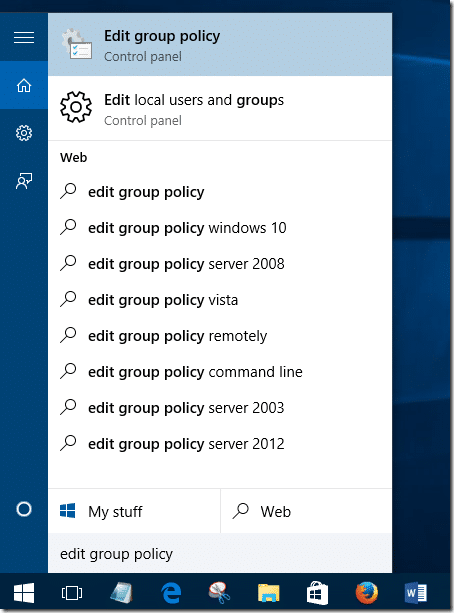
Step 1: Open Group Policy Editor by typing Edit Group Policy in the Start or taskbar search box and then pressing Enter key.
Click Yes if and when you see the UAC prompt.
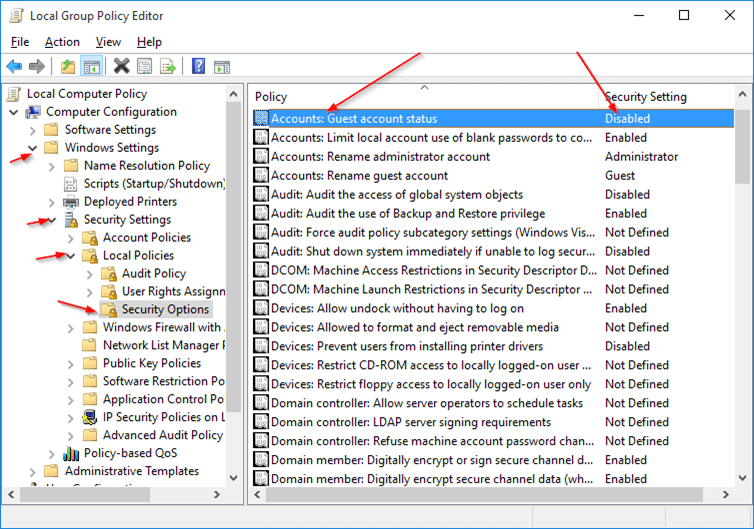
Step 2: In the Group Policy Editor, navigate to the following policy:
Computer Configuration > Windows Settings > Security Settings > Local Policies > Security Options.
Step 3: On the right-side, look for the policy labeled Accounts: Guest account status and double-click on the same to open its properties.
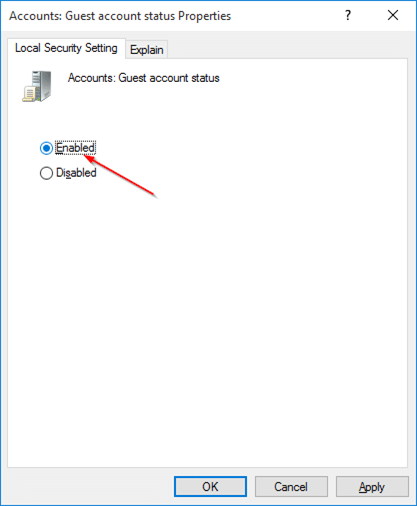
Step 4: Select the Enabled option and then click the Apply button to turn on the Guest account in Windows 10.
Have you enabled the guest account on your Windows 10 PC?
