Did you know that you can easily change the account type of a standard user account to an administrator account in Windows 10 without actually creating a new account? In this article, we will explain what an admin account is, what’s a standard account, and how to change the account type in Windows 10.
Standard vs administrator user
As most of us know, an administrator account gives complete access to your PC and allows you to make any desired changes to your Windows operating system. Administrators can install or uninstall programs, create or delete user accounts, and use advanced system tools.
A user with a standard account can access most of the installed software, but not all programs. Standard account users need to type in the admin account password in order to access some applications as well as data stored in the administrator account.
As with the case of earlier Windows versions, Windows 10 also allows you to change the account type of user accounts. Using the feature, you can make a standard user account an administrator account or vice versa with ease. The good thing is that when you change the account type, your user account data will be preserved.
The following are the three easy methods to change the account type from standard user account to administrator account or vice versa in Windows 10.
IMPORTANT: Please note that to change the type of a standard user account to an administrator or vice versa, you need to sign-in to the admin account, and it’s not possible to change the type of a standard account by signing-in to the standard account.
Method 1 of 3
Use Settings app to change user account type in Windows 10
Step 1: Open the Settings app. Navigate to Accounts > Family & other users page.
Step 3: Click on the account name that you want to change to the administrator account, and then click Change account type button.
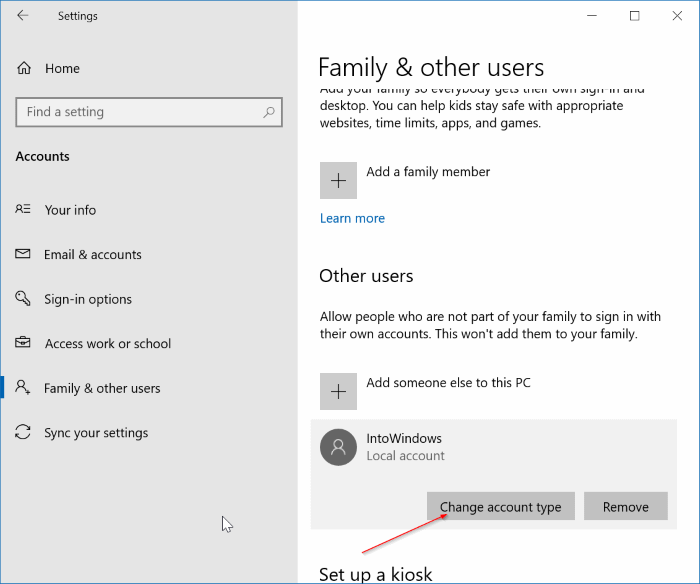
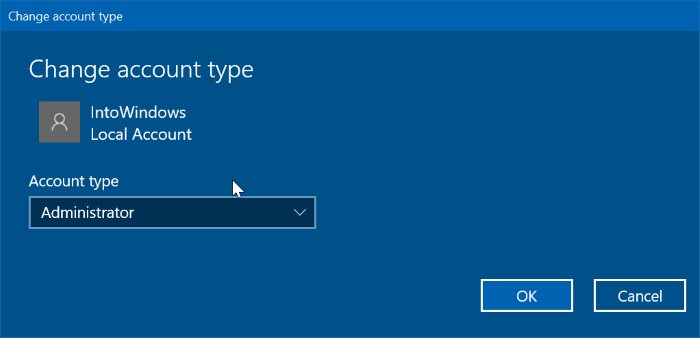
Step 4: Under Account type, select Administrator and then click OK button.
That’s it!
Method 2 of 3
Use Control Panel to change account type in Windows 10
Step 1: Open Control Panel and click Change account type. If you see the User Account Control prompt, please click the Yes button.

Step 2: Click on the user account that you want to change the account type of.

Step 3: Click the Change the account type link. This will open Choose a new account type window.

Step 4: Select Administrator, and then click Change Account Type button.

That’s all!
Method 3 of 3
Another way to change account type in Windows 10
Step 1: Type Netplwiz in Start menu, taskbar search box, or Run command box and then press Enter key to open User Accounts dialog.

Step 2: Under the default Users tab, select the user account that you want to make an administrator, and then click the Properties button.

Step 3: Here, under the Group Membership tab, select Administrator, and then click the Apply button to make the chosen account as the admin account.

Good luck!