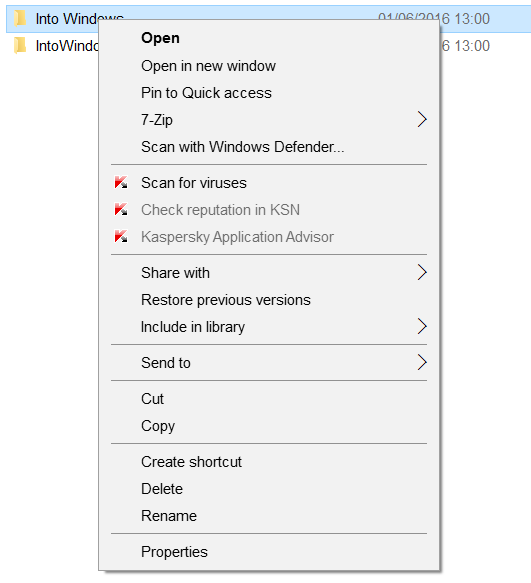
Like its predecessor Windows 8.1, Windows 10 also supports pinning certain file types to the Start menu for quick access. Users can pin folders, executable files (.exe files), and shortcuts to the Start menu. To pin one of these file types to the Start menu, you need to right-click on supported file types, and then click Pin to start option.
Pin to Start option is missing
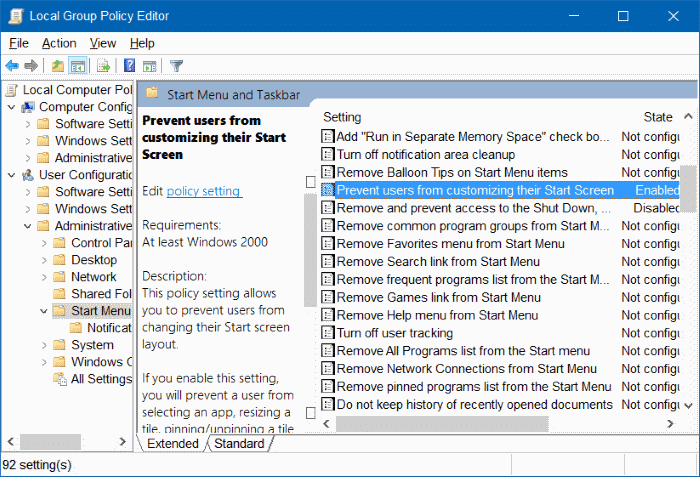
A reader recently reported us that the Pin to Start option is not appearing in the context menu for supported files. If the Pin to Start option is not appearing when you perform a right-click on a folder, .exe file, or shortcut, it’s likely because a policy named Prevent users from customizing their Start Screen has been turned on, or another policy called LockedStartLayout is enabled.
As the name of these policies might suggest, when turned on, these policies prevent users from customizing the Start menu. So when one of these or both policies enabled, the Pin to Start doesn’t appear in the context menu.
Restore missing “Pin to Start” option
To restore the missing Pin to Start option, please follow the given below directions.
Method 1 of 2
Important: This method applies to only Windows 10 Pro and Enterprise users. The Group Policy Editor doesn’t exist in the Home edition. If you’re on Home edition, please follow the instructions in Method 2.
Step 1: Type Gpedit.msc in Start menu or Run command box and then press Enter key to open the same. Click Yes button when you see the User Account Control dialog.
Step 2: In the Group Policy Editor, navigate to the following policy:
User Configuration > Administrative Templates > Start Menu and Taskbar
Step 3: On the right-side, look for a policy named Prevent users from customizing their Start screen and double-click on the same to open its properties.
Step 4: Select the Disabled radio button and then click Apply.
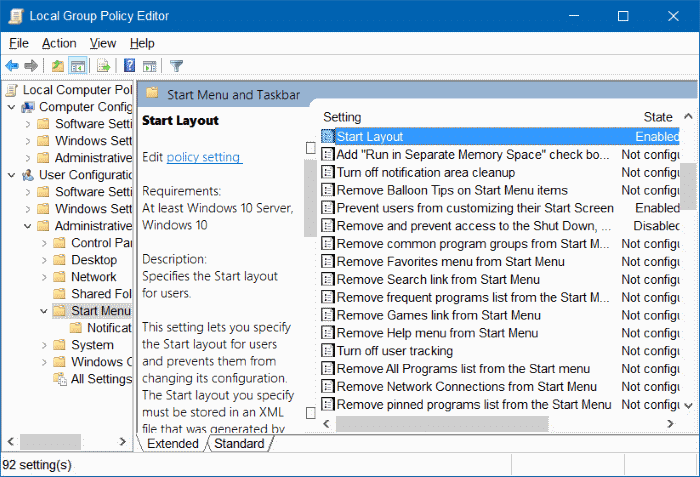
Step 5: Next, look for the policy called Start Layout and double-click on it to see the properties dialog.
Step 6: Once again, select Disabled and then click Apply button.
Method 2 of 3
Step 1: Type Regedit in the Start menu or taskbar search box and then press Enter key. Click Yes button if you see the User Account Control prompt.
Step 2: In the Registry Editor, navigate to the following key:
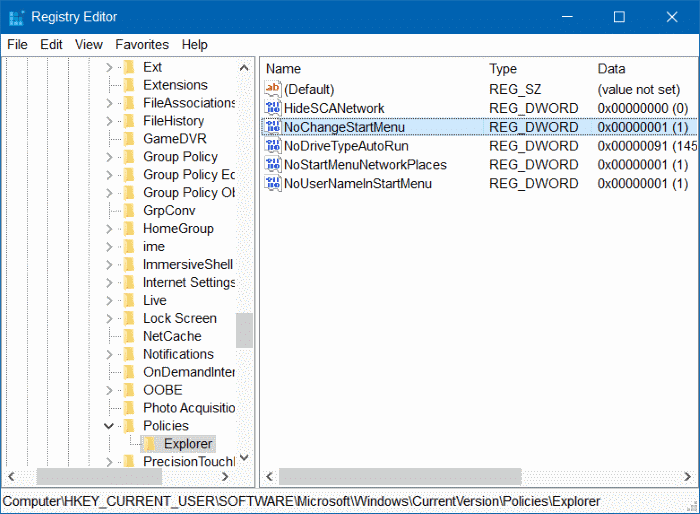
HKEY_CURRENT_USER\SOFTWARE\Microsoft\Windows\CurrentVersion\Policies\Explorer
On the right side, look for an entry named NoChangeStartMenu, if it exists, right-click on, and then click Delete.
Step 3: Next, navigate to the following key:
HKEY_LOCAL_MACHINE\SOFTWARE\Microsoft\Windows\CurrentVersion\Policies\Explorer
Once again, on the right-side, look for the entry named NoChangeStartMenu and then delete it, if found.
Step 4: Next, navigate to the following key:
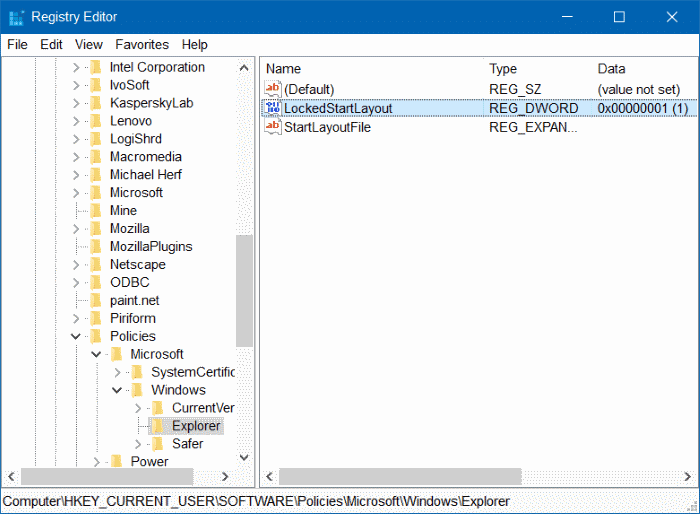
HKEY_CURRENT_USER\SOFTWARE\Policies\Microsoft\Windows\Explorer
Look for an entry named LockedStartLayout, right-click on it and then click Delete option.
Step 5: Finally, navigate to this key:
HKEY_LOCAL_MACHINE\SOFTWARE\Policies\Microsoft\Windows\Explorer
Look and delete the entry called LockedStartLayout.
The Pin to Start option should now appear when you right-click on a folder, executable or shortcut now.
