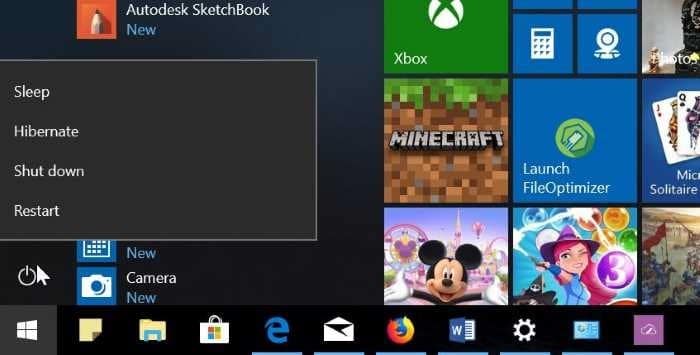
Hibernate feature helps you to quickly turn off the PC without shutting it down. The feature is very useful when you want to turn off the PC without closing all running applications. Since running programs are not closed, you can get back to where you left off as soon as you turn on the PC.
In Windows 10, by default settings, the hibernation feature is enabled but the option doesn’t show up in the power menu of Windows 10 Start menu/screen.
The Power & Sleep section in the Settings app doesn’t offer an option to add the Hibernate option to the power menu in Windows 10 Start. We need to use the classic Control Panel to add Hibernate to the power menu in Start menu.
Complete the given below directions to add the hibernate option to the power menu in Windows 10 Start menu.
Add Hibernate to power menu in Windows 10 Start
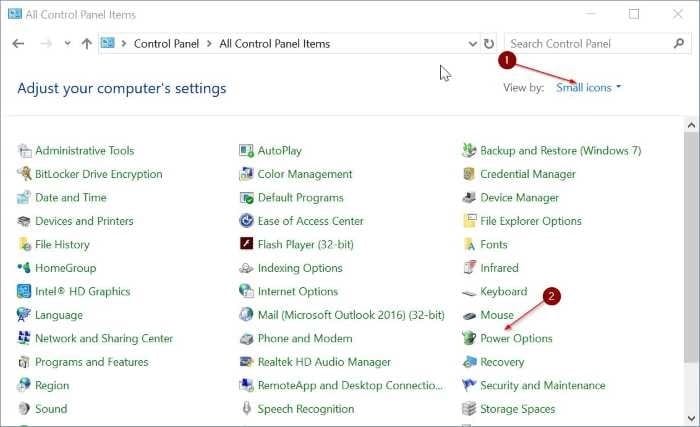
Step 1: Open the Control Panel. Change the View by to Small icons.
Step 2: Click Power Options to open Power Options window.
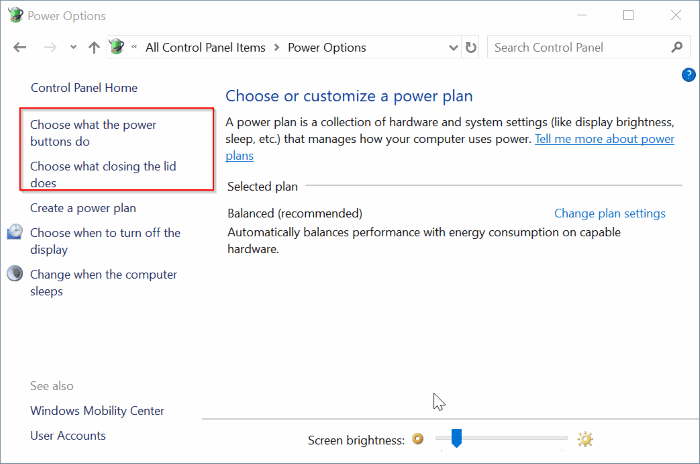
Step 3: In the left-pane, click Choose what closing the lid does link. If you are on a desktop or tablet, click Choose what the power buttons do link.
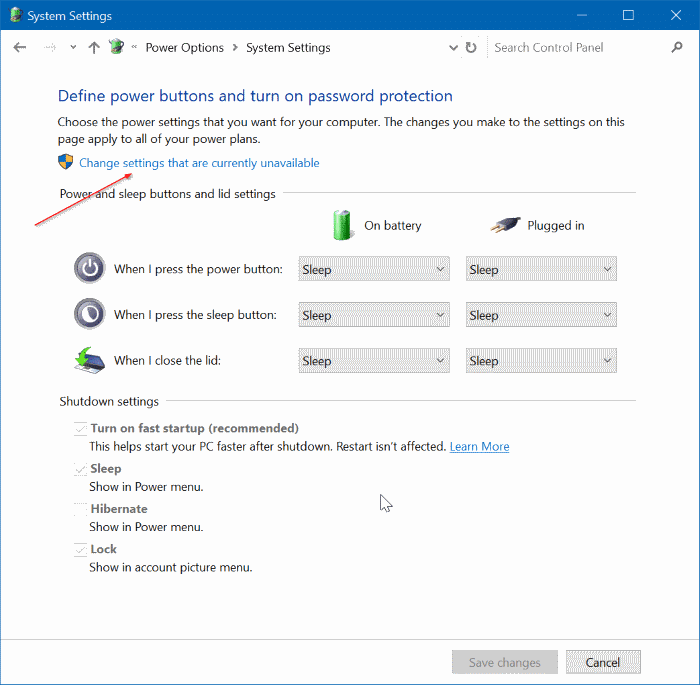
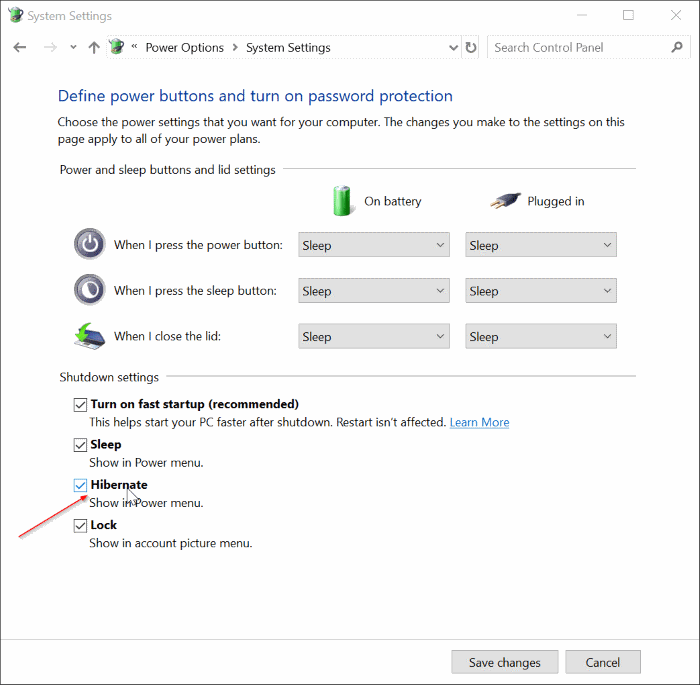
Step 4: Click Change settings that are currently unavailable link. Now, in the Shutdown settings section, check Hibernate option. Click Save changes button to add the Hibernate option to the power menu in the Start menu.
Enable/disable Hibernate feature in Windows 10
IMPORTANT: Follow these steps only if you could not find Hibernate option in Step 4 of the above method.
If the Hibernate option is missing, it’s likely because Hibernate feature has been turned off. Here is how to enable the Hibernate feature in Windows 10.
Step 1: Open the Command Prompt as administrator.
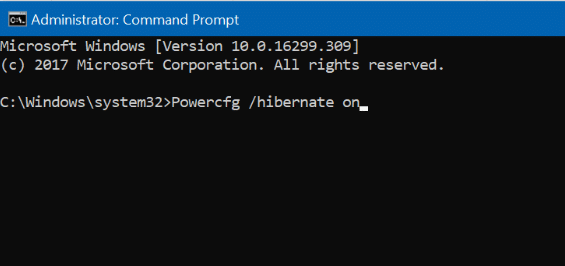
Step 2: At the Command Prompt window, type the following command and then press Enter key to enable the hibernation feature.
Powercfg /hibernate on
You may close the Command Prompt window now. Go back to the above method now to add Hibernate to power menu in Windows 10 Start menu.
Note that the feature requires roughly about the size of the RAM installed on your PC. For instance, if your PC is equipped with 8 GB of RAM, the Hibernation feature takes about 7.5 GB of drive space.
So, it’s important to have enough free space on the system drive before enabling it. If your drive is running out of free space, please refer to our 15 ways to free up drive space in Windows 10 guide.
You can use the following command to turn off the feature and delete the hibernation file.
Powercfg /hibernate off
You can also add hibernate, shutdown, and restart shortcuts to Windows 10 desktop for quick access.
