Windows 10 users regularly use the Recycle Bin to delete files to and restore when needed. If you often use the Recycle Bin, you might want to learn the tips & tricks that help you better manage the Recycle Bin.
In this article, we are sharing the five lesser-known tips that you can use to make the most out of the Recycle Bin in Windows 10.
Enable delete confirmation dialog for Recycle Bin
With default settings, Windows 10 doesn’t display a delete confirmation dialog when you select a file and click the delete option or hit the Delete button. In short, Windows 10 automatically moves selected file(s) to the Recycle Bin without showing the confirmation dialog.
The problem with this default setting is that you might accidentally move files to the Recycle Bin.
If you wish to see a delete confirmation dialog while attempting to delete file(s), do this:
Step 1: Right-click on the Recycle Bin icon on the desktop, click Properties.
Step 2: Check Display delete confirmation dialog box. Click Apply button.
Try deleting a file now. You should get the delete confirmation dialog.
Automatically delete old files from Recycle Bin
There is a provision in recent versions of Windows 10 to automatically delete older files from the Recycle Bin. For instance, you can make Windows 10 automatically delete files that are residing in Recycle Bin for over 30 days. Here is how to do that.
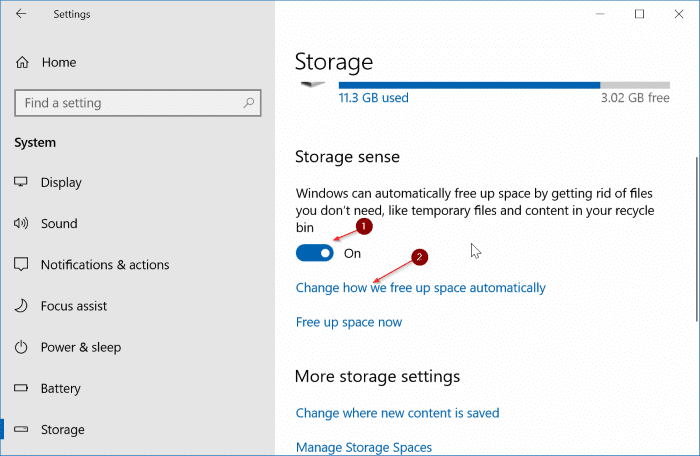
Step 1: Navigate to Settings app > System > Storage.
Step 2: Under Storage Sense section, turn on Storage sense option. Now, click Change how we free up space automatically link.
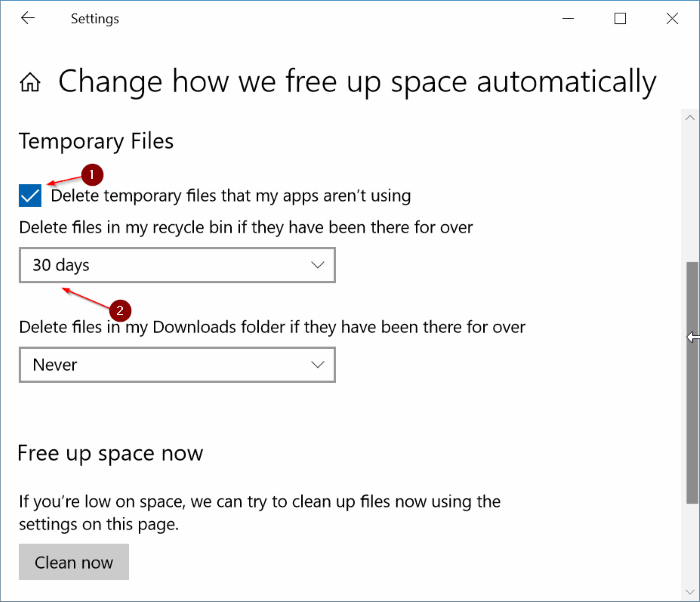
Step 3: In the Temporary files section, turn on Delete temporary files that my apps are not using option and then select 1 day, 14 days, 30 days, or 60 days.
Please ensure that Never option is selected for “Delete files in my Downloads folder if they have not been used for over” option.
Change Recycle Bin size
If your PC’s drive is running out of free space, you can reduce the default size allocated to Recycle Bin in Windows 10. Here is how to do that:
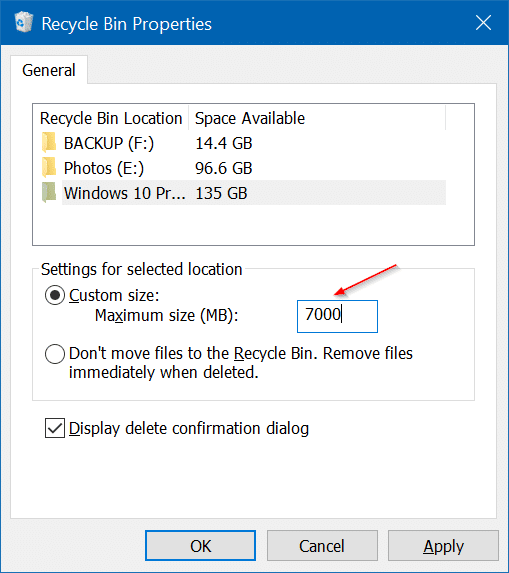
Step 1: Right-click on Recycle Bin icon and then click Properties.
Step 2: In the Settings for selected location section, select Custom size option, and then type in a custom value in MB.
Click Apply button to save the new size of the Recycle Bin.
Disable or turn off Recycle Bin
Although we don’t recommend disabling the Recycle Bin feature, you might want to turn it off if you often find yourself using Shift + Delete keys to (permanently) delete files by bypassing the Recycle Bin. Here is how to turn off or disable the Recycle Bin.
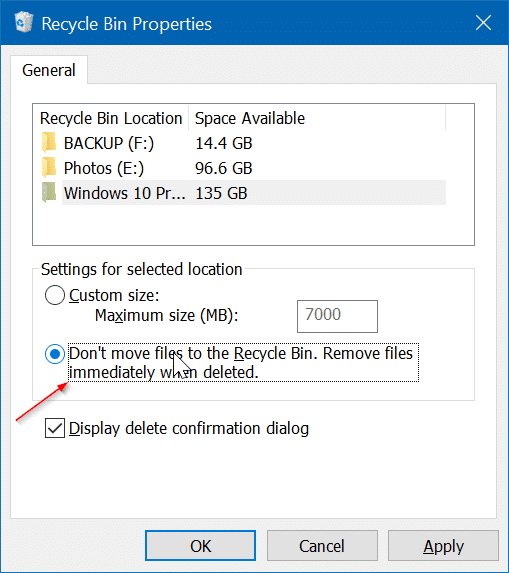
Step 1: Right-click on Recycle Bin and then click Properties to open the same.
Step 2: Check Don’t move files to the Recycle Bin. Remove files immediately when deleted option.
Click Apply button.
Show or hide Recycle Bin on desktop
If the Recycle Bin icon is not appearing on the desktop or if you want to hide the Recycle Bin icon on the desktop, you can refer to our how add/remove Recycle Bin icon on Windows 10 desktop guide for step-by-step directions.
Bonus Tips: If you are bored with the default icon of the Recycle Bin, you can change the Recycle Bin icon as well. You can pin Recycle Bin to Windows 10 taskbar as well.
Reset the Recycle Bin to fix errors
If you are getting errors like “The Recycle Bin for this drive is corrupted” or any other error for the Recycle Bin, you can try resetting the Recycle Bin to fix the error. Refer to our fix to the Recycle Bin is corrupted in Windows 10 guide for directions.


