If your computer has a Wi-Fi adapter and device driver for the Wi-Fi adapter, Windows 11 offers various settings and options to change the default Wi-Fi settings.
The Wi-Fi settings page offers the following settings/options:
- Turn on or off Wi-Fi
- Change Wi-Fi network profile type to public or private
- Set a Wi-Fi connection as metered
- Set a data limit to the Wi-Fi network
- Turn on or off random hardware address
- Add or delete a saved Wi-Fi network
- Monitor the data used by your PC when connected to a Wi-Fi network
- View detailed information about a connected Wi-Fi network, including the protocol, security type, manufacturer, driver version, network band, network channel, link speed, IPv6 and IPv4 address, physical (MAC) address
To access all these Wi-Fi-related settings, you will have to open the Wi-Fi page of the Settings app. Here are the six easy ways to access the Wi-Fi settings page in Windows 11.
Method 1 of 6
Open Wi-Fi settings in Windows 11
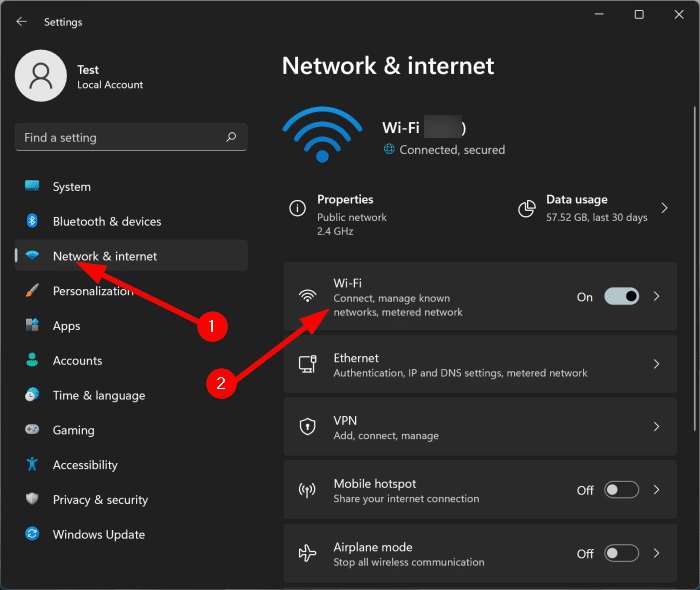
Step 1: Open the Settings app using the search or Windows logo + I hotkey.
Step 2: In the left pane of Settings, click Network & internet.
Step 3: On the right side, click on Wi-Fi to see the Wi-Fi settings page.
Method 2 of 6
Open Wi-Fi settings via Quick Settings in Windows 11
The Quick Settings, the flyout which pops up when you click on the network/volume/battery icon on the taskbar, offers basic Wi-Fi settings such as toggle on or off and connect and disconnect. The Quick Settings flyout can also be used to access the Wi-Fi settings page. Here is how.
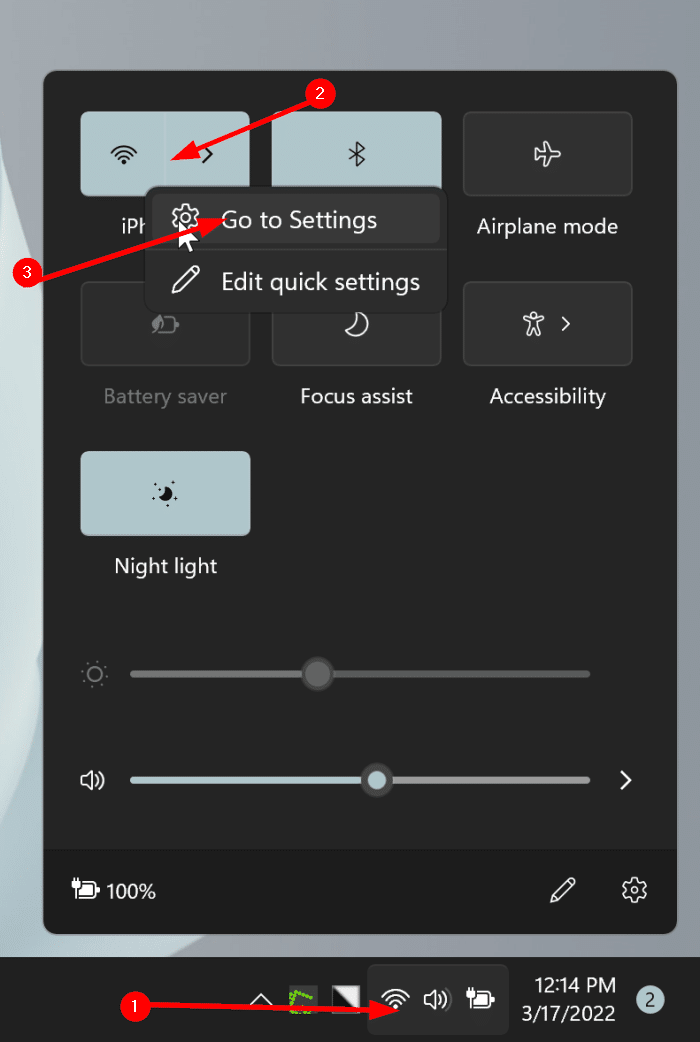
Step 1: Open the Quick Settings flyout by clicking on the battery/volume/network icon on the taskbar. If you prefer using keyboard shortcuts, use Windows + A hotkey.
Step 2: Perform a right-click on the Wi-Fi icon (refer to the picture below) and click on the Go to Settings option to open the Wi-Fi settings page.
Method 3 of 6
Open Wi-Fi settings page using search in Windows 11
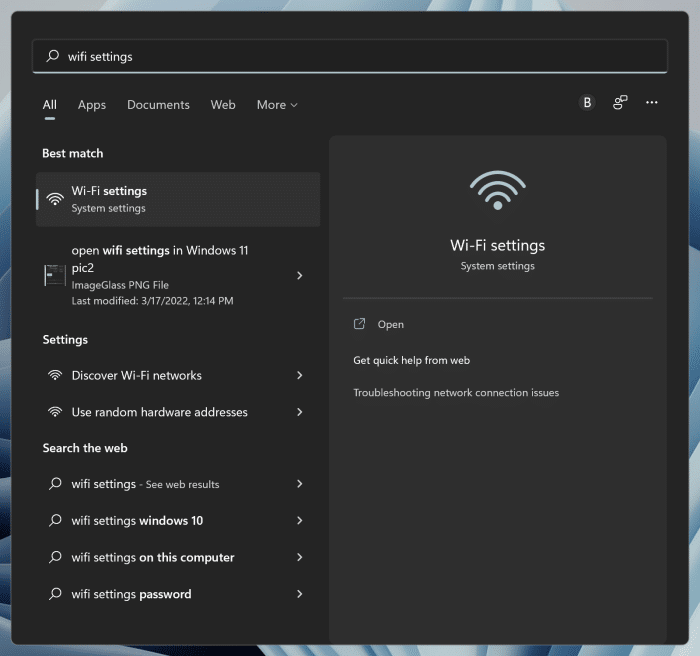
Step 1: In the search, type Wi-Fi settings and hit the Enter key to open the Wi-Fi settings page of the Settings page.
Method 4 of 6
Another way to open Wi-Fi settings in Windows 11 is via Quick Settings
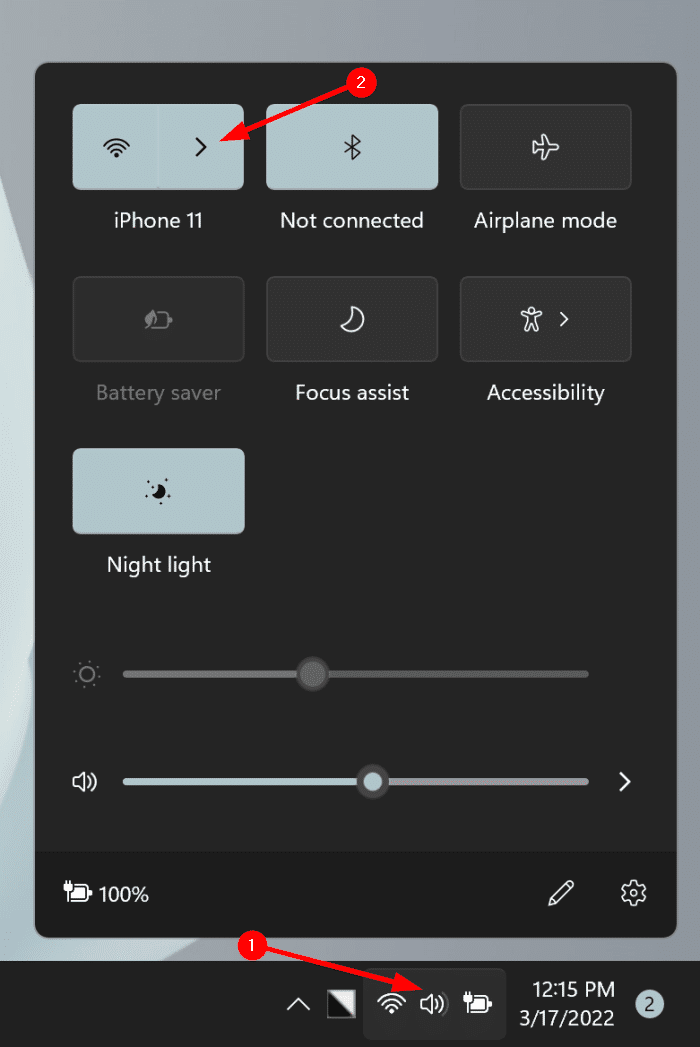
Step 1: Open Quick Settings by clicking on the volume/network/battery icon.
Step 2: Click on the right arrow icon (>) next to the Wi-Fi icon.
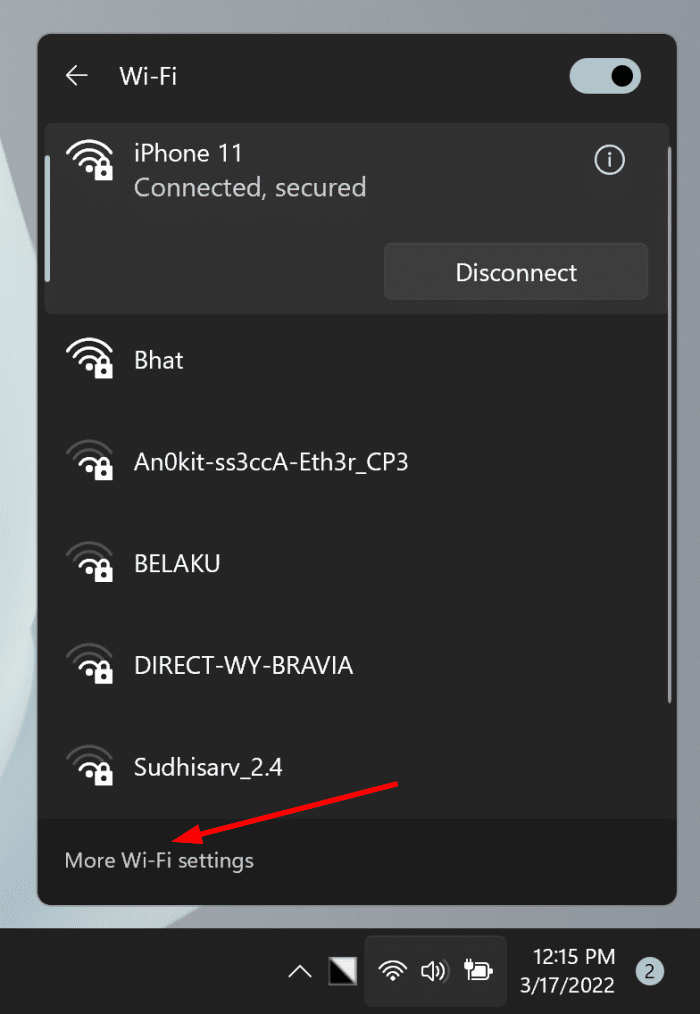
Step 3: Click the More Wi-Fi settings link to open the Wi-Fi settings page.
Method 5 of 6
Open Wi-Fi settings via Command Prompt, PowerShell or Terminal in Windows 11
Step 1: Open the Command Prompt or Terminal using search.
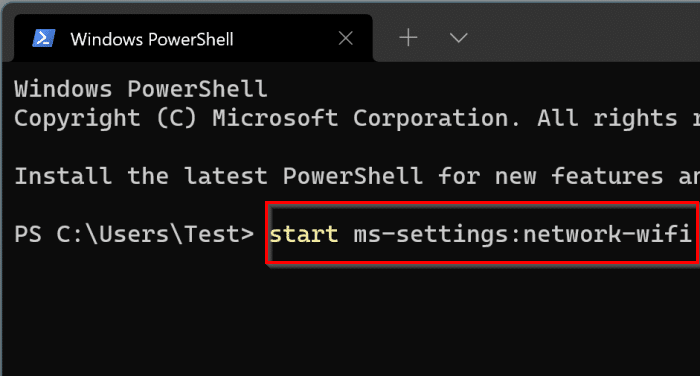
Step 2: Type start ms-settings:network-wifi and then hit the Enter key to open the Wi-Fi settings.
Method 6 of 6
Open Wi-Fi settings via the Run command in Windows 11
Step 1: Open the Run command box using search or Windows + R hotkey.
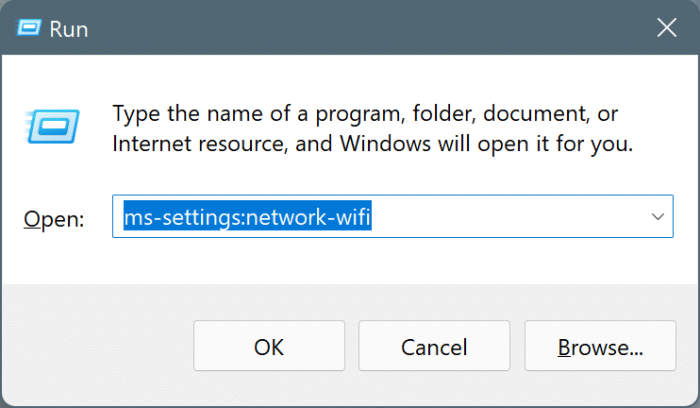
Step 2: In the Open field, type ms-settings:network-wifi and then hit the Enter key to open Wi-Fi settings.
How to open taskbar settings in Windows 11 guide might also interest you.
