If you have connected multiple sound output devices to your Windows 11 PC, then you can easily switch between them. Windows 11 offers five easy ways to change or set the default sound output device.
Following are the five ways to change/set the default sound output device in Windows 11.
Method 1 of 5
Change the sound output device via Quick Settings in Windows 11
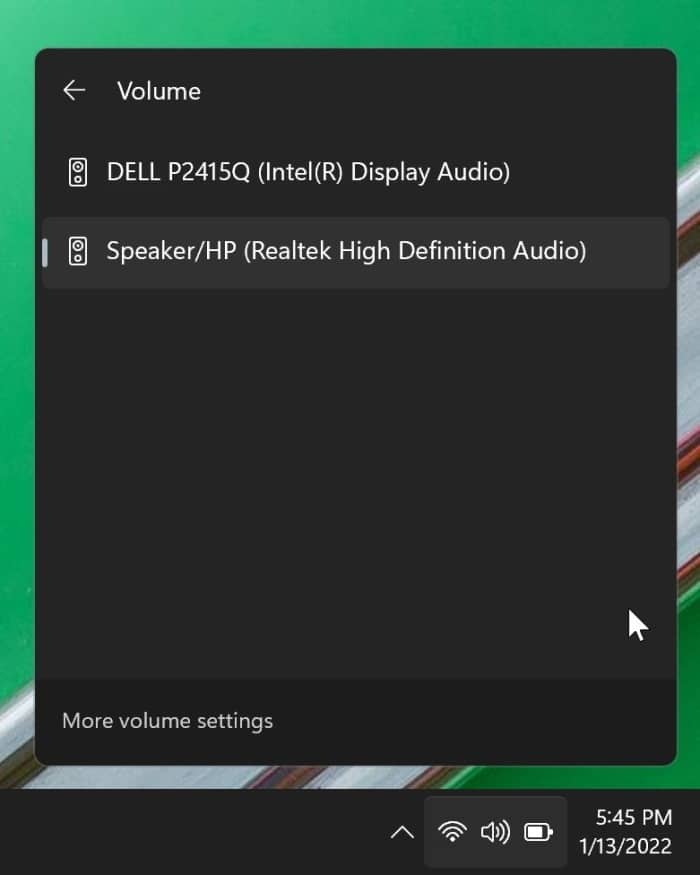
Step 1: Click on the network/volume/battery icon on the taskbar to open the Quick Settings flyout.
Step 2: Perform a click on the right arrow icon present next to the volume slider (refer to the picture below) to view all connected sound output devices to your Windows 11 computer.
Step 3: Click on a sound output device to set it as the default sound output device.
Method 2 of 5
Set the default sound output device via the Settings app in Windows 11
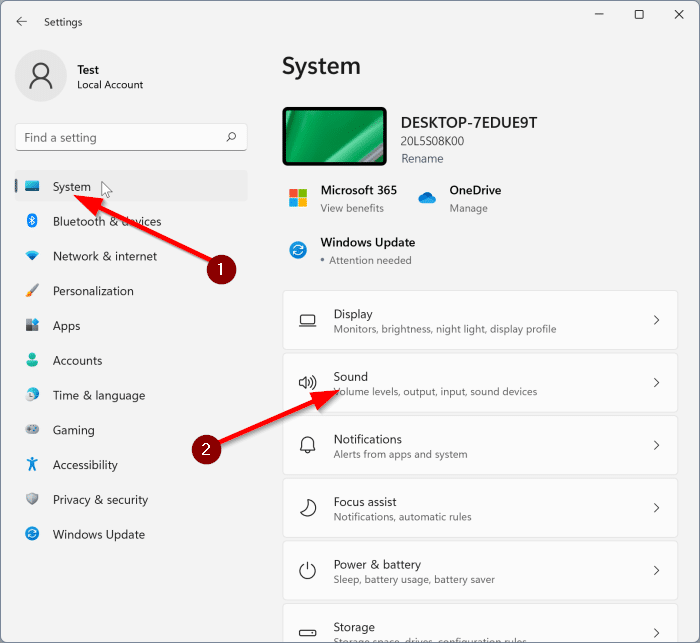
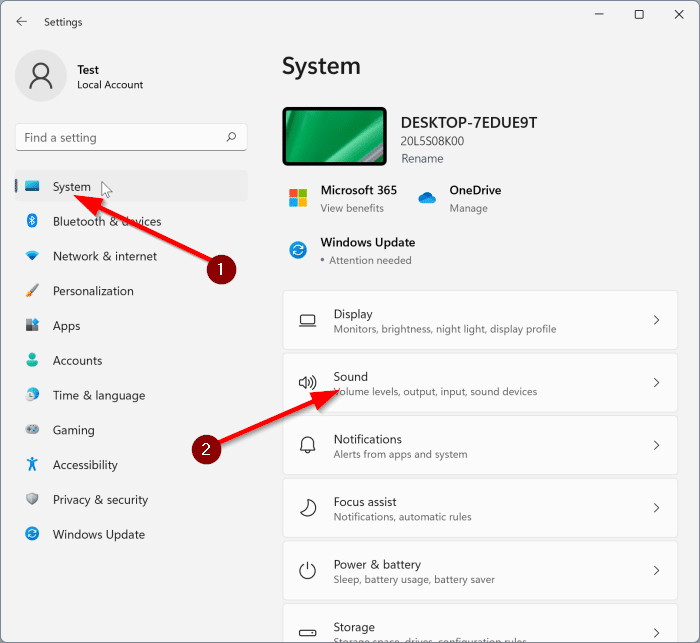
Step 1: Open the Settings app. In the left pane, click System and then click Sound on the right side.
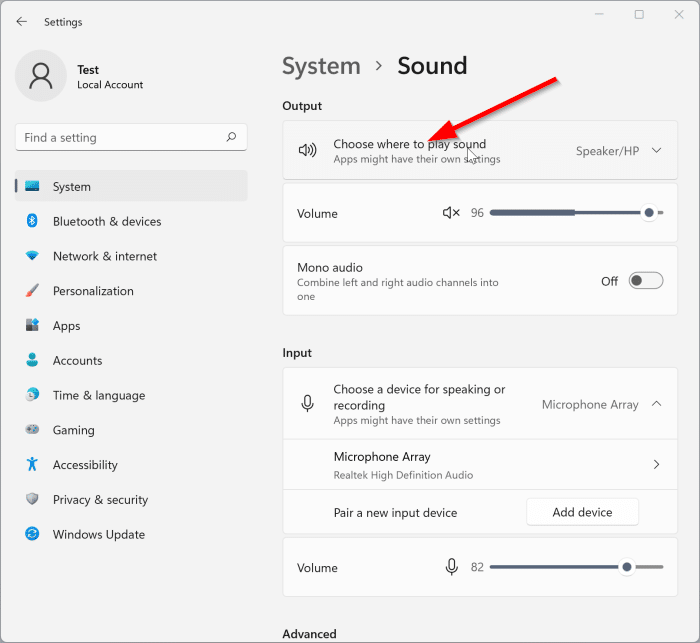
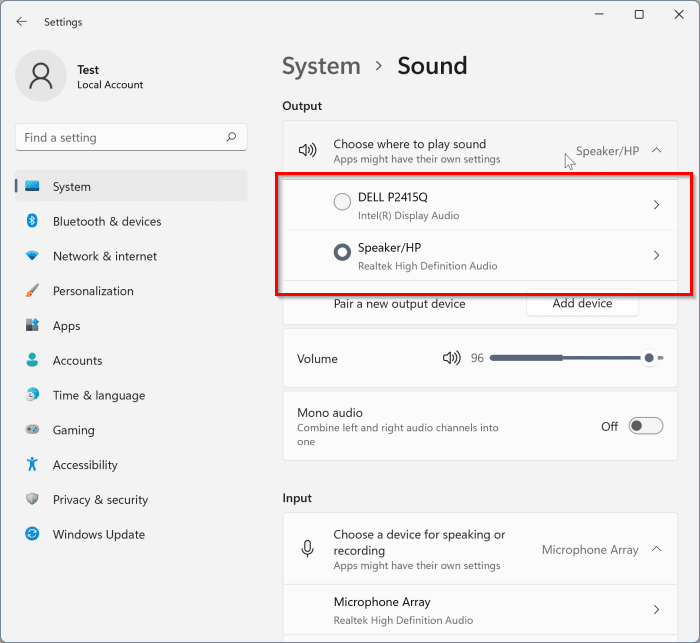
Step 2: In the Output section, click Choose where to play sound to see a list of sound output devices connected to your PC.
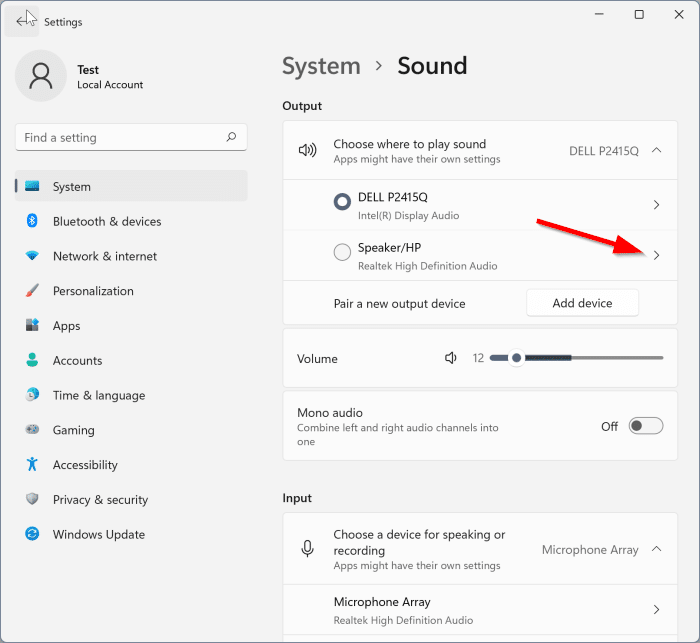
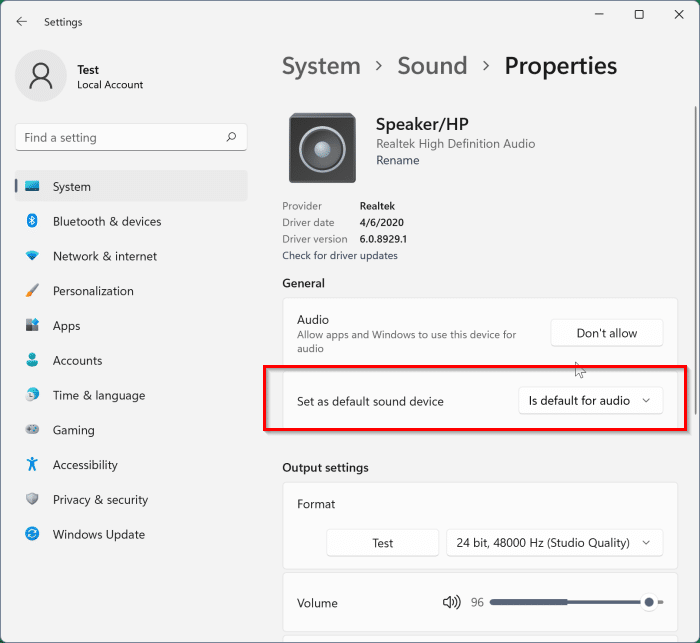
Step 3: To make an output device the default, click on the arrow (>) icon next to it. This action will bring up the properties page.
Step 4: Here, in the General section, select Use as default for audio option from the drop-down next to the Set as default sound device. That’s all!
Method 3 of 5
Change sound output device or default speaker via Settings app in Windows 11
Step 1: Open the Windows 11 Settings app using search or Windows + I hotkey.
Step 2: On the left side of the Settings app, make sure that the System is selected. On the right side, click on Sound.
Step 3: On the resulting page (Settings > System > Sound), in the Output section, select a connected output device from the list to make it the default.
If you cannot see the connected output devices, click on the Choose where to play sound.
Method 4 of 5
Set the default sound output device in Windows 11
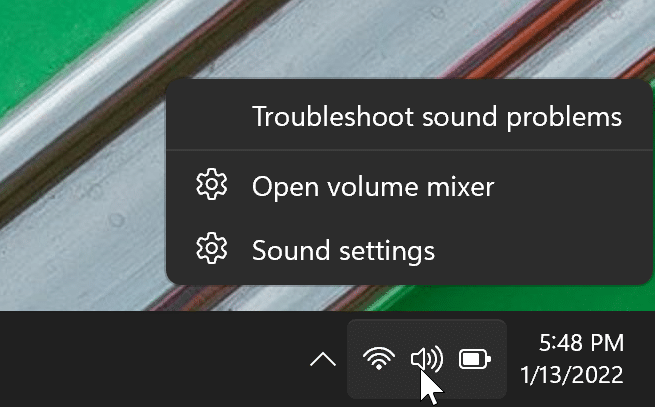
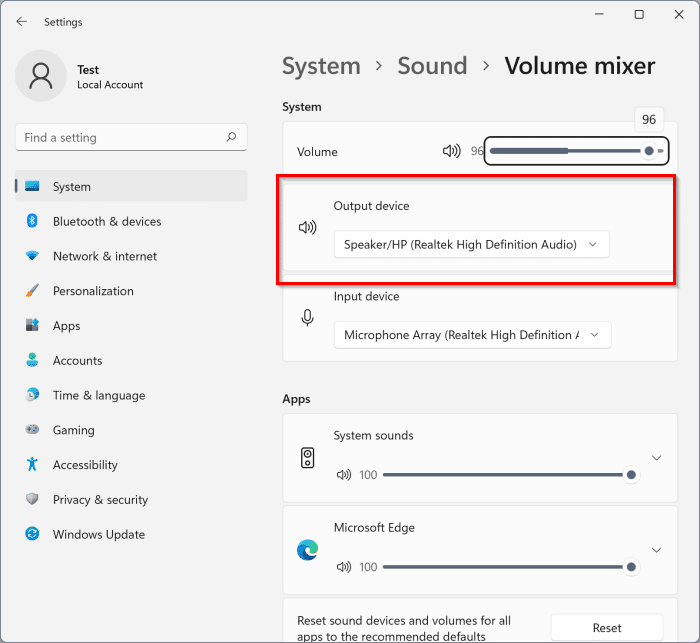
Step 1: Perform a right-click on the volume icon on the taskbar and click Open volume mixer. This will open the Volume Mixer page of the Settings app.
Step 2: In the Output device section, select a device you want to set as the default from the drop-down list. Simple as that!
Method 5 of 5
Change the default speaker/sound output device using Game Bar in Windows 11
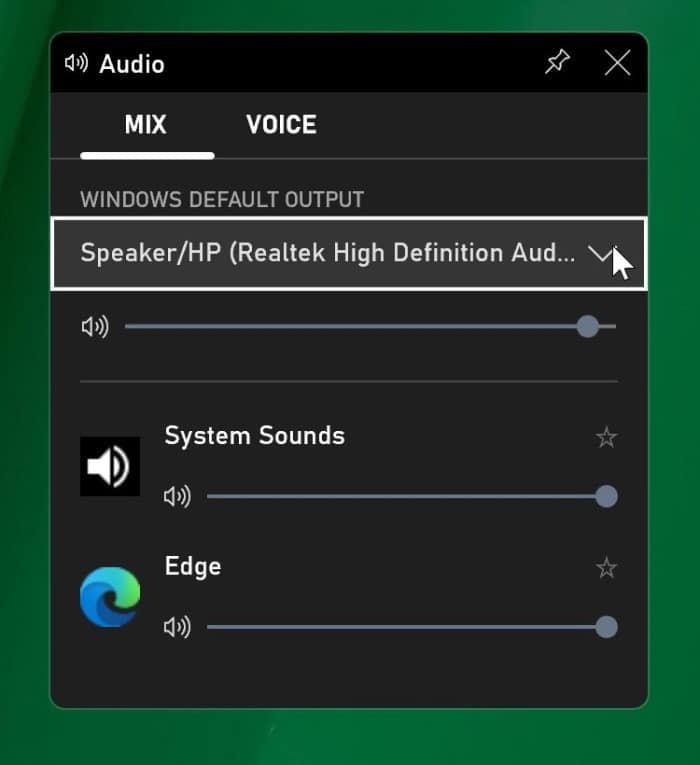
Step 1: Simultaneously press Windows logo + G keys to open the Game bar and widgets.
Step 2: In the Audio Widget, under the MIX tab, you can select the default sound output device by clicking on the down arrow and selecting a device from the list.
You can see in the picture that you can also adjust the volume here.
