Here are three ways to disable startup programs in Windows 11:
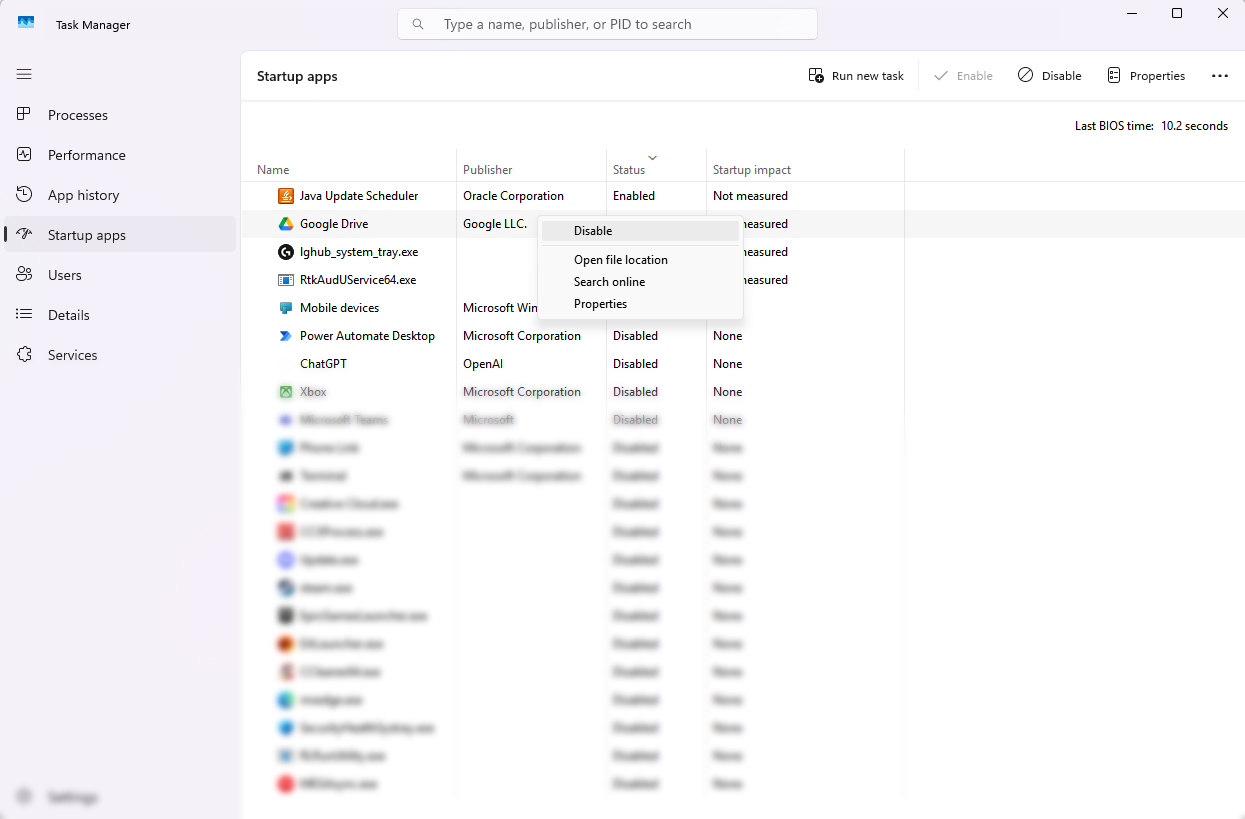
Method 1: Using Task Manager
- Open Task Manager:
- Press Ctrl + Shift + Esc to open Task Manager directly.
- Alternatively, right-click on the taskbar and select “Task Manager.”
- Navigate to the Startup Tab:
- Click on the “Startup” tab at the top.
- Disable Programs:
- You’ll see a list of programs that start with Windows. Each has an “Impact” rating.
- Right-click on the program you want to disable or click on it and then click on “Disable” at the bottom right of the window.
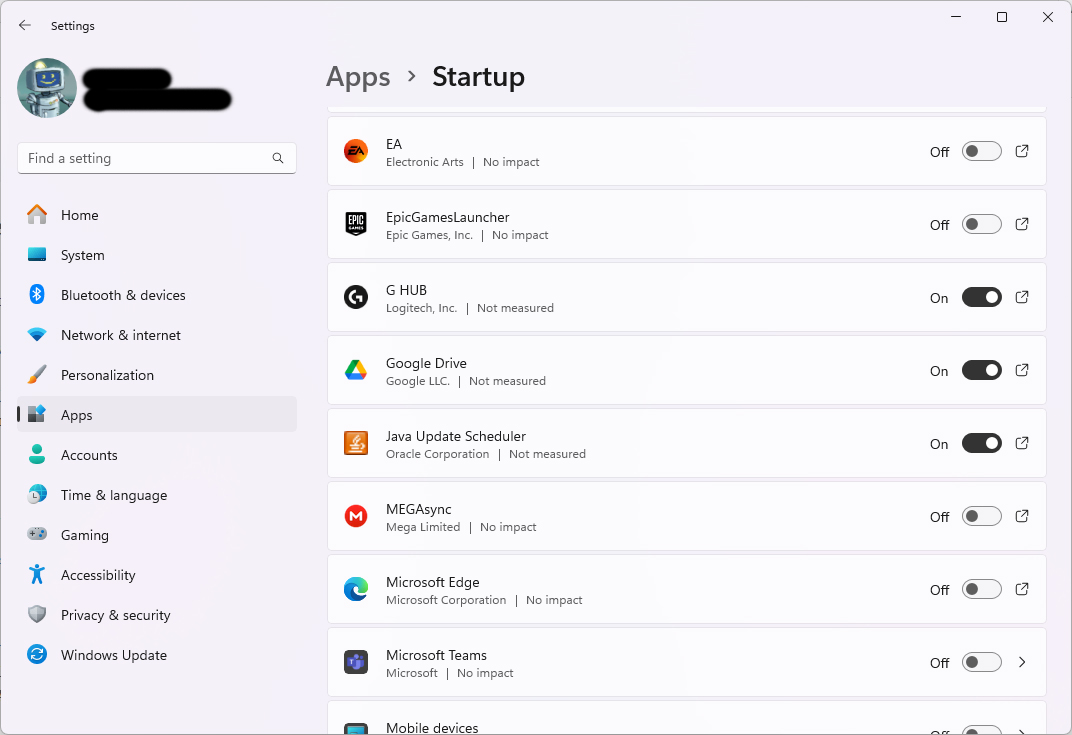
Method 2: Using Settings App
- Open Settings:
- Click on the Start button, then click on the “Settings” icon (or press Windows key + I).
- Go to Apps:
- In the Settings window, click on “Apps.”
- Startup:
- From the left pane, click on “Startup.”
- Here, you’ll see the same list of apps from Task Manager. Toggle off the switch next to any app you want to prevent from starting automatically.
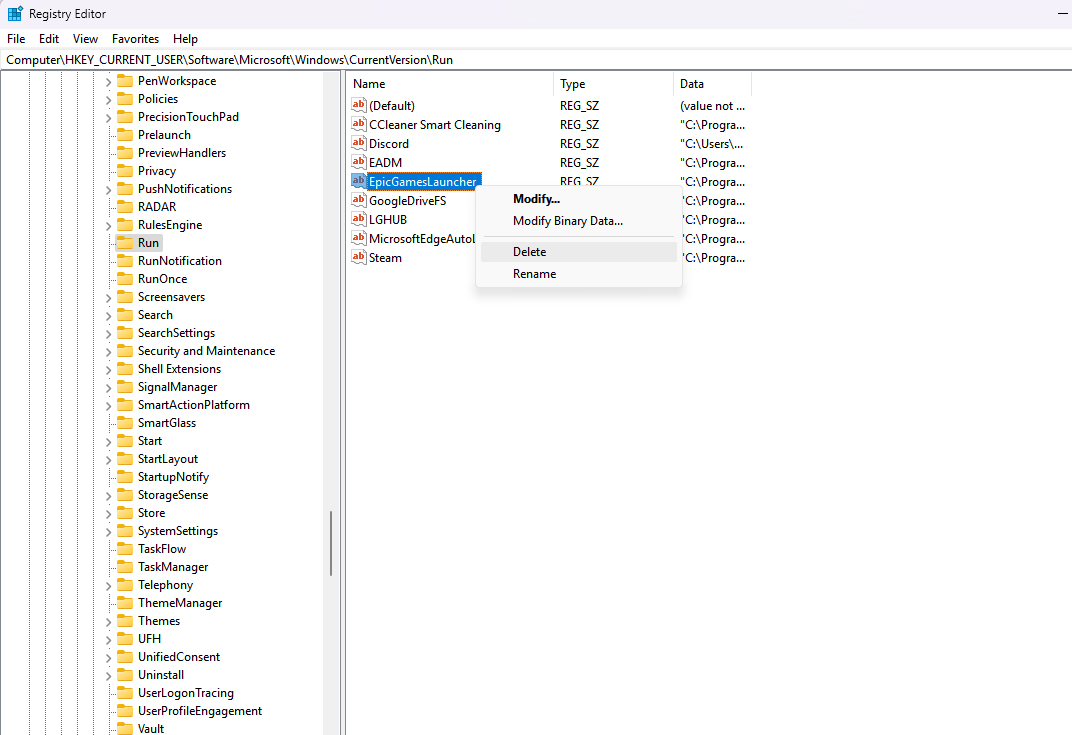
Method 3: Using the Registry Editor (Advanced)
Warning: Editing the Registry can be risky; ensure you back up the registry before making changes.
- Open Registry Editor:
- Press Windows key + R, type regedit, and press Enter.
- Navigate to the Startup Key:
- Go to HKEY_CURRENT_USER\Software\Microsoft\Windows\CurrentVersion\Run or HKEY_LOCAL_MACHINE\SOFTWARE\Microsoft\Windows\CurrentVersion\Run for system-wide applications.
- Modify Entries:
- Look for the program you want to disable. Right-click on its value and choose “Delete” or modify the data to disable it (though outright deletion is more common for disabling).
Note: This method is less intuitive as you need to know the exact entry for the program. It’s useful when other methods don’t work or for very specific scenarios.
Each of these methods should help in managing which programs start when your Windows 11 boots up, potentially speeding up your system’s startup time and reducing resource usage. Remember, some startup programs are necessary for certain functionalities, so selectively disable those you don’t need.